Best Solutions to Record PowerPoint Presentation with Audio and Video

PowerPoint presentations are no longer confined to live settings. In today’s digital-first world, recording a PowerPoint presentation with audio narration and video is essential for educators, students, marketers, and remote teams. Whether you’re creating online courses, virtual business proposals, or project demos, having a recorded video of your presentation ensures you can share your message effectively with a wider audience.
This article explores the best solutions to record PowerPoint presentations with audio and video, as well as recommend the best solution to meet your needs.
1. Using PowerPoint’s Built-in Recording Feature
Microsoft PowerPoint offers a native method to record your presentation with voice and webcam video. This solution is ideal for users who already use PowerPoint 2019, 2021, or Microsoft 365.
Steps:
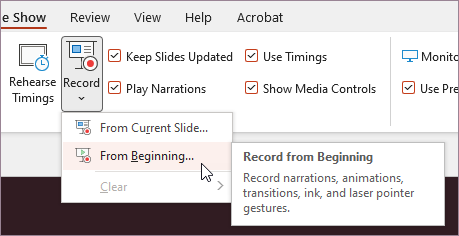
- Open your presentation in PowerPoint and click the “Recording” tab; if it’s not visible, enable it by going to File > Options > Customize Ribbon and checking the “Recording” box.
- Click “Record Slide Show” , then choose either “Record from Beginning” to start at the first slide or “Record from Current Slide” to begin where you left off.
- You’ll see a recording interface with: Your slides; Webcam preview; Voice recording controls
- You can annotate slides as you record the presentation.
- Once done, go to File > Export > Create a Video to save the presentation as an MP4.
| ✅ Pros | ❌ Cons |
| Integrated directly into PowerPoint
Supports webcam and voice narration Slide timings and annotations included |
Only available in newer versions
Limited editing features |
2. Using Online Recording Tools
Online platforms are a great option for users who don’t want to install software. They run in a browser and are perfect for recording presentations on-the-go.
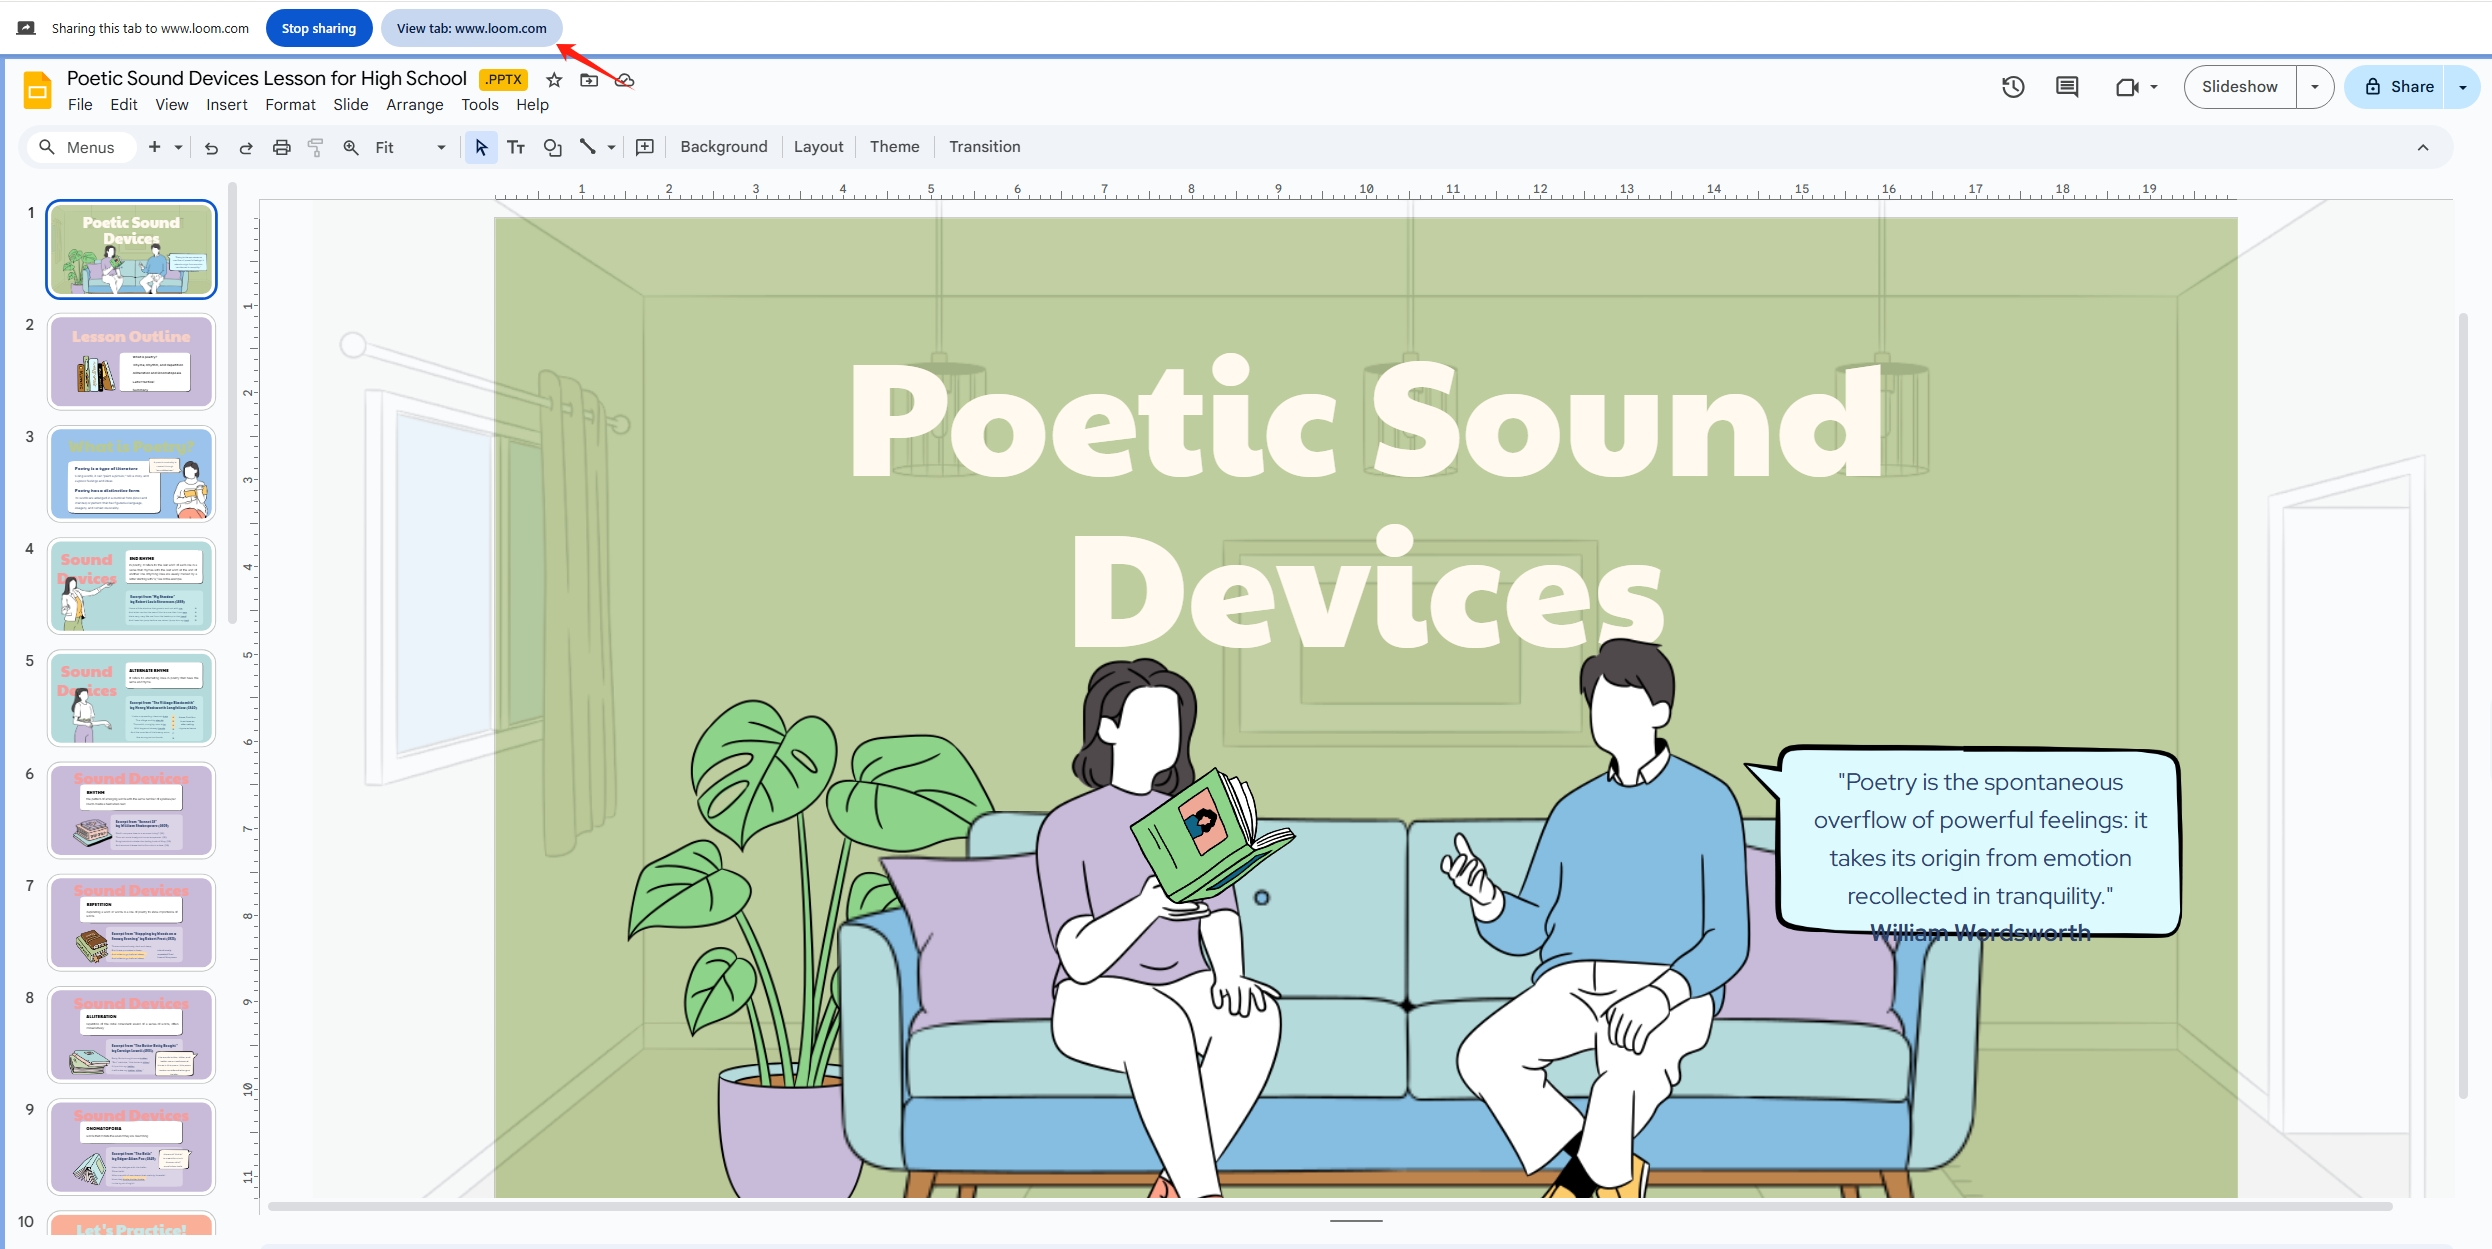
🔹 Loom
Loom is a browser-based screen and webcam recorder. It lets you record your PowerPoint window, voice, and webcam all at once.
🔹 Screencast-O-Matic
Screencast-O-Matic allows you to record your screen and voice and then add overlays, text, and simple edits.
🔹 Clipchamp
Clipchamp, now owned by Microsoft, supports webcam and screen recording with integrated editing tools.
| ✅ Pros | ❌ Cons |
| No installation required
Quick to set up Good for collaboration and sharing |
Some features are paywalled
Requires internet access |
3. Using Browser Extensions for Presentation Recording
If you frequently use PowerPoint Online or Google Slides, browser extensions are an efficient way to record presentations with just a few clicks.
🔹 Screenify
This popular extension records your screen, mic, and webcam directly within Chrome. It’s widely used in education.
🔹 Nimbus Screenshot & Screen Video Recorder
Nimbus provides both screen capture and screen recording features, allowing you to include voice narration and webcam video in your recordings.
🔹 Vidyard GoVideo
Vidyard focuses on business users and sales professionals. It records screen, voice, and webcam and provides tracking analytics.

| ✅ Pros | ❌ Cons |
| One-click recording from browser
Works well with online presentation tools Easy sharing |
Limited functionality in free versions
Often browser-specific (usually Chrome) |
4. Using Open-Source Tools for Advanced Users
Tech-savvy users or those with specific recording needs may prefer open-source software for complete control over recording quality and format.
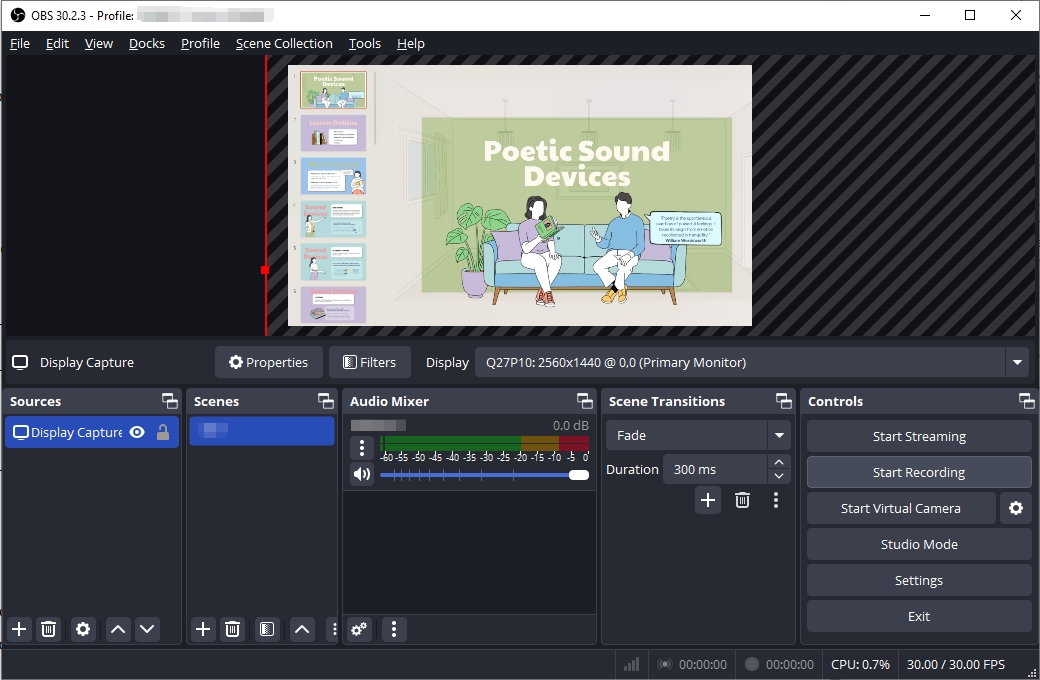
🔹 OBS Studio (Open Broadcaster Software)
OBS is a free, open-source screen recording and streaming platform that offers powerful customization options, including support for multiple video sources, scenes, overlays, and real-time audio mixing.
🔹 ShareX
ShareX is another powerful open-source screen capture tool. It’s lightweight and supports custom workflows for capturing and saving screen videos.
| ✅ Pros | ❌ Cons |
| Free and feature-rich
No watermarks or time limits High-quality exports |
Not beginner-friendly
Complex setup for webcam and audio sources |
5. Using Recordit (Best-Ease-of-Use Screen Recorder)
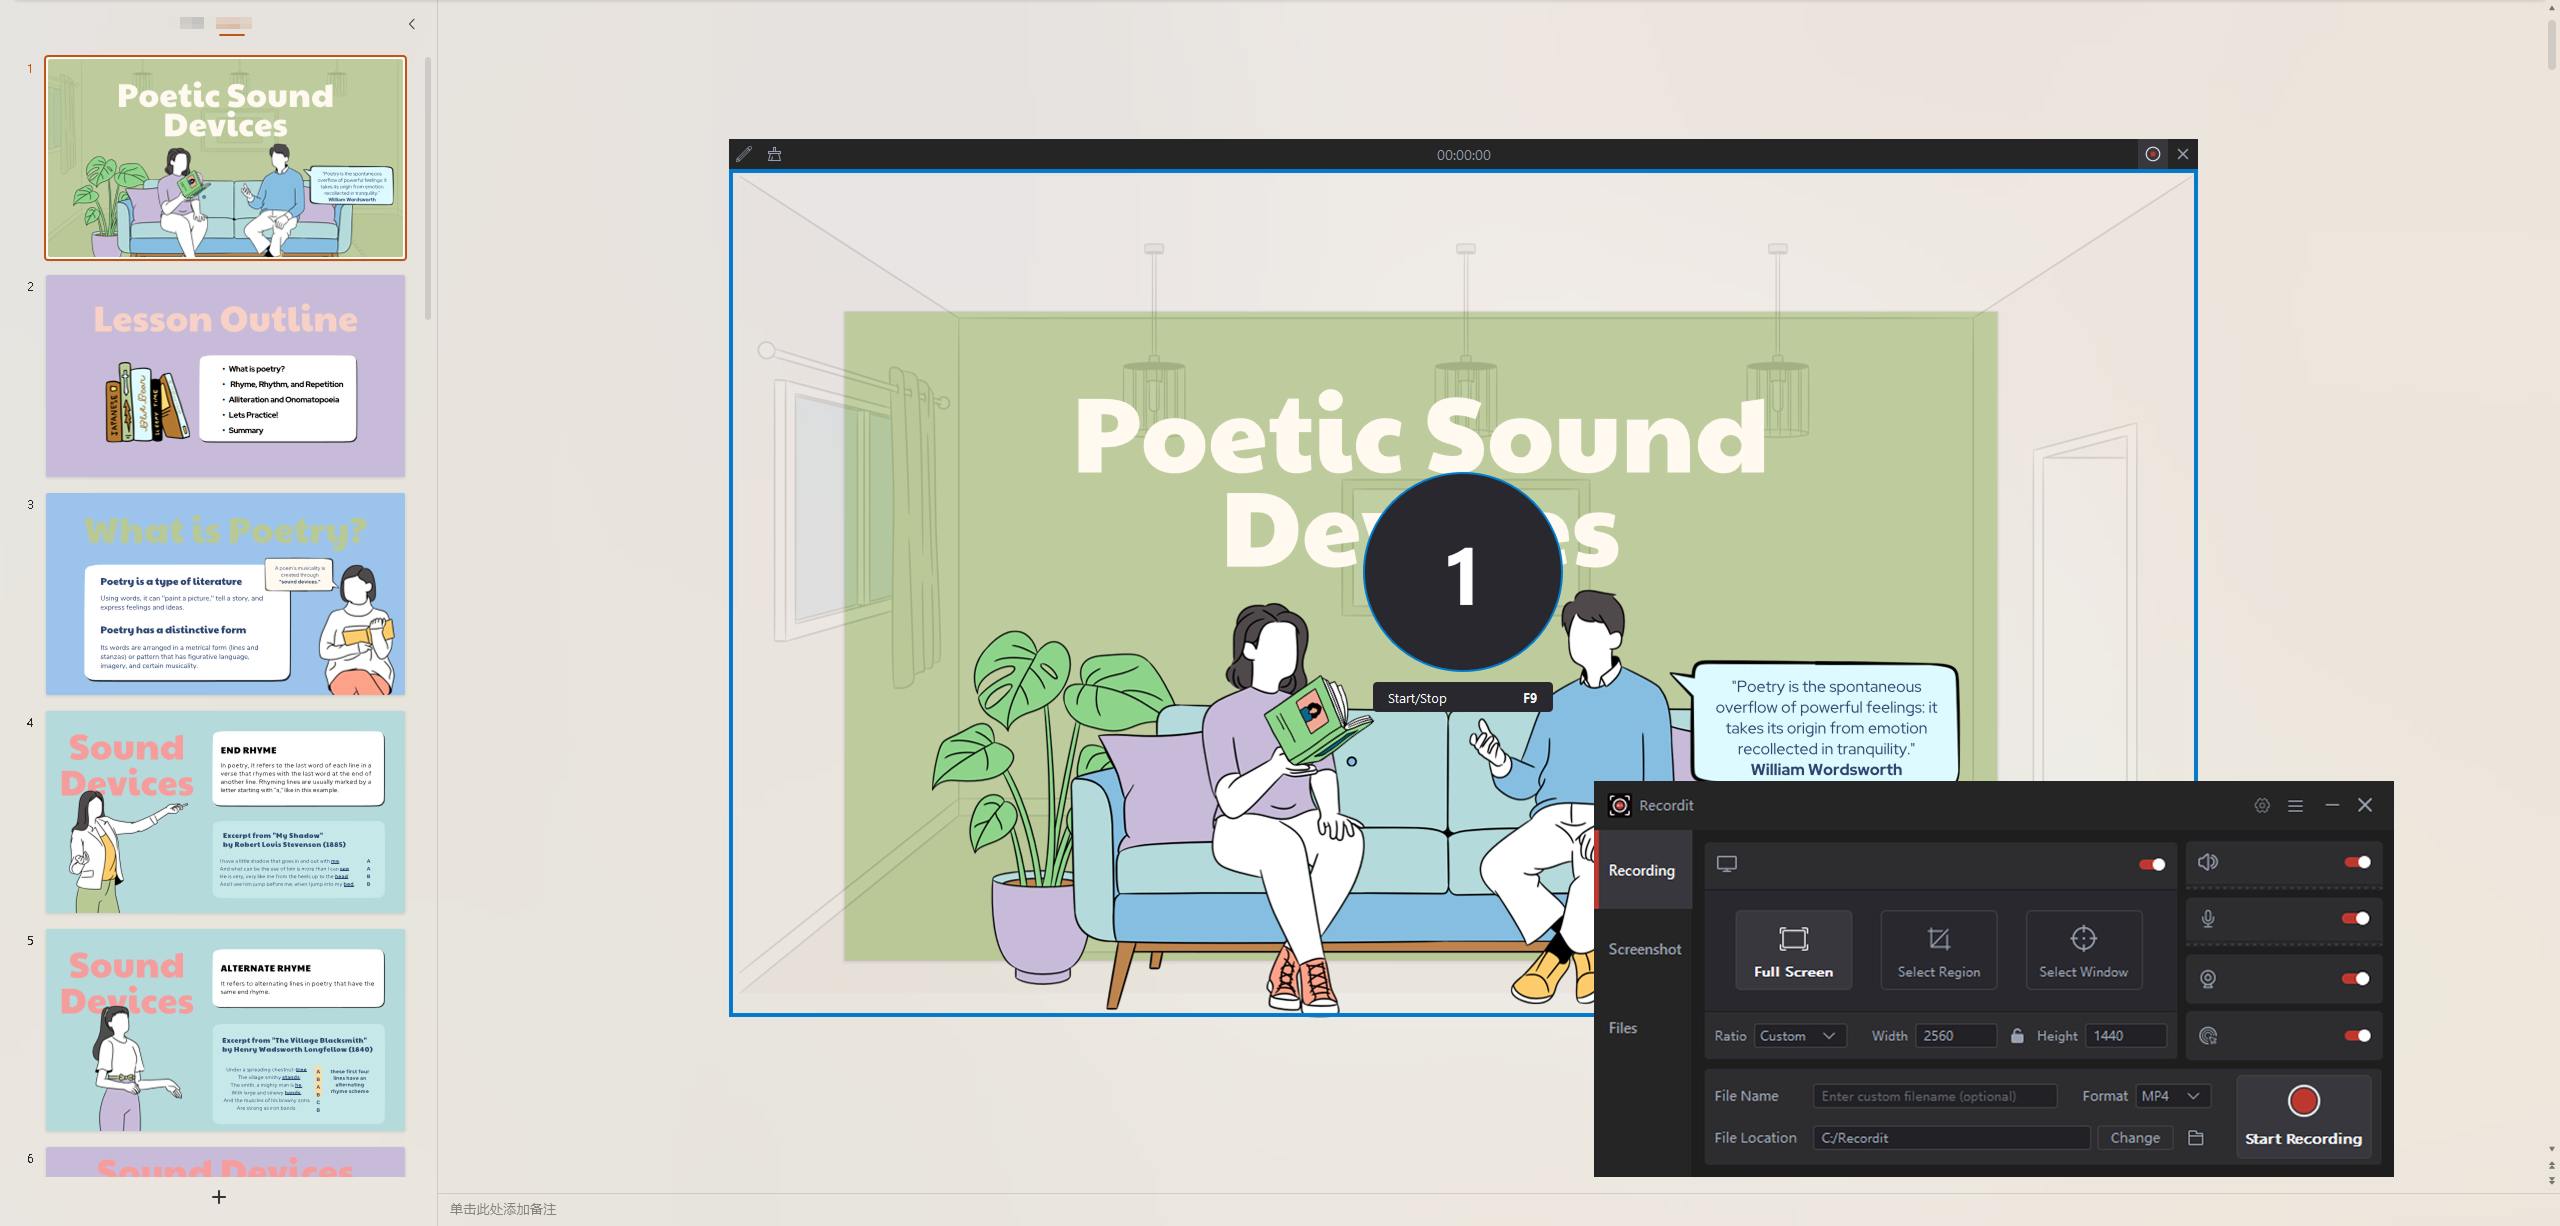
If you’re looking for a simple and fast way to record a PowerPoint presentation with your voice, Recordit is the perfect tool. It’s a lightweight screen recorder for Windows and macOS that captures your presentation window and voice without complicated settings.
Step-by-Step Guide: Recording Your PowerPoint Presentation with Audio Using Recordit
- Download the appreciate Recordit version on your device, and install it by following the prompts.
- On the Recordit interfacem, ebable microphone sound, system audio and webcam based on needs.
- Launch your PowerPoint in presentation mode, then use recordit to select the recording area and then start recording.
- Click “Stop Recording” to end the process, Recordit will open the “Files” tab and show all the recordings.
6. Conclusion
When it comes to recording PowerPoint presentations with audio and video, your choice of tool depends on your needs, skill level, and preferences.
- Use PowerPoint’s built-in tool if you need webcam video + narration and already have Office 365 or PowerPoint 2019+.
- Choose online tools like Loom or Screencast-O-Matic if you want easy sharing and minimal setup.
- Opt for browser extensions if you’re using online presentations and need fast, in-browser recording.
- Go for OBS or ShareX if you’re experienced and need advanced customization and control.
- But if you want the fastest, simplest, and most reliable solution, choose Recordit presentation recorder.
Recordit lets you record your presentation with narration in just seconds—without installing large programs or facing a learning curve. Whether you’re preparing tutorials, reports, or quick updates, Recordit helps you deliver polished video presentations with minimal effort.