How to Make OBS Recordings Take Less Space?

Recording high-quality video can be a data-heavy endeavor, especially when you’re using software like OBS. Whether you’re streaming gameplay, creating tutorials, or recording presentations, the resulting video files can quickly pile up, consuming significant disk space. In this article, we’ll walk you through how to make your OBS recordings take less space, offering tips and settings adjustments.
1. How to Make OBS Recordings Take Less Space?
OBS is widely used for its flexibility and power in recording high-quality video, but it can be tricky to manage large file sizes, especially if you’re recording at high resolution or frame rates. Below are some essential tips and settings adjustments you can make in OBS to reduce the size of your recordings while still maintaining good quality.
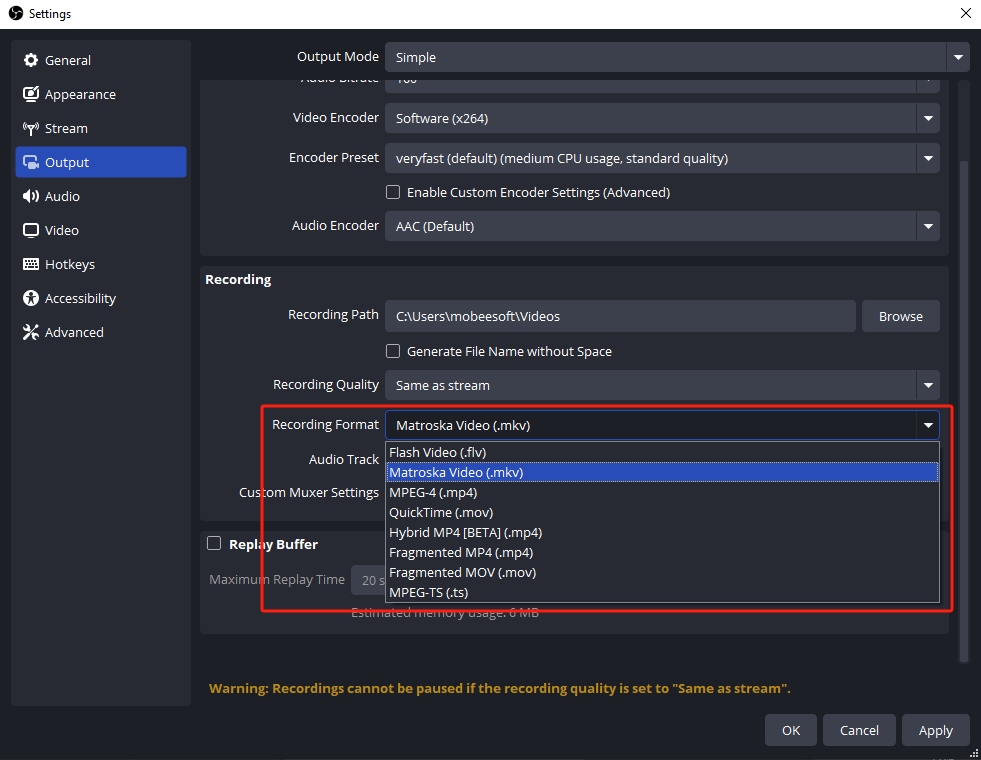
1.1 Change the Recording Format
One of the simplest ways to reduce the size of your OBS recordings is by choosing a more efficient recording format.
- Unlike MP4, which can become corrupted if OBS crashes, MKV and FLV are more resilient and typically produce smaller file sizes. If you are using MP4 to ensure compatibility with most players, consider switching to MKV or FLV during your recording process, and then remux to MP4 afterward in OBS to avoid the risk of corruption.
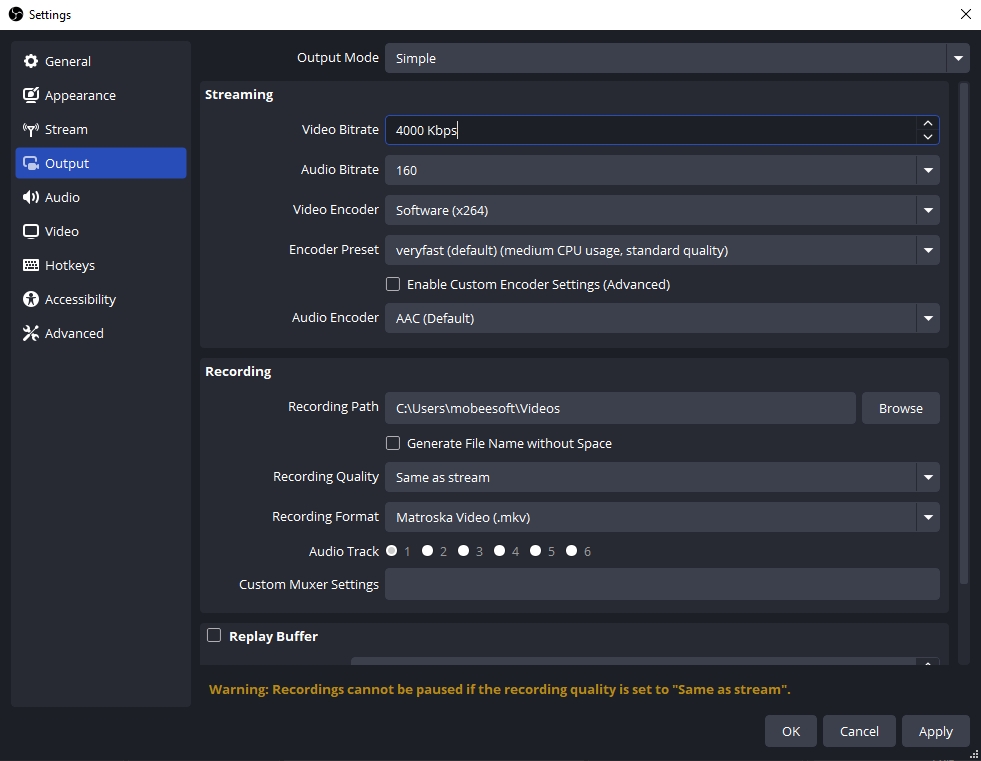
1.2 Adjust the Bitrate
Bitrate directly affects video quality and file size – higher bitrates improve quality but increase size, while lower bitrates reduce size at the cost of clarity.
- For 1080p 30FPS recordings , a bitrate of around 6,000 kbps to 8,000 kbps is usually enough.
- For 720p 30FPS recordings , reduce it further to around 4,000 kbps to 6,000 kbps .
- If you’re recording with NVENC or x264 , consider using Variable Bitrate (VBR) , which adjusts the bitrate dynamically based on the complexity of the scene. This can help optimize the file size while maintaining a reasonable level of quality.
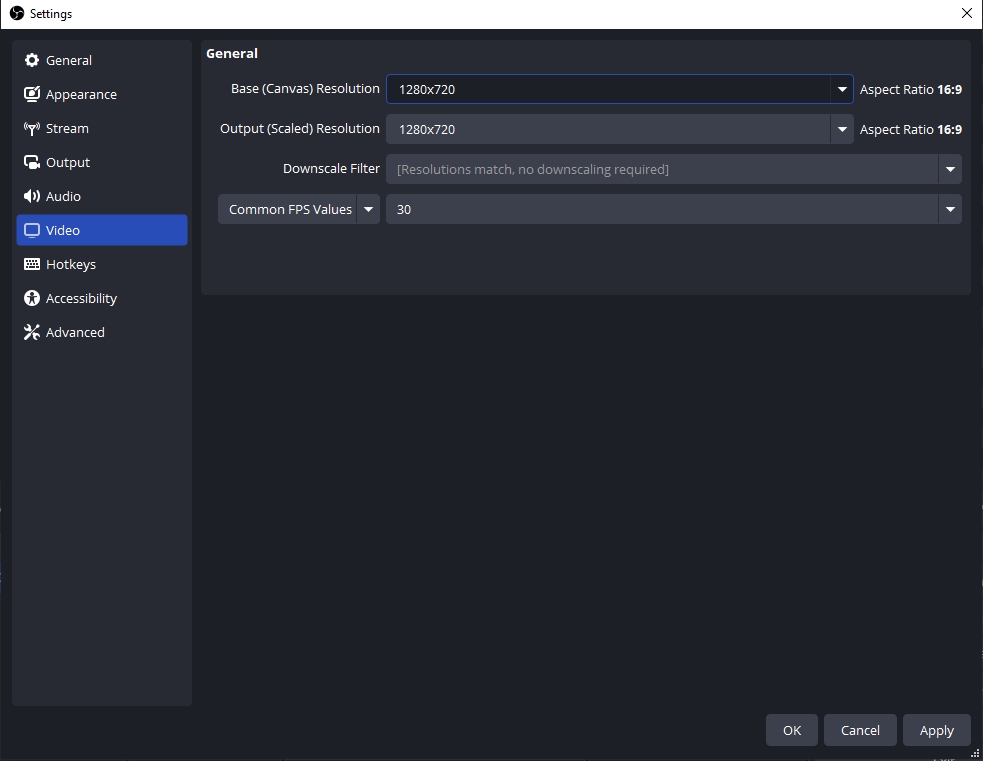
1.3 Lower the Resolution
Another effective way to reduce file size is by lowering the resolution of your recording.
- 1080p (1920×1080) is standard for most content creators, but if file size is a concern, 720p (1280×720) is an excellent compromise between quality and file size.
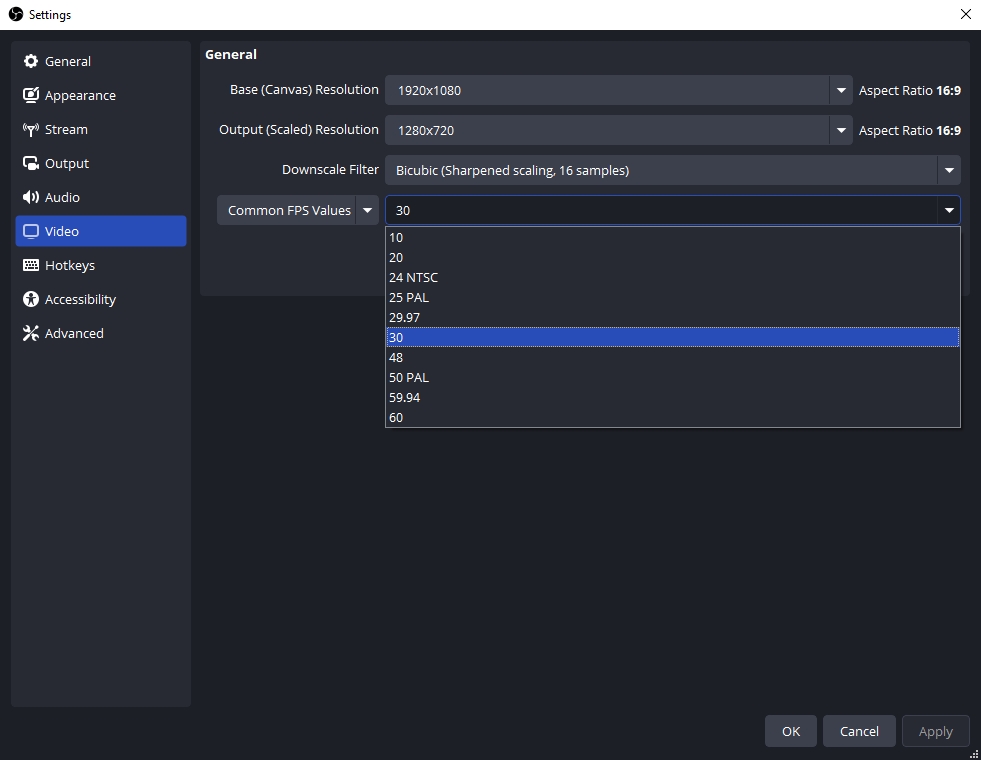
1.4 Lower the Frame Rate (FPS)
Recording at 60 FPS results in smoother motion but increases file size by a large factor. If you’re not recording fast-paced action or gaming content, consider lowering the frame rate to 30 FPS .
- 30 FPS provides a perfectly acceptable experience for many types of content, and the difference in file size can be substantial. This is particularly effective for tutorials, screen recordings, and slower-paced videos.
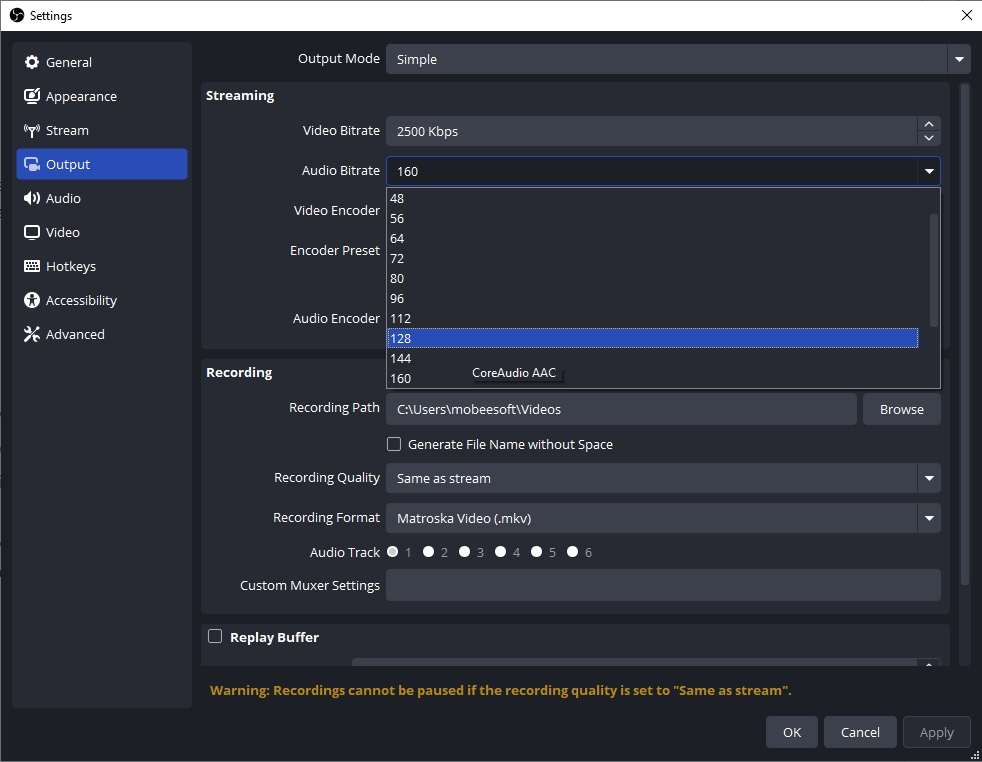
1.5 Optimize Audio Settings
While video is the primary contributor to large file sizes, audio can also play a role. OBS offers several audio settings that can help optimize file size.
- Reduce the audio bitrate to 128 kbps or 160 kbps rather than using higher options like 320 kbps .
- If you’re recording multiple audio tracks, ensure that you only record the necessary audio channels to save space.
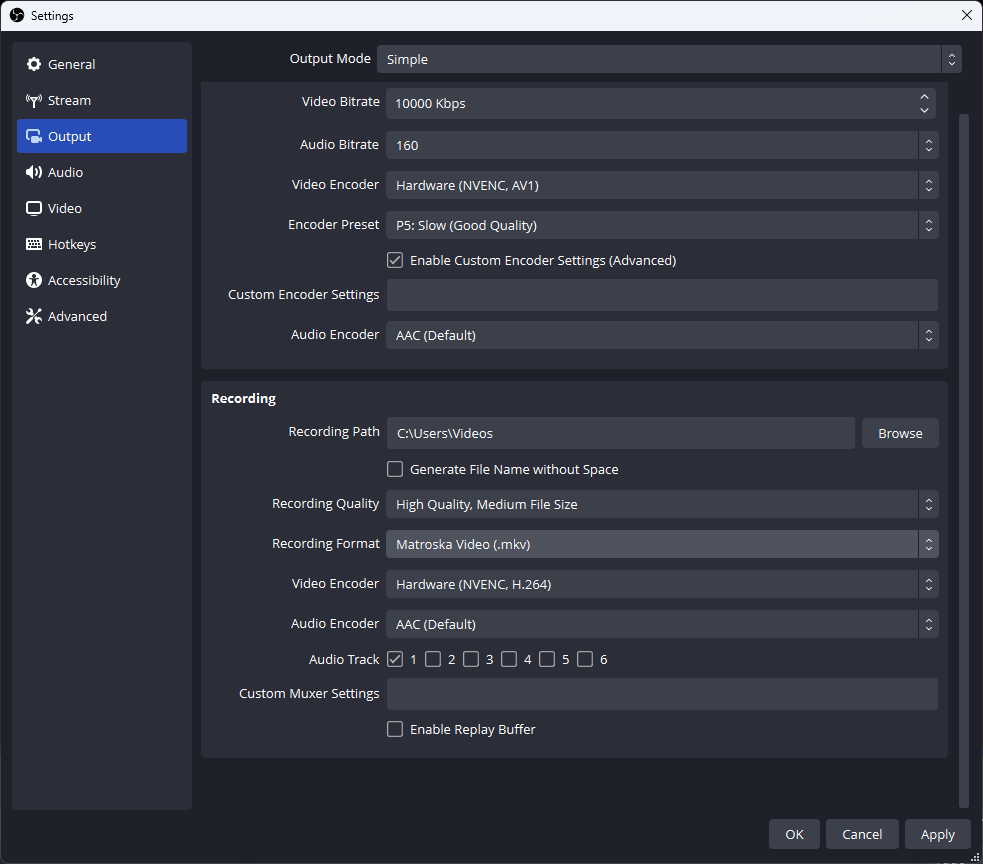
1.6 Use Hardware Encoding (NVENC or AMD VCE)
Software encoding (x264) offers high-quality compression but demands a lot of CPU power and can result in large files. On the other hand, hardware encoding like NVENC (NVIDIA) or AMD VCE (Video Coding Engine) uses the GPU to handle the encoding process, which is typically more efficient and results in smaller files.
- NVENC and AMD VCE offer comparable video quality while generating smaller file sizes and putting less strain on your CPU.
- If you have an NVIDIA GPU, enable NVENC (new) in OBS’s output settings. This will give you an excellent balance between performance and file size.
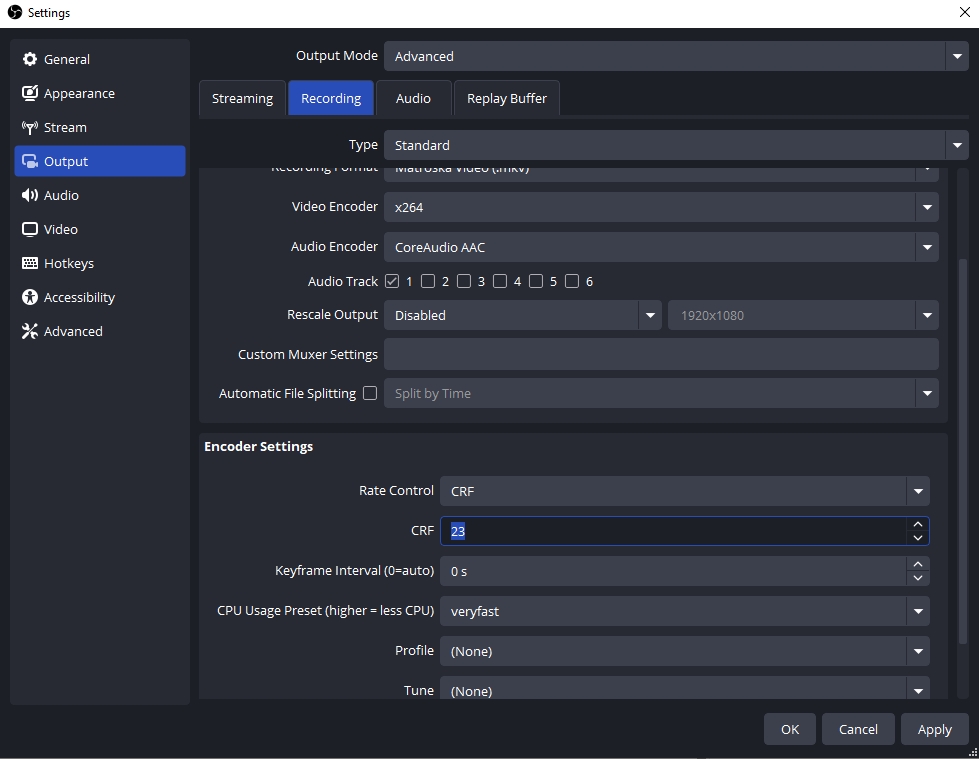
1.7 Use More Efficient Encoding Options
When using x264 for encoding, you can further adjust the CRF (Constant Rate Factor) to compress your videos without losing too much quality. A CRF value between 18 and 23 is ideal for reducing file size while maintaining good quality.
- CRF 23 is usually a good starting point for most users, but you can go lower for better quality (and larger file sizes) or higher for smaller files (with some quality loss).
2. Try the Easy-to-Use Alternative to OBS – Recordit
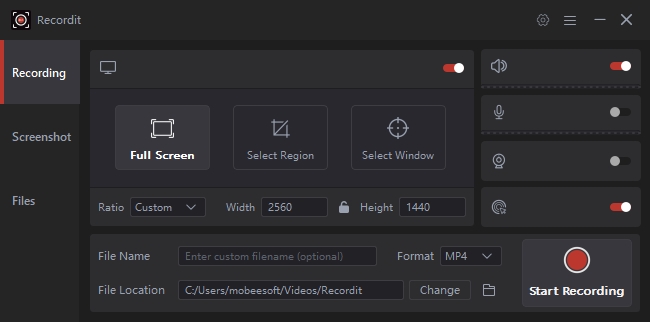
If you find these settings too technical or time-consuming to implement, you might want to try an easier alternative to OBS – Recordit , an user-friendly screen recording software designed to make recording and saving videos as simple as possible. Recordit offers intuitive preset options that allow you to quickly adjust recording quality and file sizes. You won’t have to deal with advanced bitrate, resolution, or frame rate settings manually.
How to use Recordit to record while taking less space:
- Go to the Recordit website to download and set up the software for your Windows or Mac.
- Launch Recordit and adjust recording settings on the main interface, including video resolution, format, etc.
- Pick preferred record and choose the area you want to record, then start recording.
- Once done, stop recording and open the “Files” tab to find the recorded videos.
3. Conclusion
If you find yourself struggling to manage large video files with OBS or if you simply want a hassle-free recording experience, Recordit is an excellent alternative. While OBS offers powerful customization, it requires a deeper understanding of settings and adjustments to optimize file size. Recordit , on the other hand, takes care of the hard work for you and provides a simple, efficient way to record videos without taking up unnecessary space.
Ultimately, both OBS and Recordit are great tools, but if reducing space and simplifying the recording process is your priority, Recordit is the way to go.