How to Add JPG/PNG Image to Bandicam as Watermark?

In today’s digital landscape, screen recordings are used for tutorials, gameplay, presentations, online courses, and more. With so much content being published daily, branding your videos is vital to stand out and protect your work. One effective way to do that is by adding a watermark—a logo or identifier that sits on your video throughout playback.
Bandicam, a popular screen recording software for Windows, allows you to embed watermark images such as JPG or PNG files directly into your recordings. Whether you’re a beginner or experienced user, this guide will show you how to add jpg image to Bandicam, and introduce other screen recorders that support this essential feature.
1. Why Add a Watermark to Your Recording Videos?
Before diving into the technical steps, it’s helpful to understand why watermarks are used:
- Branding : Promote your YouTube channel, website, or social media by displaying your logo.
- Protection : Prevent others from stealing or re-uploading your content without credit.
- Professionalism : Watermarks help your videos look polished and official.
- Monetization : For sponsored content, watermarks can include sponsor logos or affiliate branding.
2. How to Add JPG/PNG Image to Bandicam as Watermark?
Bandicam allows users to overlay a static image (JPG or PNG) directly into the recording, and here’s how to do it step by step:
Step 1: Prepare Your Watermark Image
- Format : Choose either JPG or PNG.
- Size : Keep your watermark reasonably small (e.g., 200×50 px) so it doesn’t obstruct video content.
- Design : Use free design tools like Canva or Photoshop to create a clean logo or text watermark.
Tip: Use PNG for logos or watermarks that need a transparent background—JPG doesn’t support transparency and will always display with a solid background.
Step 2: Launch Bandicam
Install the latest version of Bandicam on your PC and open it to get started.
Step 3: Enable the Watermark Option
- Navigate to the “Video” tab in the left-hand sidebar > Click “Settings” under “Record”.
- Open “Recording Settings” tab and check the box labeled “Add logo overlay to video.”
- Click the “…” (browse) button to locate and select your JPG or PNG image.
Step 4: Set the Watermark Position
- Once your image is selected, you can choose the logo position and set the left/R or Top/B margins.
Step 5: Start Recording
- With the watermark applied, you can begin recording.
- The image will now appear in your video as a static overlay in the chosen position.
3. How to Remove or Change the Watermark Later?
If you ever want to switch out or remove the watermark, Bandicam makes it easy:
To Change the Watermark:
- Return to the “Video” tab.
- Click the “…” button again and choose a new JPG or PNG image.
- Adjust the position as needed.
To Remove the Watermark:
- Uncheck the option labeled “ Add logo overlay to video ” to disable the watermark.
- This will turn off the watermark feature for all future recordings until you manually enable it again.
4. More Screen Recorders That Support Adding Watermark
While Bandicam is a great option, it isn’t the only screen recorder that supports watermarking. Here are other excellent tools with built-in watermark features:
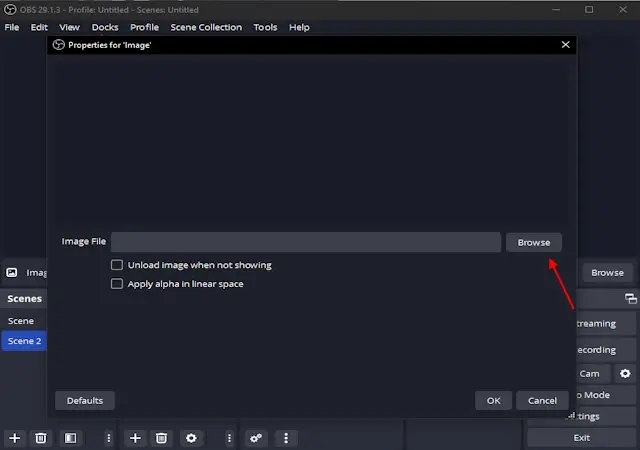
1) OBS Studio
- Platform : Windows, macOS, Linux
- Watermark Support : Add image sources to scenes
- Pros : Free, open-source, unlimited customization
- Cons : Steep learning curve
- Best For : Advanced users needing full control over video layers and overlays
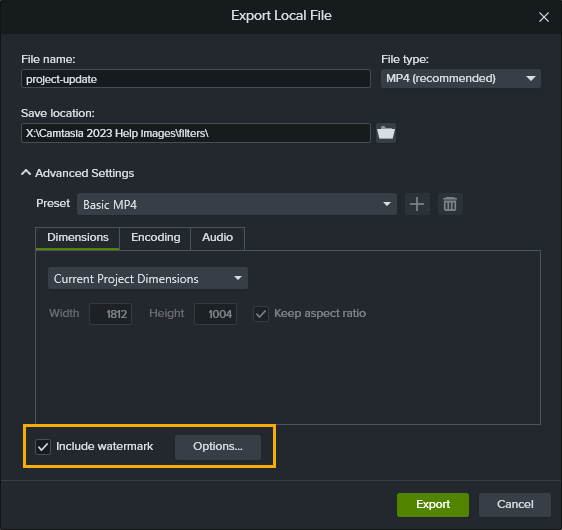
2) Camtasia
- Platform : Windows, macOS
- Watermark Support : Add image/logo during post-editing
- Pros : Easy timeline editing and watermark animation
- Cons : Expensive license
- Best For : Professionals producing polished tutorials and training videos
3) ScreenPal
- Platform : Web-based, Windows, macOS, Chromebook
- Watermark Support : Watermarks available in paid version with full positioning control.
- Pros : Great for teachers, team training, and browser-based recording.
- Cons : Watermarking requires a paid plan; basic features in free version.
- Best For : Online educators, team tutorials, and remote work training.
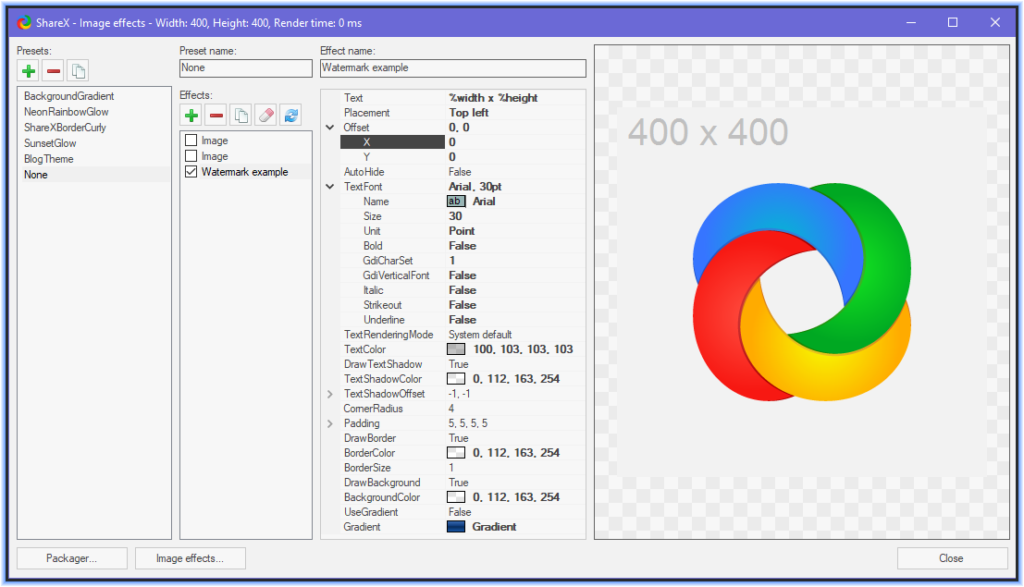
4) ShareX
- Platform : Windows
- Watermark Support : Supports image watermarks using task settings.
- Pros : Free and highly configurable.
- Cons : May be difficult for beginners; the interface isn’t very intuitive.
- Best For : Developers, power users, and those needing automation or screenshots with branding.
Each of these tools has its strengths. Some prioritize real-time watermarking like Bandicam, while others support it during editing. Choosing the right one depends on your workflow, technical skill, and recording needs.
5. Conclusion
Watermarking is a simple yet impactful tool used by content creators, educators, streamers, and businesses to protect and brand their videos. By adding your logo or identifier to your videos, you establish brand authority, protect your work, and present yourself professionally.
Bandicam makes the watermarking process accessible and efficient by allowing users to add JPG or PNG images directly into their recordings. It supports basic positioning and image selection without the need for post-editing, which is ideal for users who want a straightforward solution.
However, if you need additional features such as watermark transparency, animation, or more complex overlays, consider exploring other screen recorders like OBS Studio, Camtasia, ScreenPal or ShareX.
Whether you’re creating tutorials, gameplay clips, or training videos, watermarking ensures your hard work is recognized and protected. With the right screen recorder and a well-placed logo, your videos will not only stand out—but also carry your name wherever they’re shared.