Best Recording Settings for OBS: Unlock High-Quality Video with Ease

As one of the most robust open-source tools, OBS offers top-tier screen recording and streaming capabilities, completely free. Whether you’re a gamer, content creator, teacher, or professional looking to record tutorials, OBS provides advanced functionality that can produce broadcast-quality recordings. However, with power comes complexity—many users find themselves overwhelmed by OBS’s settings.
In this article, we’ll walk you through the best recording settings for OBS , as well as answer some of the most common questions users have about OBS.
1. Best Recording Settings for OBS
To achieve the best recording quality without overburdening your system or generating massive files, it’s important to configure OBS correctly. Follow the setup below based on your hardware capabilities and needs.
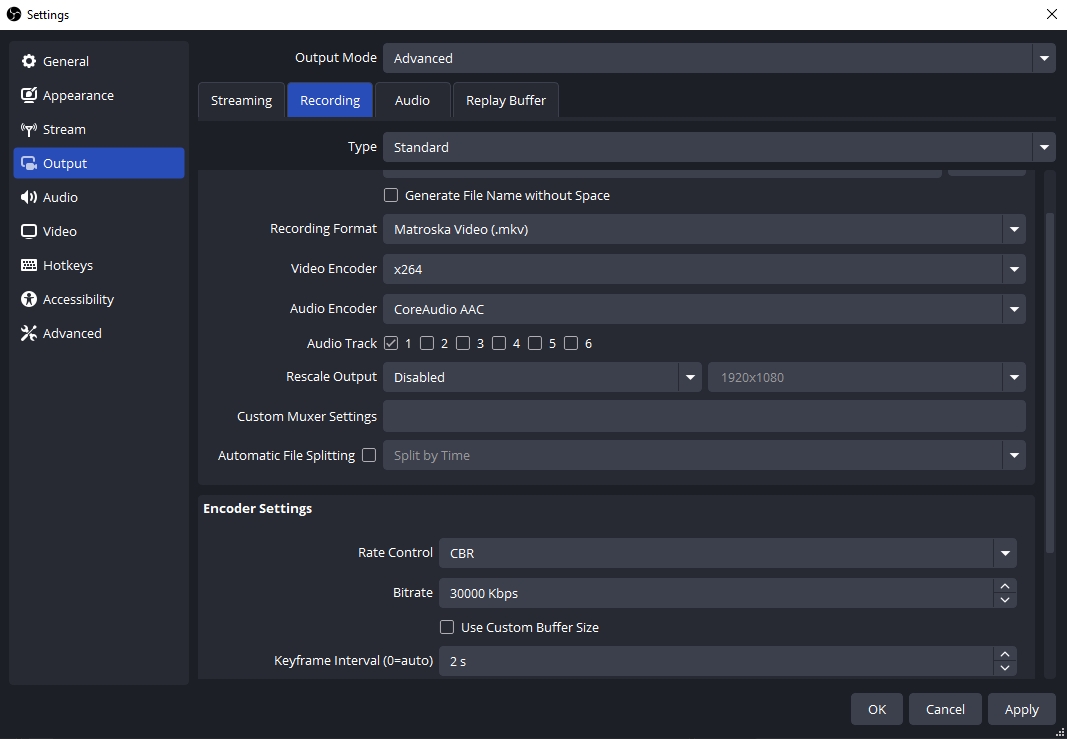
1.1 Output Settings
- Output Mode : Go to the Output tab and set the Output Mode to ‘ Advanced ‘ from the dropdown menu.
- Recording Format : Select MKV as your recording format to avoid file corruption if OBS crashes—remux to MP4 later if needed.
- Encoder
:
- NVENC (new) for Nvidia GPU users (preferred for less CPU usage).
- x264 for users relying on CPU encoding.
- Rate Control
:
- CBR (Constant Bitrate) for consistency.
- Set
bitrate
to:
- 20,000–30,000 kbps for 1080p60fps.
- 50,000+ kbps for 4K.
- Keyframe Interval : 2 seconds.
- Preset : Quality or Max Quality for NVENC; use Faster or Veryfast for x264 (depending on your CPU).
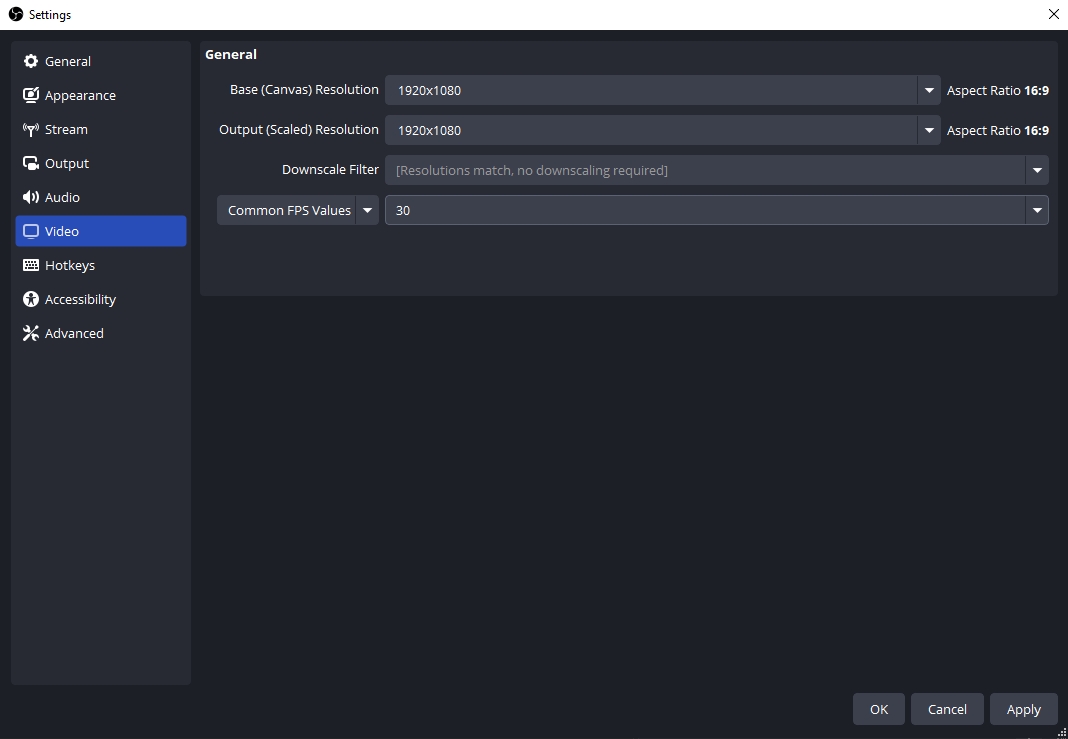
1.2 Video Settings
- Base (Canvas) Resolution : Set this to your monitor’s resolution (e.g., 1920×1080).
- Output (Scaled) Resolution : Same as canvas for full quality, or scale down for smaller file sizes.
- Downscale Filter : Select Lanczos with 36 samples for superior sharpness in scaled recordings.
- FPS (Frames Per Second)
:
- 60 FPS for gameplay and smooth motion.
- 30 FPS for tutorials or low-action content.
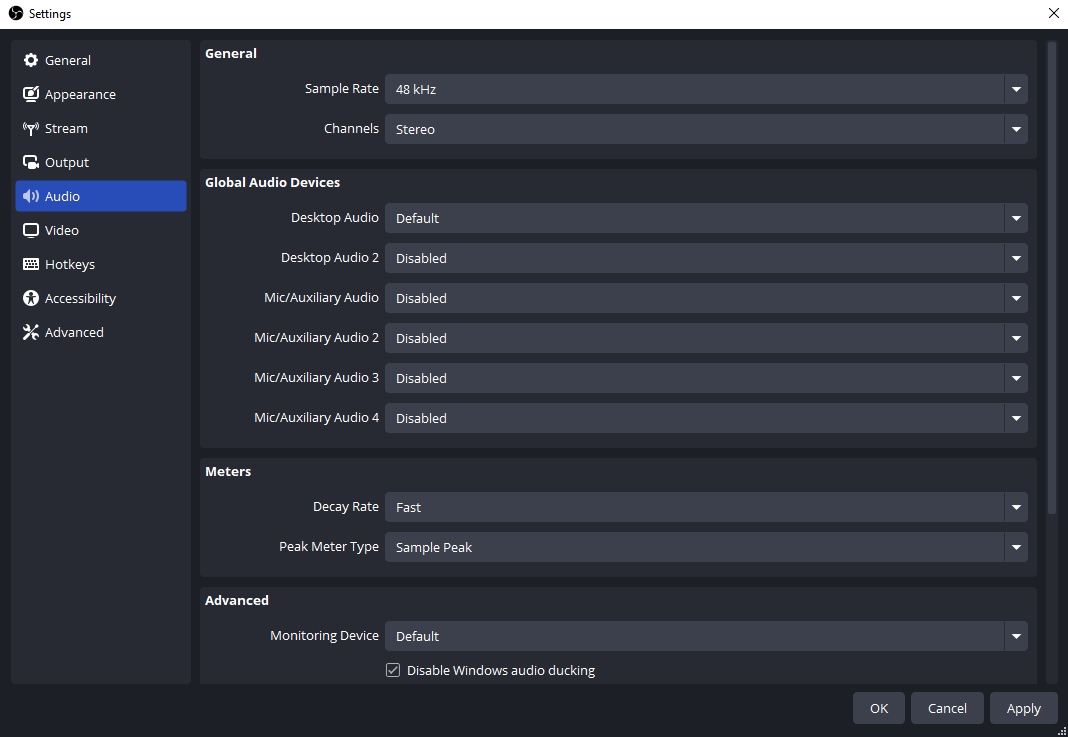
1.3 Audio Settings
- Sample Rate : 48 kHz (standard for high-quality audio).
- Channels : Stereo is best for most users.
- Bitrate : 160–320 kbps for top audio clarity.
2. FAQs About OBS
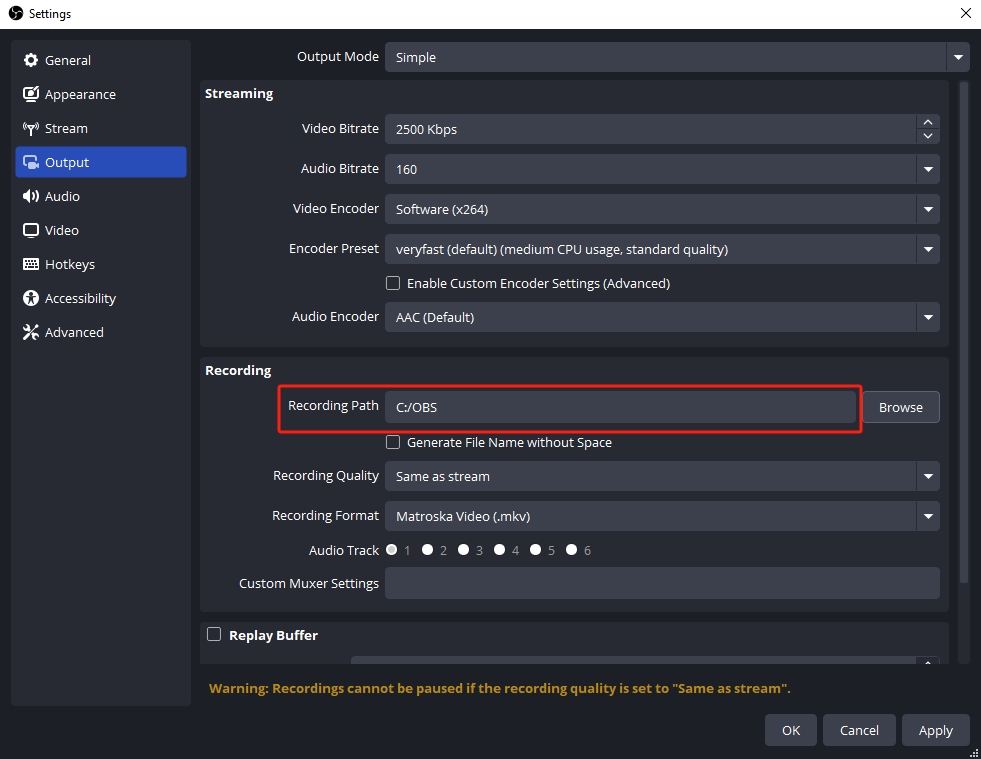
2.1 Where Does OBS Save Recordings?
Your OBS recordings are saved to the directory set in Settings > Output > Recording Path.
You can change this path to a more convenient location, such as a dedicated external drive or project folder.
2.2 How Can I Make OBS Record Less Large Files?
Large video files are usually the result of high bitrates or long recording sessions. To reduce file size:
- Lower the Bitrate : Try dropping from 30,000 kbps to 10,000 kbps.
- Scale Down Resolution : Record at 1280×720 instead of 1920×1080.
- Use More Efficient Codecs : H.265 (if supported) is more efficient than H.264.
- Record Shorter Clips : Trim recordings instead of capturing everything in one go.
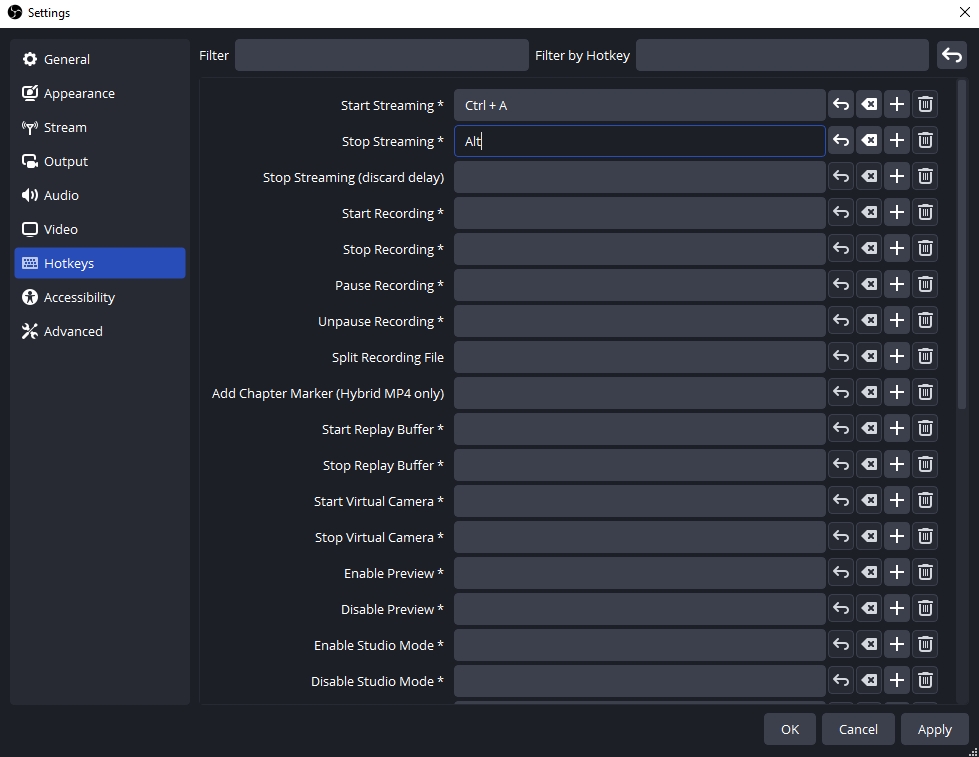
2.3 OBS Start Recording Hotkey
You can set custom hotkeys in OBS to quickly begin or end your recordings and streams:
- Go to Settings > Hotkeys .
- Assign a key combination to Start Recording and Stop Recording .
- Example: Use
Ctrl + Shift + Rfor easy access without interfering with your other shortcuts.
2.4 What’s a Good Bitrate for Recording OBS?
Since bitrate directly influences the sharpness and file size of your recordings, you can use the table below for guidance:
| Resolution | Frame Rate | Bitrate |
|---|---|---|
| 720p | 30 FPS | 5,000–10,000 kbps |
| 1080p | 60 FPS | 15,000–30,000 kbps |
| 1440p | 60 FPS | 30,000–50,000 kbps |
| 4K | 60 FPS | 50,000–100,000 kbps |
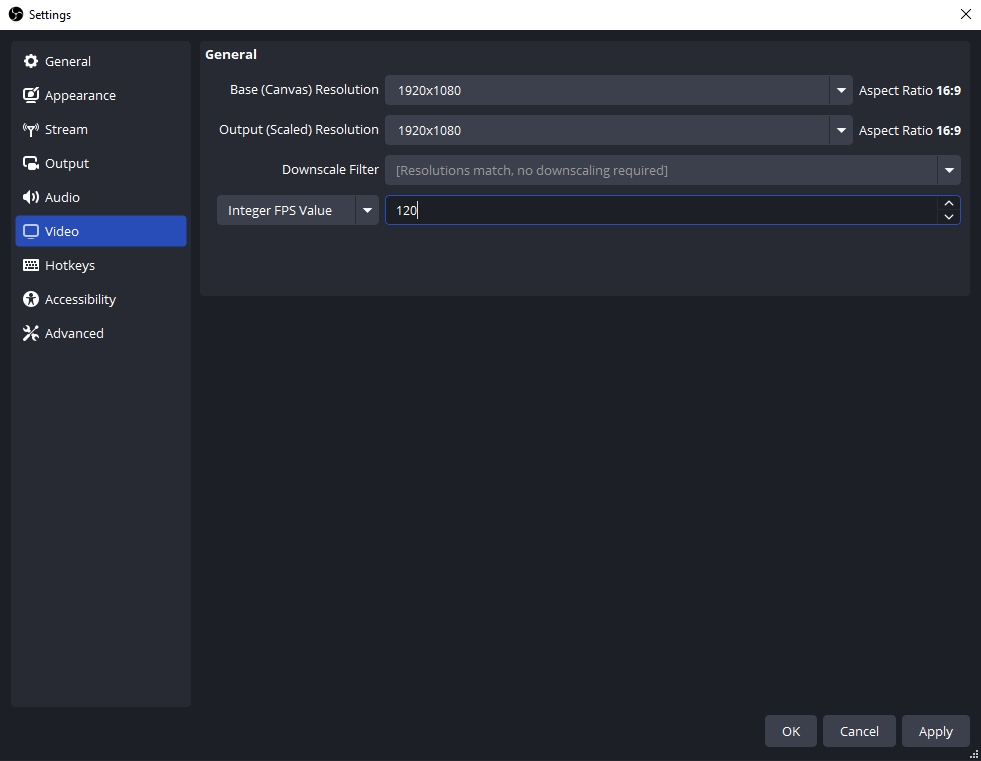
2.5 Can OBS Record 120 FPS?
Yes, OBS can record at 120 FPS, but:
- Your display must support 120 Hz or higher.
- Your hardware (CPU/GPU) must handle the extra processing.
- Use NVENC or AV1 if available, and set the bitrate high (40,000–80,000+ kbps) for smooth 120 FPS.
To enable it:
- Go to Settings > Video > Common FPS Values > Select Integer FPS Value and enter 120 .
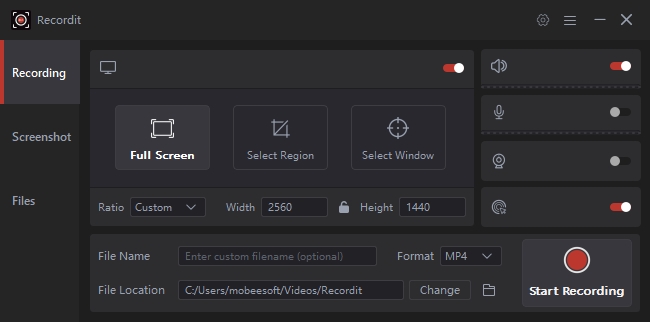
3. Try the Best Simple Screen Recorder – Recordit
OBS offers advanced features, but its interface can be overwhelming for beginners. If you’re just looking to record your screen without tweaking dozens of settings, consider using Recordit .
Why Choose Recordit ?
- Simple Interface : One-click recording. No need to configure bitrates or encoders.
- High Quality : Record videos, audio and webcam without losing frames.
- Lightweight : Minimal CPU usage; runs smoothly even on older systems.
- Quick Export : Perfect for capturing short tutorials or demos in MP4 or GIF format.
- Screenshot : One-click take still screenshots from screen.
Who Should Use Recordit ?
- Teachers creating quick how-tos.
- Professionals recording app demos.
- Casual users who don’t want to dive into advanced configurations.
While Recordit doesn’t offer the same depth as OBS, it makes recording a breeze. If you’re not a power user, it’s the smarter and faster choice.
4. Conclusion
OBS is a powerhouse for screen recording—if you know how to use it. With the best OBS recording settings, you can capture professional-grade videos without crushing your system. Whether you’re recording gameplay, tutorials, or live commentary, a proper setup can dramatically improve your final output.
However, not everyone wants to wrestle with advanced settings and technical jargon. For those seeking a no-fuss screen recording solution, Recordit is the ideal alternative. It’s fast, simple, and gets the job done with zero hassle.
Ready to skip the setup headaches? Try Recordit today and start recording smarter.