How to Screen Record Training Videos on Descript?

Creating high-quality training videos is a critical part of modern education and corporate learning. Screen-recorded videos allow instructors to demonstrate processes, teach software features, or provide step-by-step guidance, all while letting learners progress at their own pace. Among the many tools available for producing screen recordings, Descript is a popular choice due to its intuitive interface and powerful editing features. This article will guide you on how to screen record training videos on Descript, as well as examine its pros and cons.
1. What Is Descript?
Descript is a complete platform for recording, editing, and collaborating on video and audio projects. Unlike conventional video editors, Descript lets you refine your recordings just like you would a document. Its key features include:
- Screen and webcam recording : Record your screen alone or add a webcam overlay.
- Text-based video editing : Simply edit your transcript, and the video updates automatically.
- Automatic transcription: Convert audio into text for captions or searchable content.
- Overdub: AI-generated voice correction for polishing narration.
- Annotations and captions: Add callouts, arrows, or highlights to emphasize key points.
Descript is particularly useful for creating training videos because it combines recording and post-production in one intuitive interface, saving time and reducing the learning curve for content creators.
2. Step-by-Step Guide to Recording Training Videos with Descrip
Recording a training video on Descript involves several clear steps:
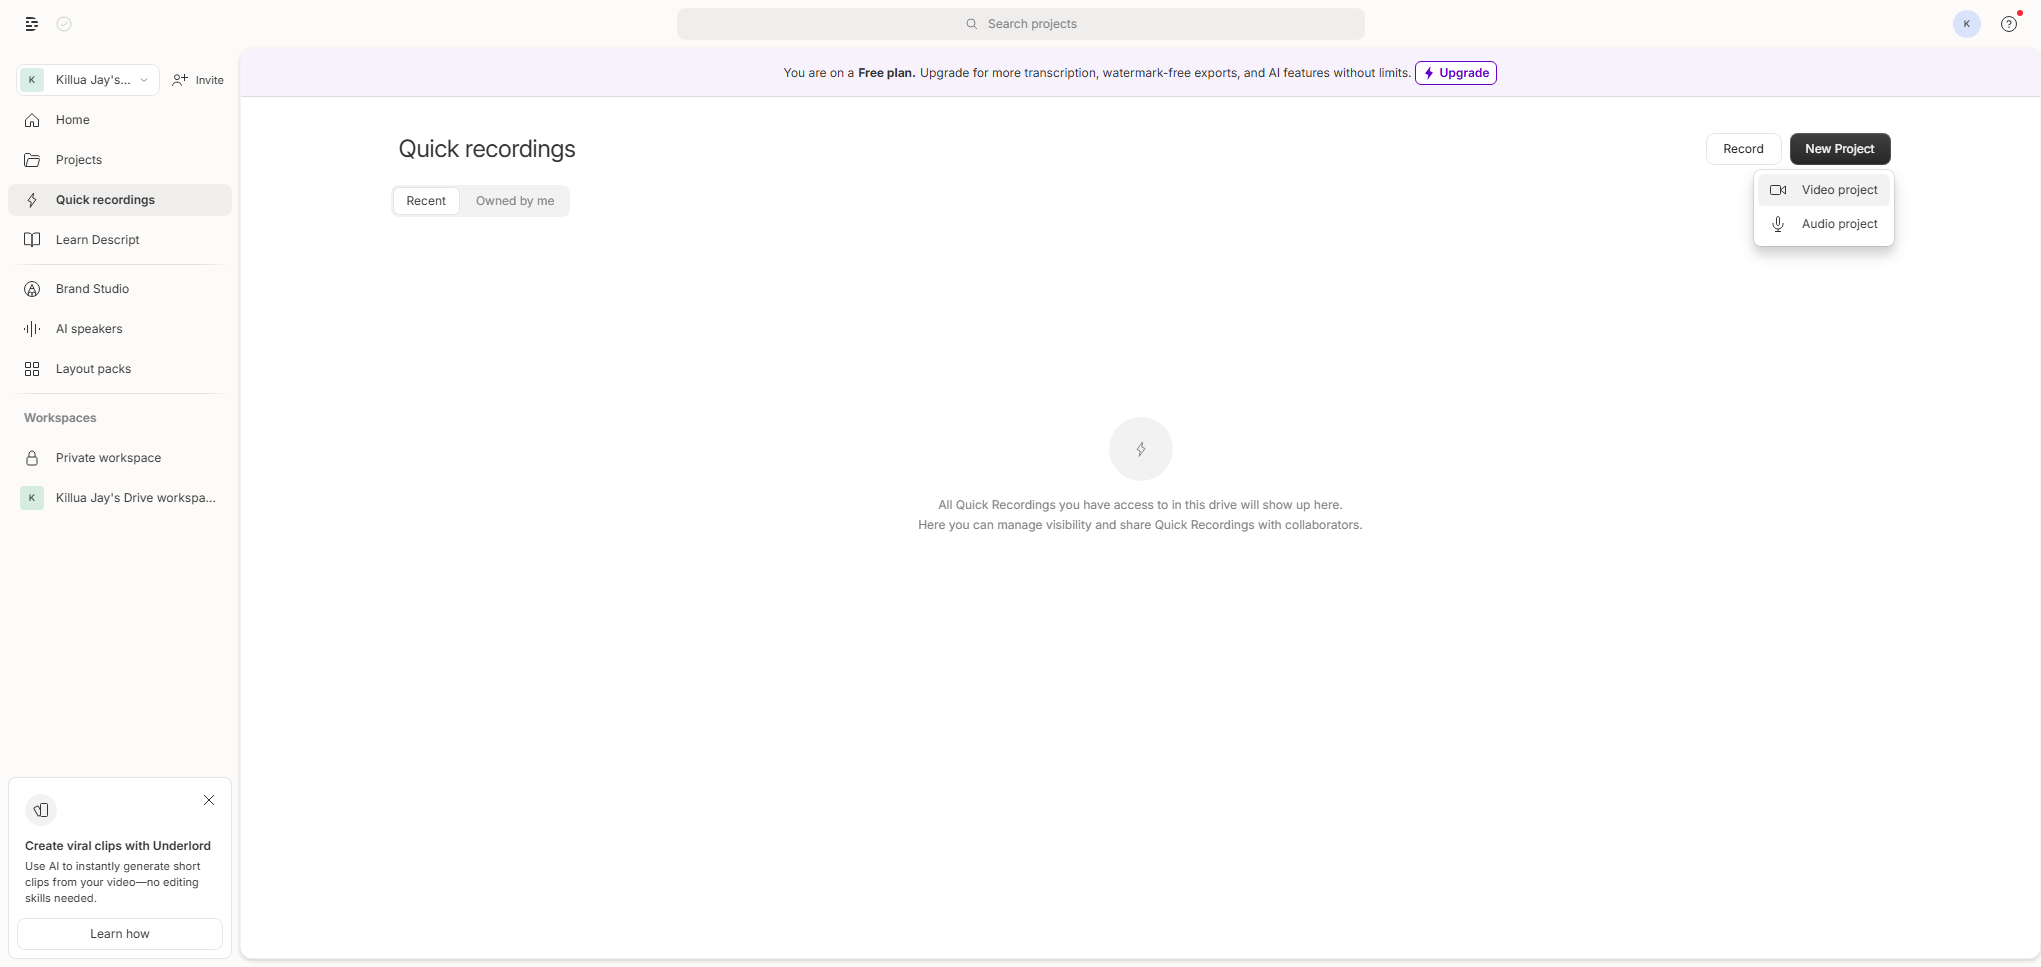
Step 1: Create a New Project
Start by launching Descript and creating a new project with these steps:
Navigate to “ Quick recordings ” > Click “ New Project ” > Choose “ Video project „.
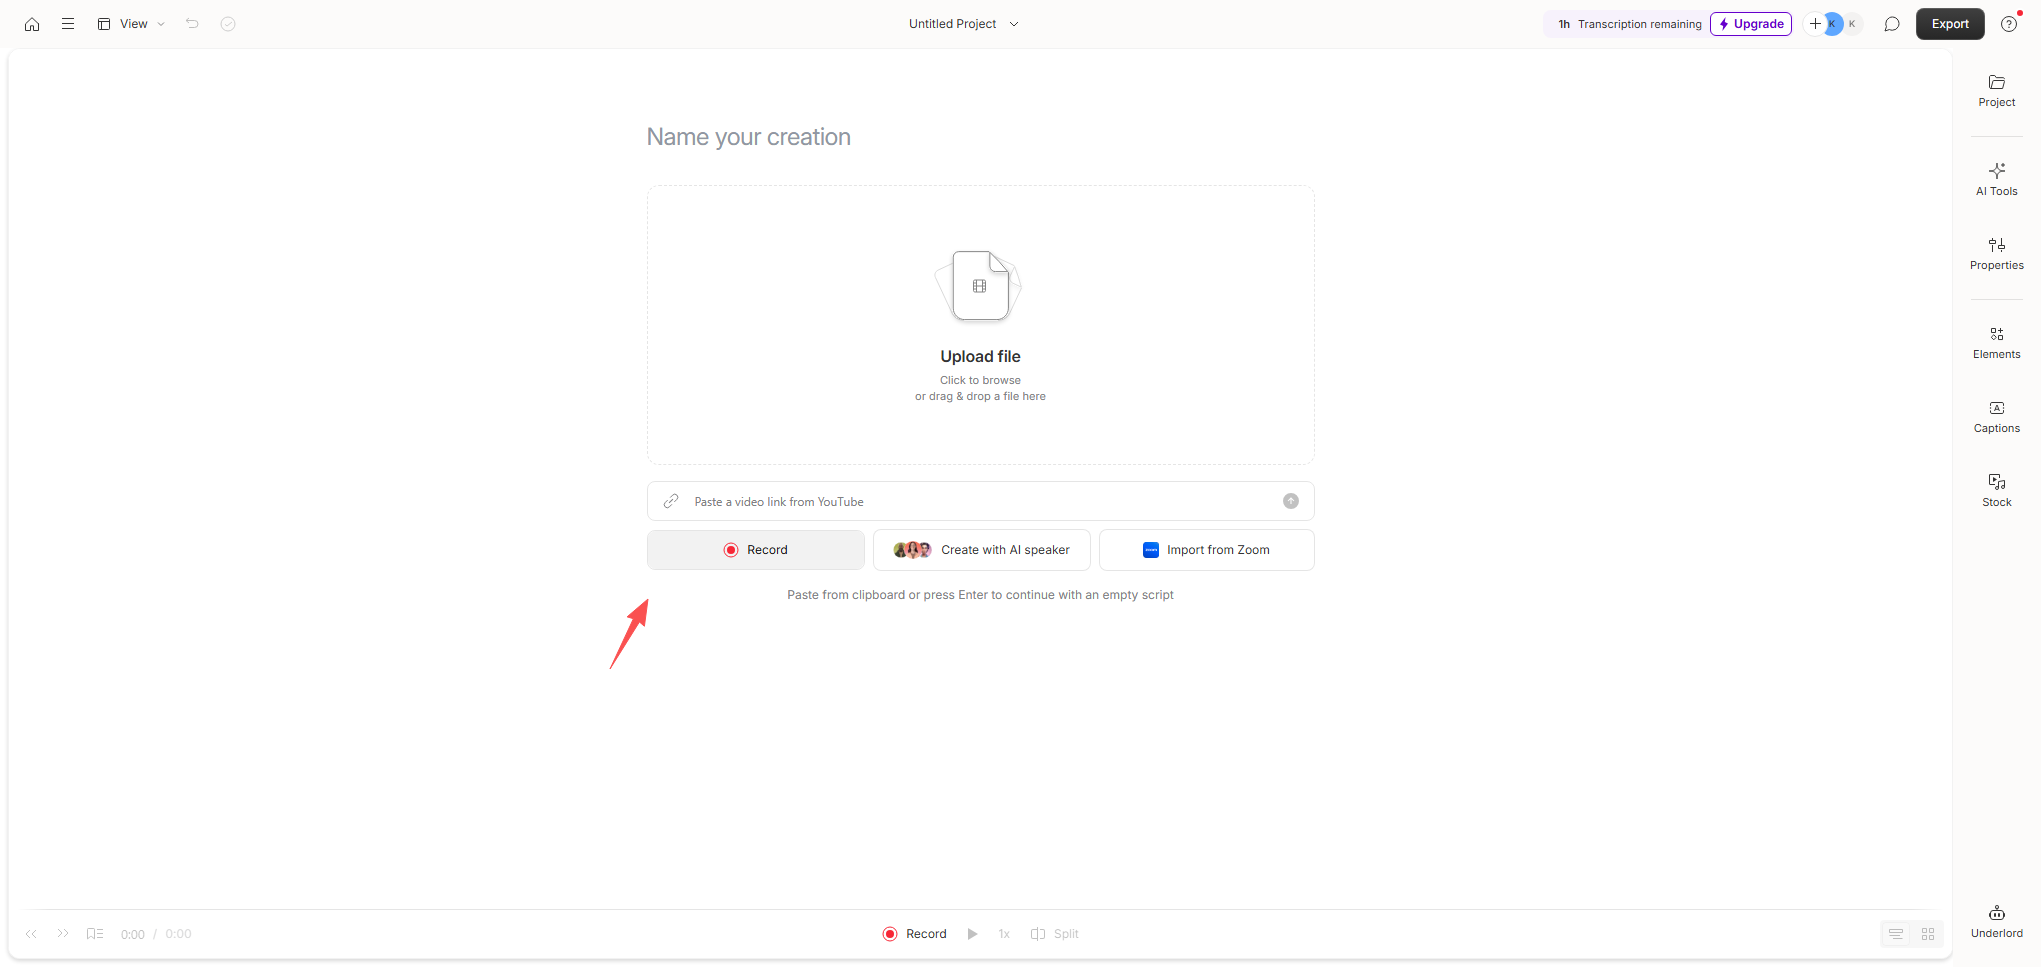
Step 2: Click Record Button
Decript will open it’s brower screen recorder tab, rename your project and then click the red “ Record " Taste.
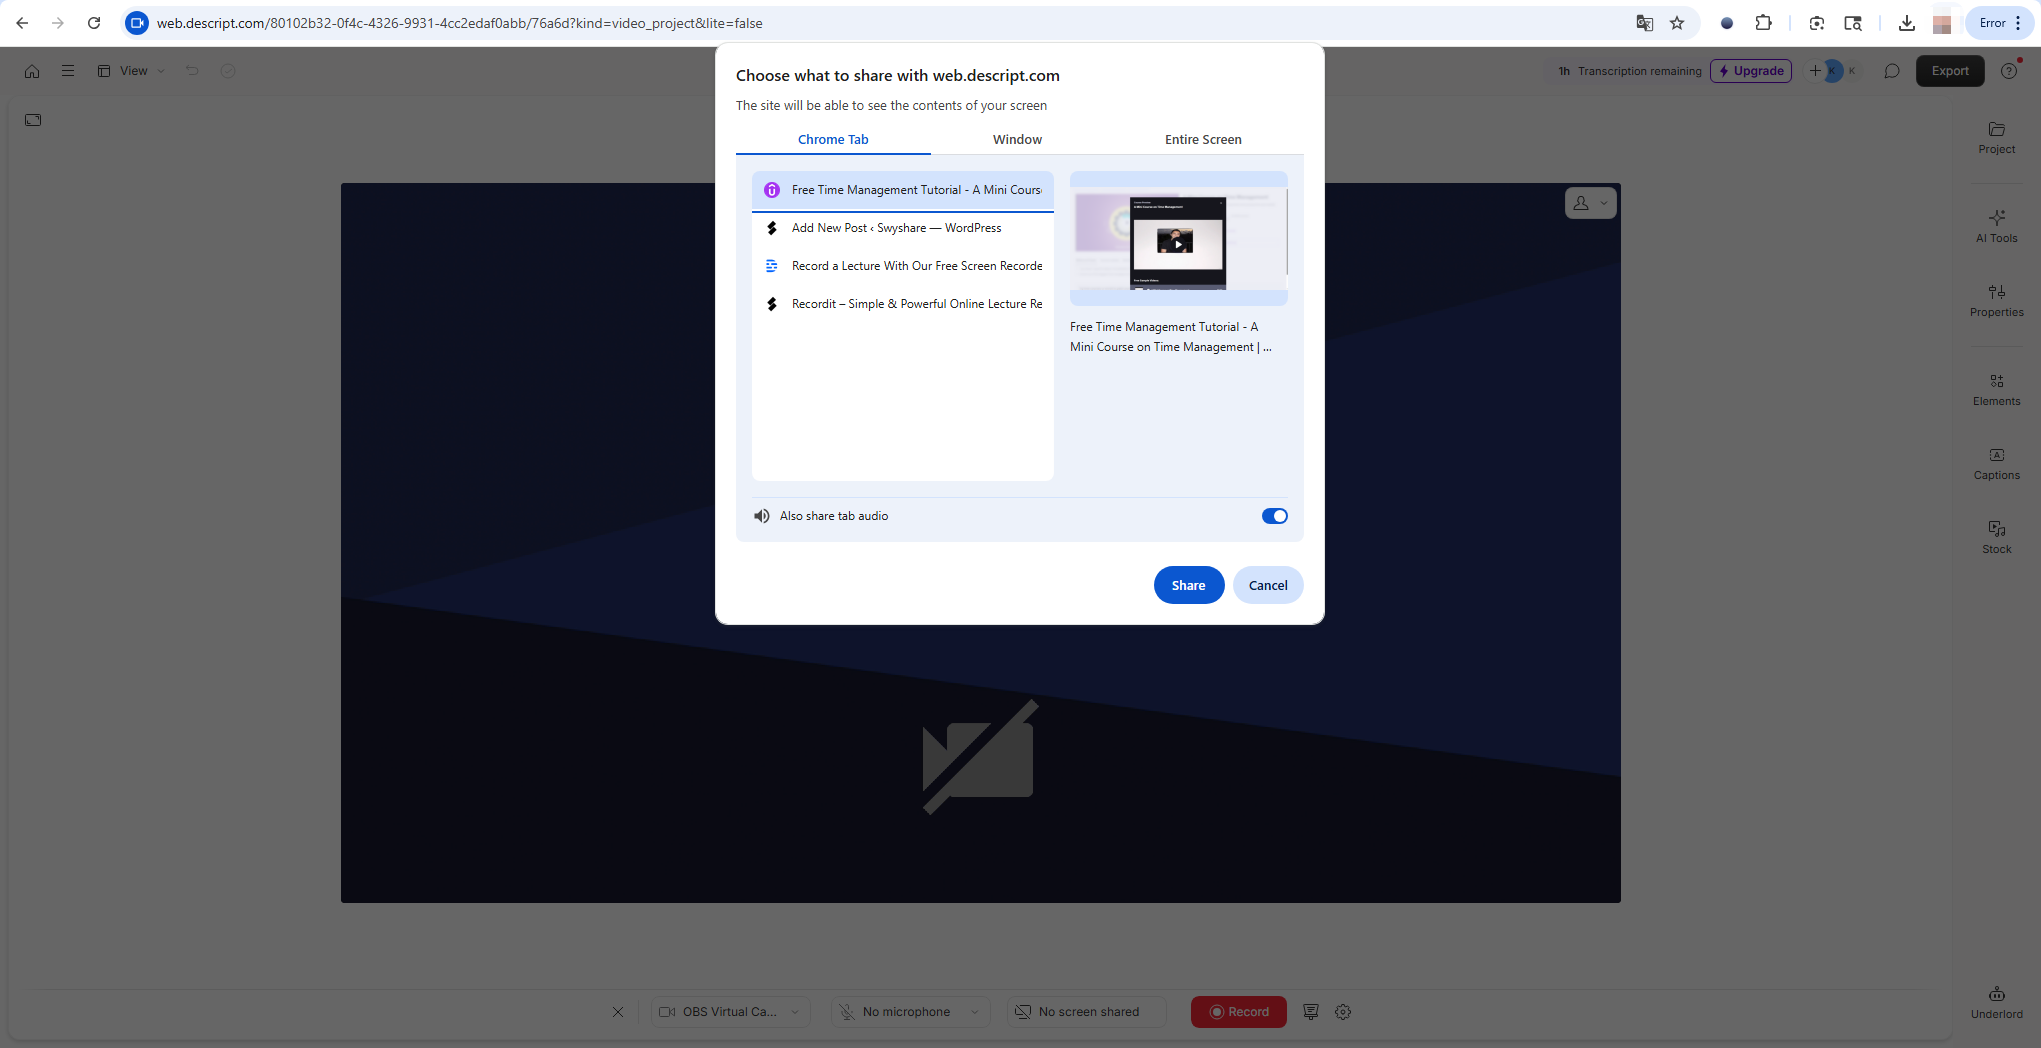
Step 3: Choose Record Area
Choose the tab that contain the training video you to record, turn on “ Also share the audio “, then click “ Share " Taste.
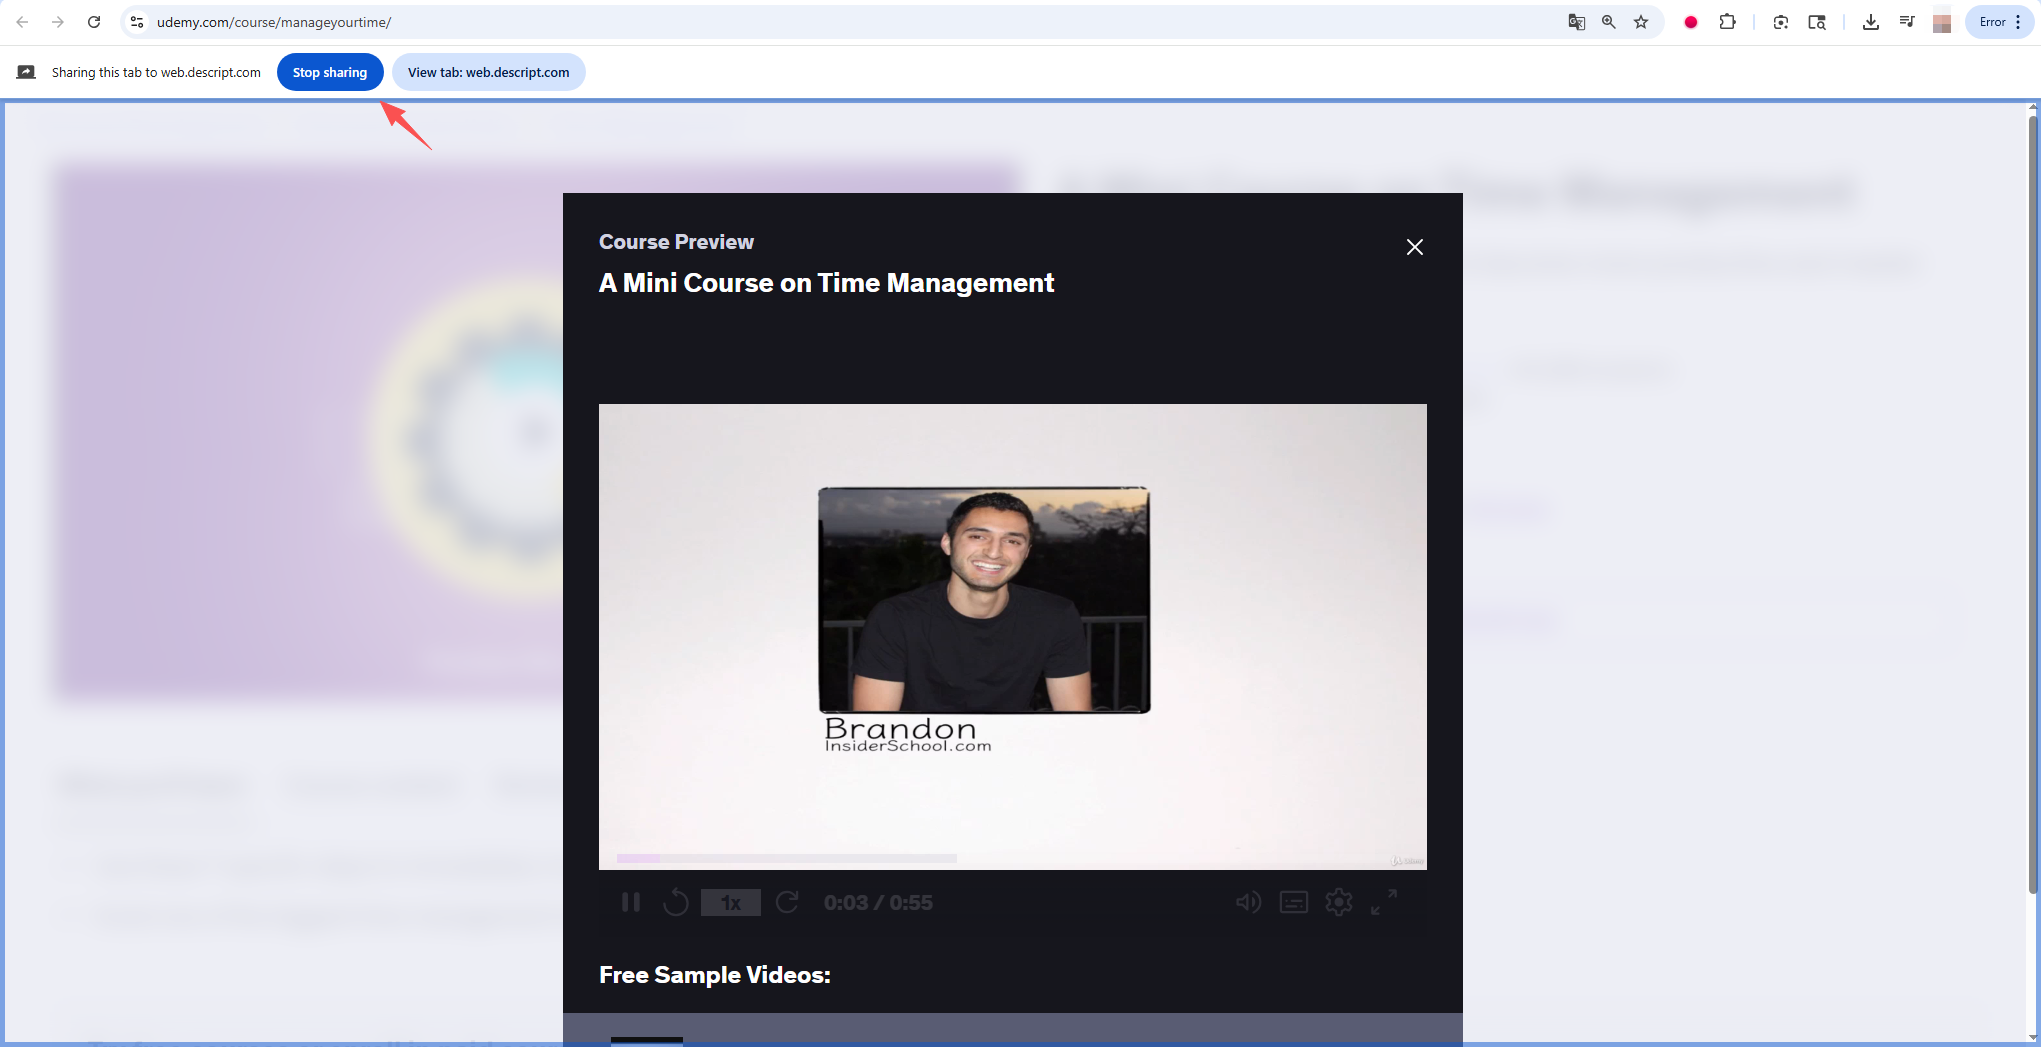
Step 4: Start Recording
Play the training video and Descript will start recording it in real time; Once the video ends, click “ Stop sharing „.
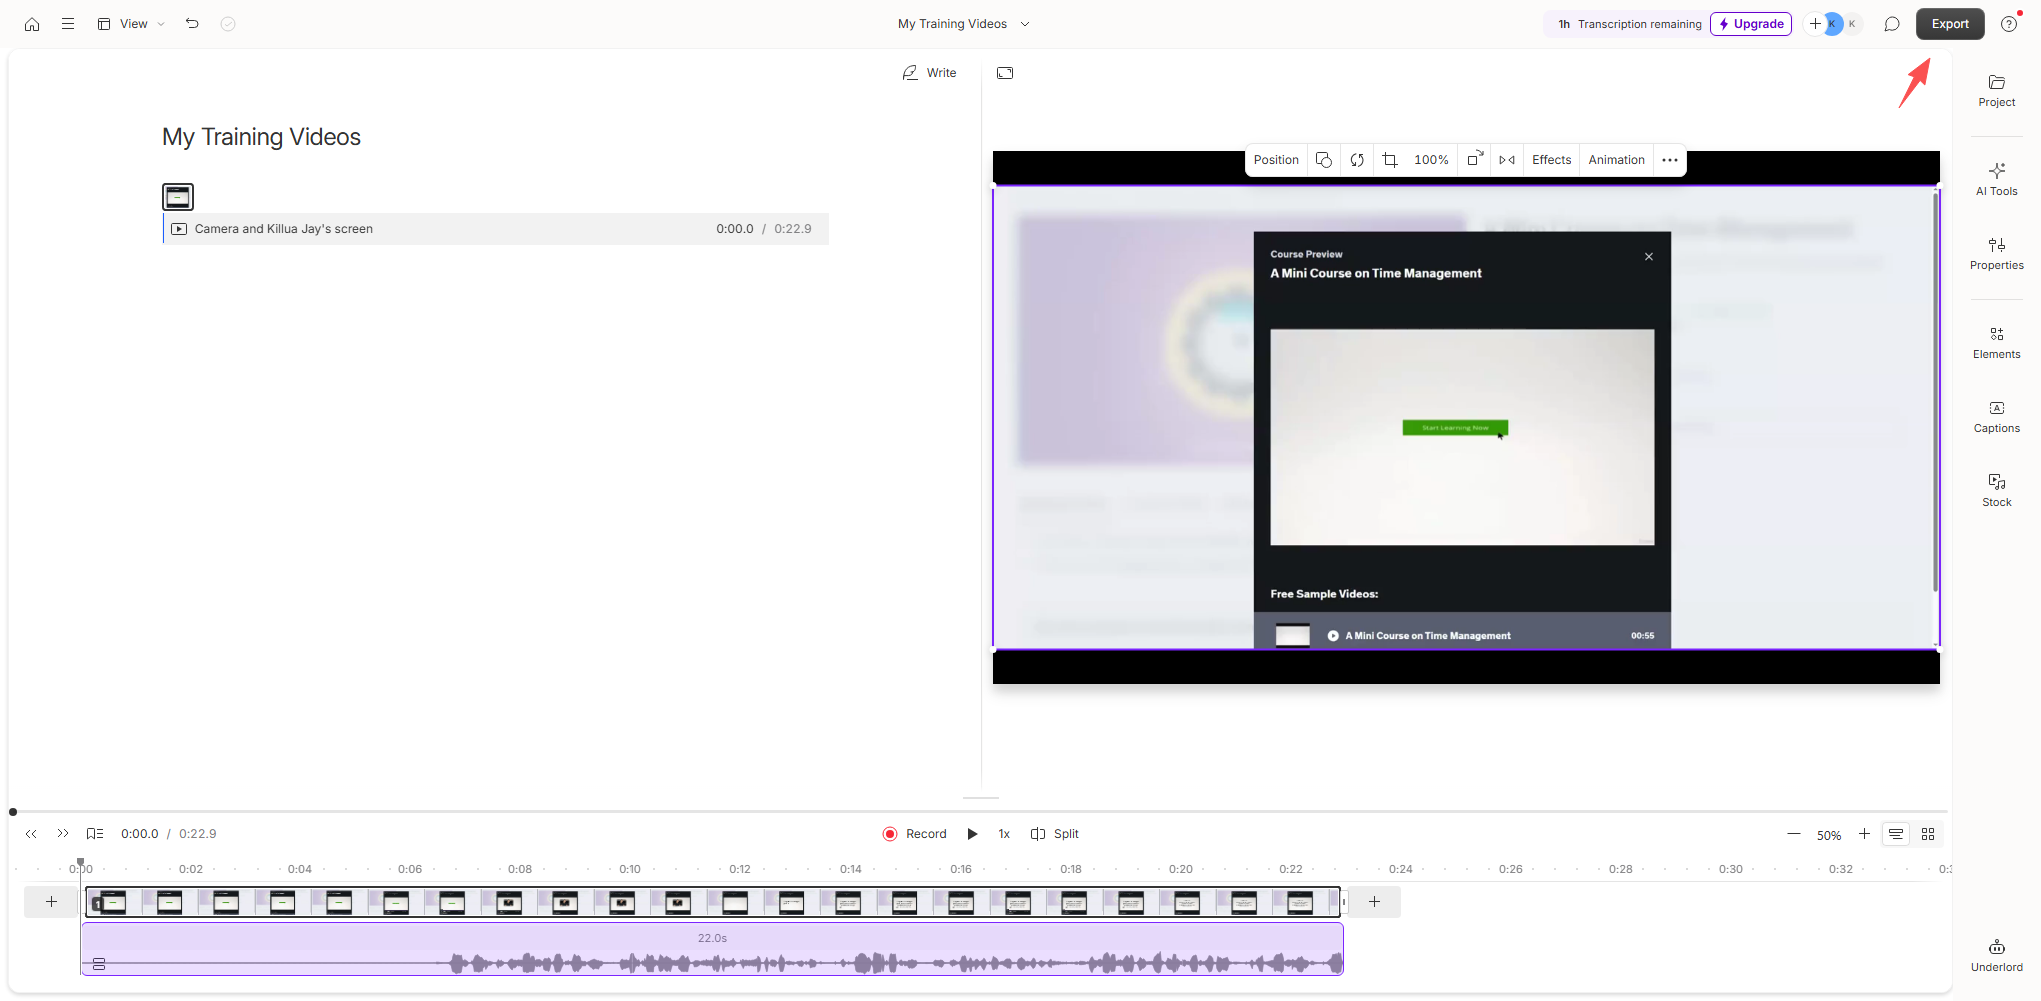
Step 5: Edit & Export Your Video
After recording, edit the video within Descript and export it in various formats: MP4 for video platforms, MP3 for audio, or a project file for collaborative editing.
3. Pros and Cons of Recording on Descript
While Descript offers a range of benefits, it is important to consider both the advantages and limitations before committing to it for screen-recorded training videos.
Pros :
- All-in-One Solution: Combines screen recording, video editing, transcription, and collaboration in one tool.
- Text-Based Editing: Simplifies video editing by allowing you to cut mistakes directly from the transcript.
- Annotations and Captions: Improves learner comprehension through visual cues and text overlays.
- AI-Powered Tools : Use Overdub and auto-transcription to save time and improve video quality.
- Professional Output: Exports in high-resolution formats suitable for professional training purposes.
Cons:
- Resource Intensive: Descript can be demanding on your computer’s CPU and memory, potentially causing lags on older systems.
- Learning Curve: While easier than traditional editors, some users find Descript’s interface slightly complex at first.
- Limited Real-Time Recording Control: Unlike lightweight recorders, fine-tuning live recording settings can be cumbersome.
- High Subscription Costs: Advanced features require a high cost plan, which may not fit every budget.
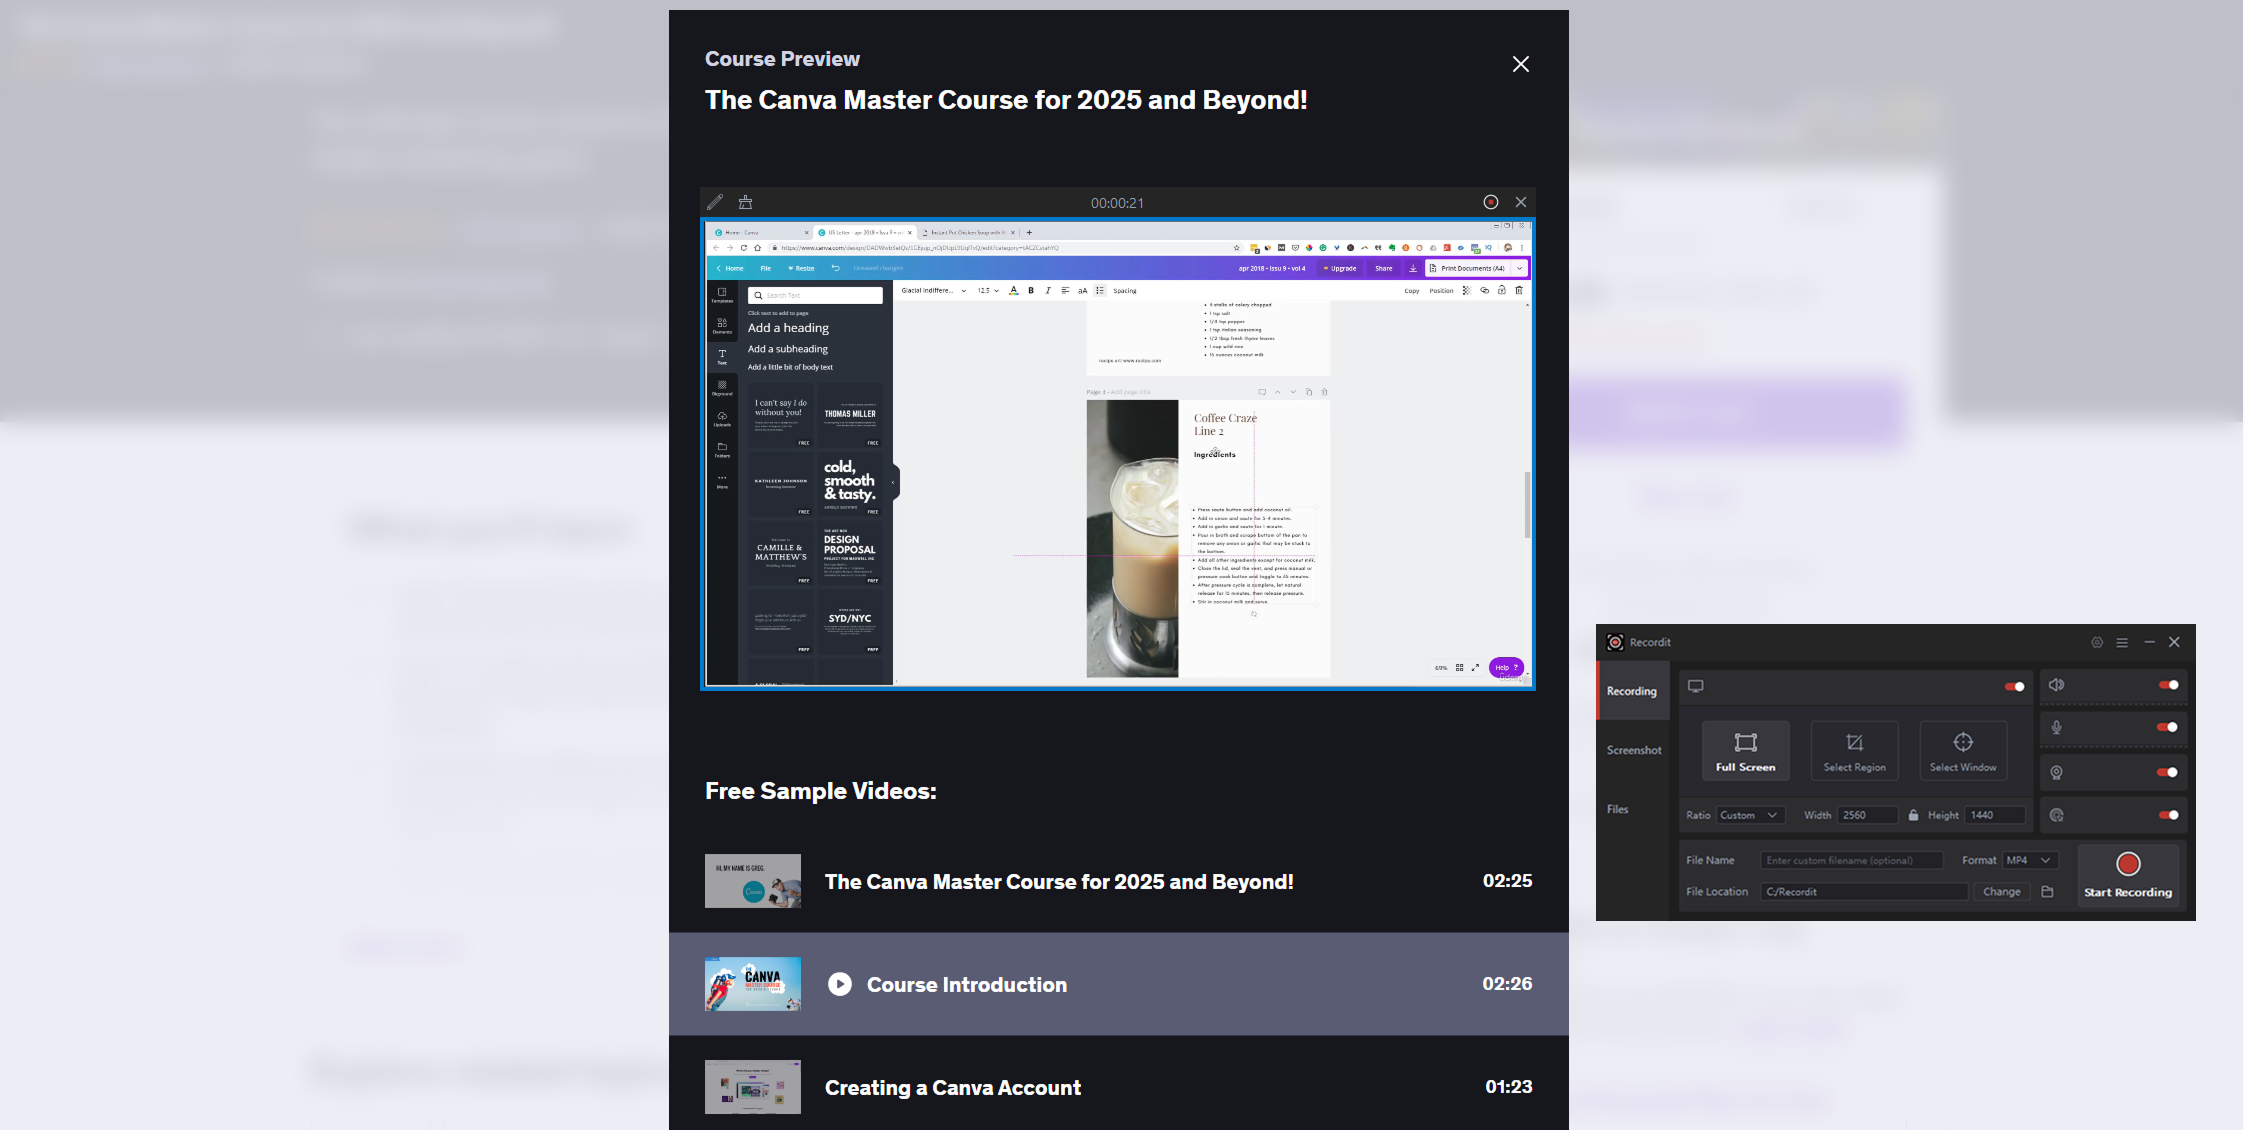
4. Try the Lightweight but Powerful Lecture Recorder – Swyshare Recordit
While Descript excels in editing and post-production, some users prefer a faster, simpler solution for recording training videos without worrying about heavy software. Swyshare Recordit is a lightweight, intuitive screen recorder designed for educators, trainers, and content creators who need reliable, hassle-free recording.
Key features of Swyshare Recordit lecture recorder:
- Minimalistic Interface: Start recording with one click – no complex setup needed.
- System and Microphone Audio: Capture both computer sounds and narration simultaneously.
- Format Support : Record lectures in multiple formats, e.g. MP4, MKV and GIF.
- High-Quality Output: Records in crisp HD resolution suitable for professional training videos.
- Lightweight and Fast: Uses minimal system resources, ensuring smooth recordings even on older computers.
How to record lectures with Recordit :
- Download Recordit from the official website, install and launch it.
- Configure your desired recording settings: Choose full screen, a window, or a custom area; Enable microphone and system audio if needed; Set output format, quality and file location.
- Start recording and deliver your lecture (Use Pause/Resume if necessary).
- To complete your session, click “Stop Recording “and the lecture file will be stored and accessible via Recordit ’s “Files” tab.
5. Conclusion
Screen-recorded training videos are an effective way to convey information, demonstrate processes, and improve learner engagement. Descript offers an all-in-one platform with advanced features, however, its resource-intensive nature and learning curve may not suit everyone, especially users looking for lightweight, hassle-free recording.
For those who prioritize speed, simplicity, and reliable recording performance, Swyshare Recordit is a highly recommended alternative. It allows educators and trainers to record high-quality lectures and training sessions with minimal setup and no distractions. Whether you are a teacher, corporate trainer, or online course creator, Swyshare Recordit provides the perfect balance of power and simplicity, ensuring your training videos are both professional and easy to produce.