How to Make OBS Record Mac Audio Output?

OBS Studio, short for Open Broadcaster Software, is a free and open-source tool for live streaming and screen recording. It’s widely used by gamers, content creators, and professionals who want high-quality, customizable recordings.
However, if you’re using a Mac, you might quickly notice a frustrating limitation: OBS doesn’t record system audio (Mac audio output) by default. This means that when you try to capture a game, a YouTube video, or music playback, the video will have no sound unless you use additional tools.
In this article, we’ll explain how you can record Mac audio output with OBS, and introduce a more lightweight but also powerful Mac alternative to obs.
1. Can OBS Record Mac Audio Output?
Not directly.
Due to Apple’s privacy and security restrictions, macOS does not allow apps like OBS to directly capture system audio output. This is part of Apple’s sandboxing rules to prevent unauthorized apps from recording everything you hear, such as calls or confidential meetings.
Instead, OBS can only record audio from input sources — like your microphone — unless you install a virtual audio driver . This driver connects your Mac’s system audio to OBS, enabling OBS to capture all sounds playing on your device.
Without such a driver, you’ll only get video with no sound (or just your mic input). That’s why Mac users who want to record system audio in OBS must follow extra steps.
2. How to Make OBS Record Mac Audio Output
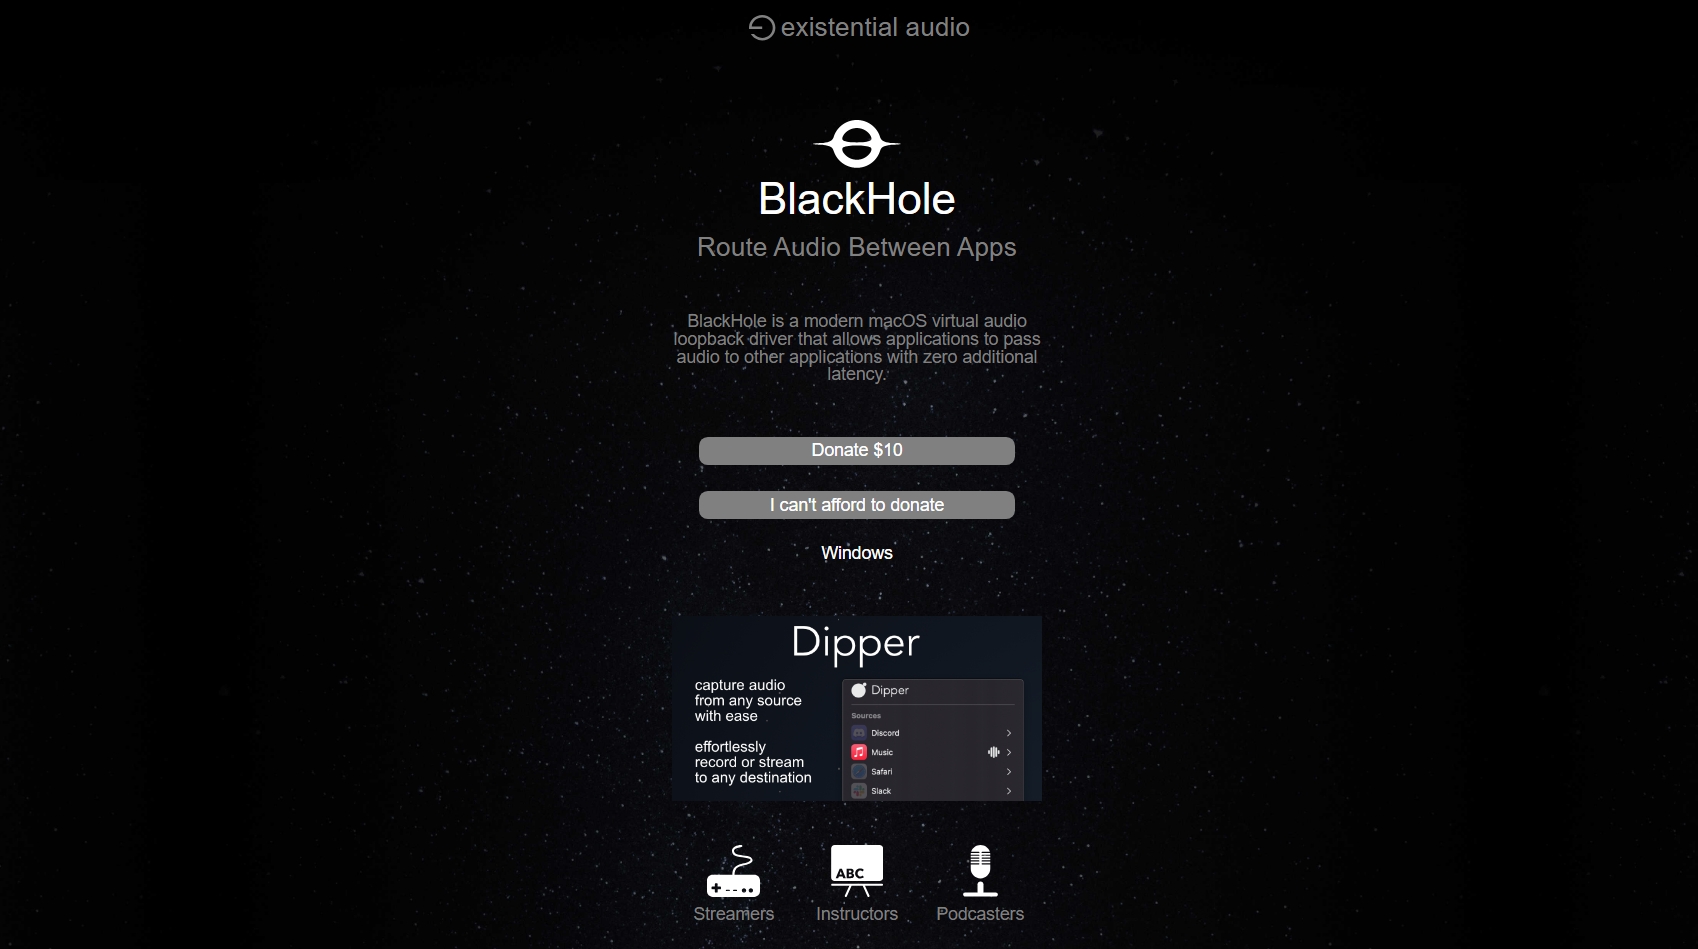
The most common method is to install a virtual audio driver, set it up in macOS, and then link it to OBS. One of the most popular and free drivers is BlackHole .
Here are the steps making OBS record Mac audio with BlackHole:
Step 1: Download and Install BlackHole
Head to the official BlackHole site, request the free download, and install it on your Mac. Approve the driver in System Settings → Privacy & Security → System Extensions if prompted.
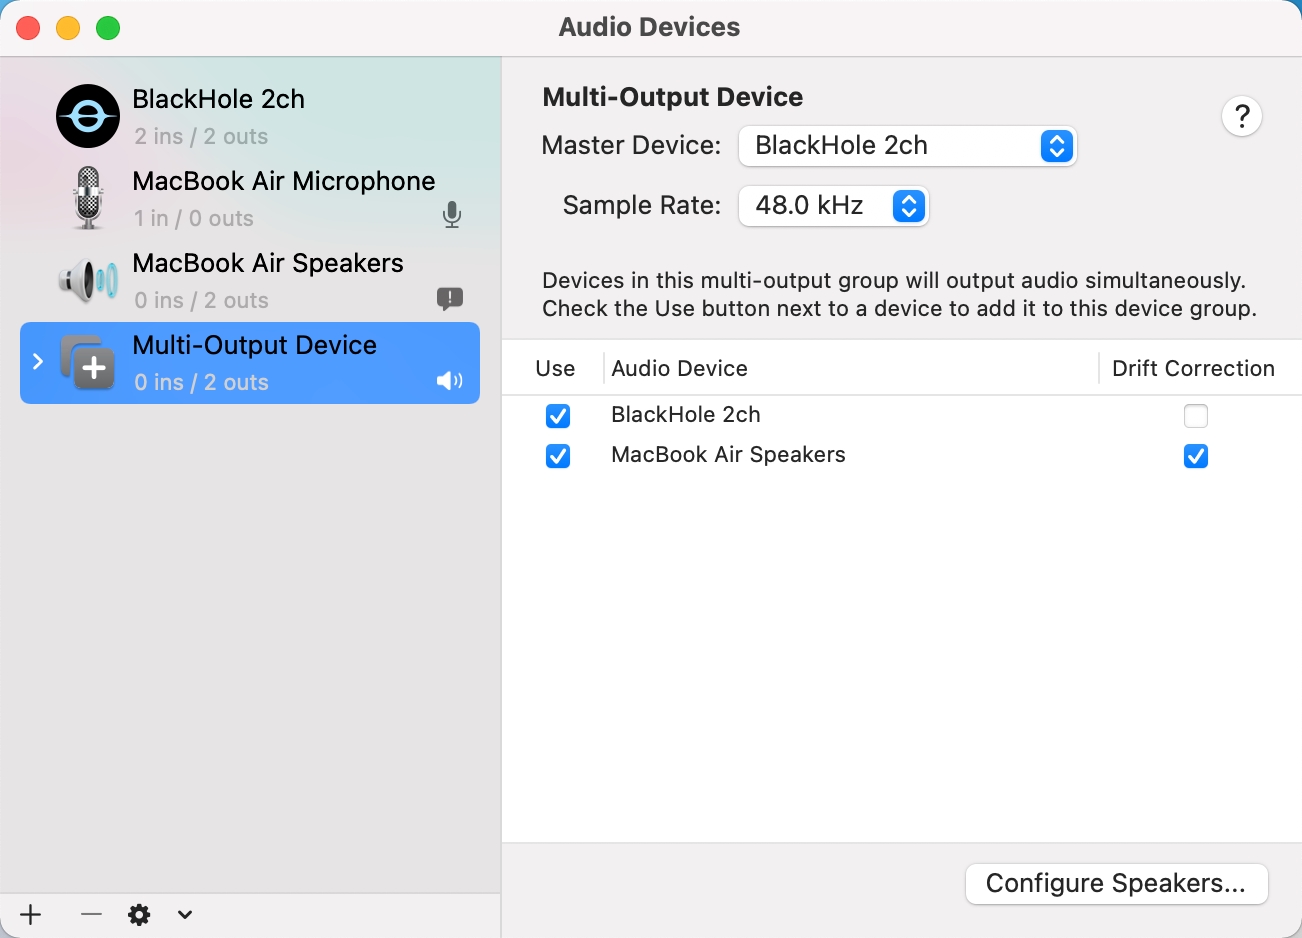
Step 2: Create a Multi-Output Device
- Open Audio MIDI Setup under Applications Utilities.

- Click the + button → Create Multi-Output Device .

- Check both MacBook Speakers (or your preferred output) and BlackHole .
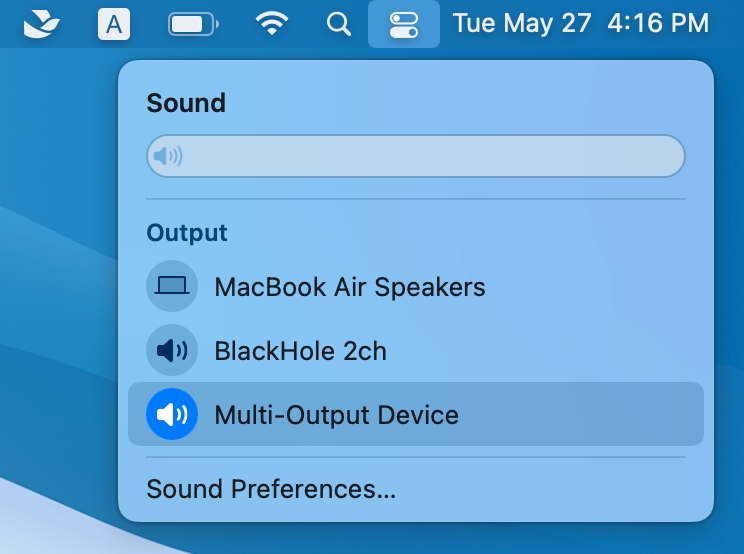
Step 3: Set Multi-Output Device as Default Output
- Go to System Settings → Sound → Output .
- Select your Multi-Output Device.
- Now your Mac will play audio to your speakers and send a copy to BlackHole.
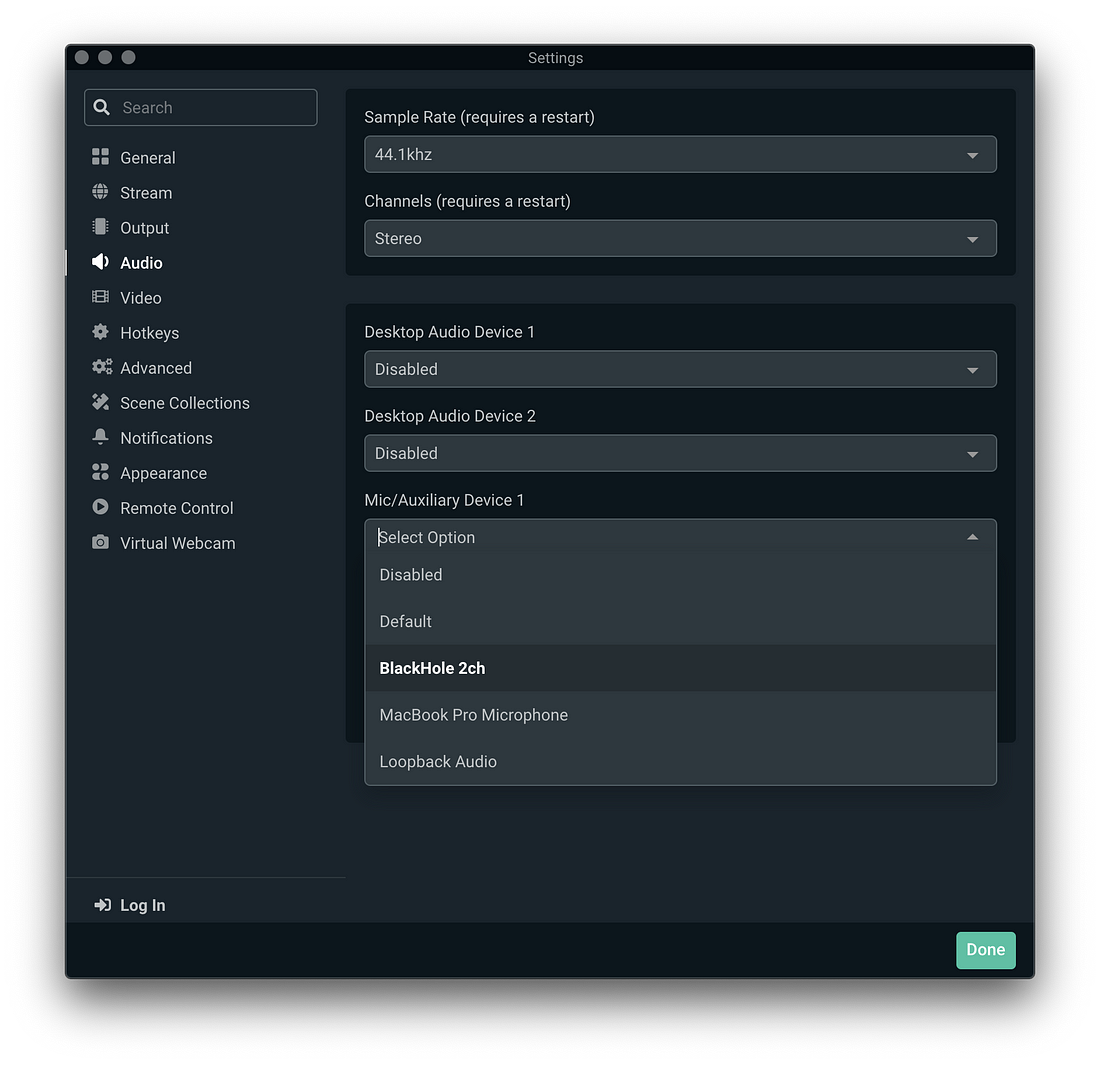
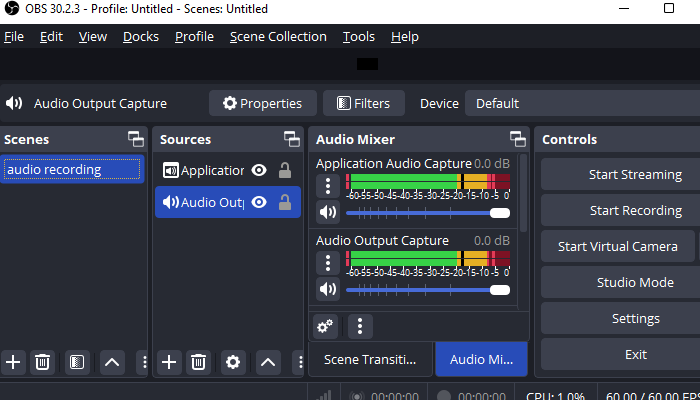
Step 4: Add BlackHole as Audio Input in OBS
- Open OBS → Settings → Audio .
- Under Mic/Auxiliary Audio , select BlackHole 2ch .
- Or manually add an Audio Input Capture source and choose BlackHole.
Step 5: Test Recording
Play some audio on your Mac, watch OBS’s audio meter, and verify that it’s picking up the sound.
3. More FAQs About Using OBS on Mac
1) Does OBS Work on Mac?
Yes, OBS Studio is compatible with macOS on both Intel and Apple Silicon, offering the same core features as Windows, though capturing system audio requires additional setup due to Apple’s restrictions.
2) What Video Encoder Should I Use for OBS Mac?
- Apple VT H264 Hardware Encoder (recommended for most users): Uses your Mac’s GPU for faster encoding with less CPU usage.
- x264 Software Encoder : Offers better quality at the cost of higher CPU usage. Suitable for powerful Macs or when maximum quality is required.
3) Where Do OBS Recordings Go on Mac?
By default, OBS saves recordings to:
/Users/[YourUsername]/Movies
, and you can change this in
Settings → Output → Recording Path
.
4) How Much CPU Usage for Mac OBS Should I Use?
Aim to keep OBS CPU usage below 50% during recording to avoid dropped frames or stutters. If usage is too high:
- Lower resolution or frame rate.
- Use a hardware encoder.
- Close unnecessary background apps.
5) How to Resolve “OBS Could Not Find Virtual Camera” on Mac?
If OBS shows this error:
- In OBS, go to Tools → Install Virtual Camera to make sure the Virtual Camera is installed.
- Restart OBS and make sure it has camera access enabled under System Settings → Privacy & Security → Camera .
- On Apple Silicon Macs, confirm you installed the ARM64 version of OBS.
4. Try the Best Easy-to-Use Mac Alternative to OBS – Swyshare Recordit
If setting up virtual audio devices and adjusting OBS settings sounds too complex, you can skip the hassle by using Swyshare Recordit – an all-in-one Mac screen recorder that captures system audio and microphone audio without extra drivers.
Key Features of Recordit :
- Capture Mac full screen or a specific window.
- Support different input sources, such as system audio, microphone voice and webcam.
- Record smooth, high-quality video & quality.
- Export recorings in populat fromats within a few seconds.
- Take still snapshots from screen in one-click.
- Available on Windows and Mac.
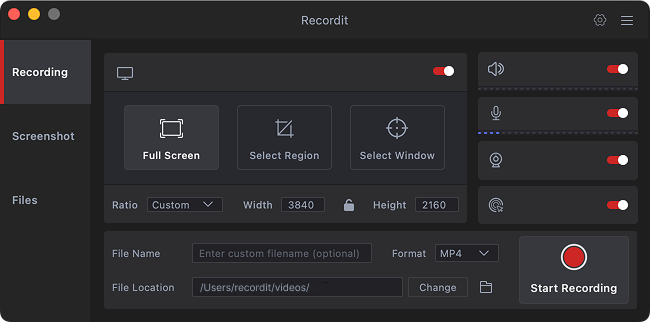
With Recordit , you get system audio recording on Mac in seconds, making it a great choice for non-technical users or those who want a faster workflow than OBS.
5. Conclusion
OBS Studio is a powerful tool for streaming and recording on Mac, but macOS’s built-in restrictions mean you can’t directly capture system audio without extra steps. By using a virtual audio driver like BlackHole (free) or Loopback (paid), you can route your Mac’s output into OBS and capture high-quality audio alongside your video.
However, using OBS can be time-consuming and technical, and this’s why Swyshare Recordit stands out as the easiest Mac alternative to OBS, letting you record screen easily, quickly and without complicated steps.
For recording Mac audio quickly and easily, Swyshare Recordit is a better choice than OBS.