How to Troubleshoot DaVinci Record Live Black Screen?

DaVinci Resolve is a feature-rich video editing software trusted by both professionals and hobbyists for its advanced capabilities and intuitive interface. One of its many features is the ability to record live audio and video directly within the software. However, some users have encountered an issue where attempting to record live results in a black screen. This problem can be frustrating, especially when you need to capture high-quality footage for your project. In this article, we will explore how to record video/audio in DaVinci Resolve and troubleshoot the record live black screen issue.
1. Step-by-Step Guide to Recording Video and Audio in DaVinci Resolve
Recording video and audio in DaVinci Resolve requires the correct setup to ensure seamless capture. Follow these steps to properly record video and audio:
How to Record Video in DaVinci Resolve:
- Launch DaVinci Resolve and initiate a fresh project.
- Navigate to either the “Cut” or “Edit” page, depending on your workflow.
- Ensure that your video input device (webcam, external camera, or capture card) is properly connected.
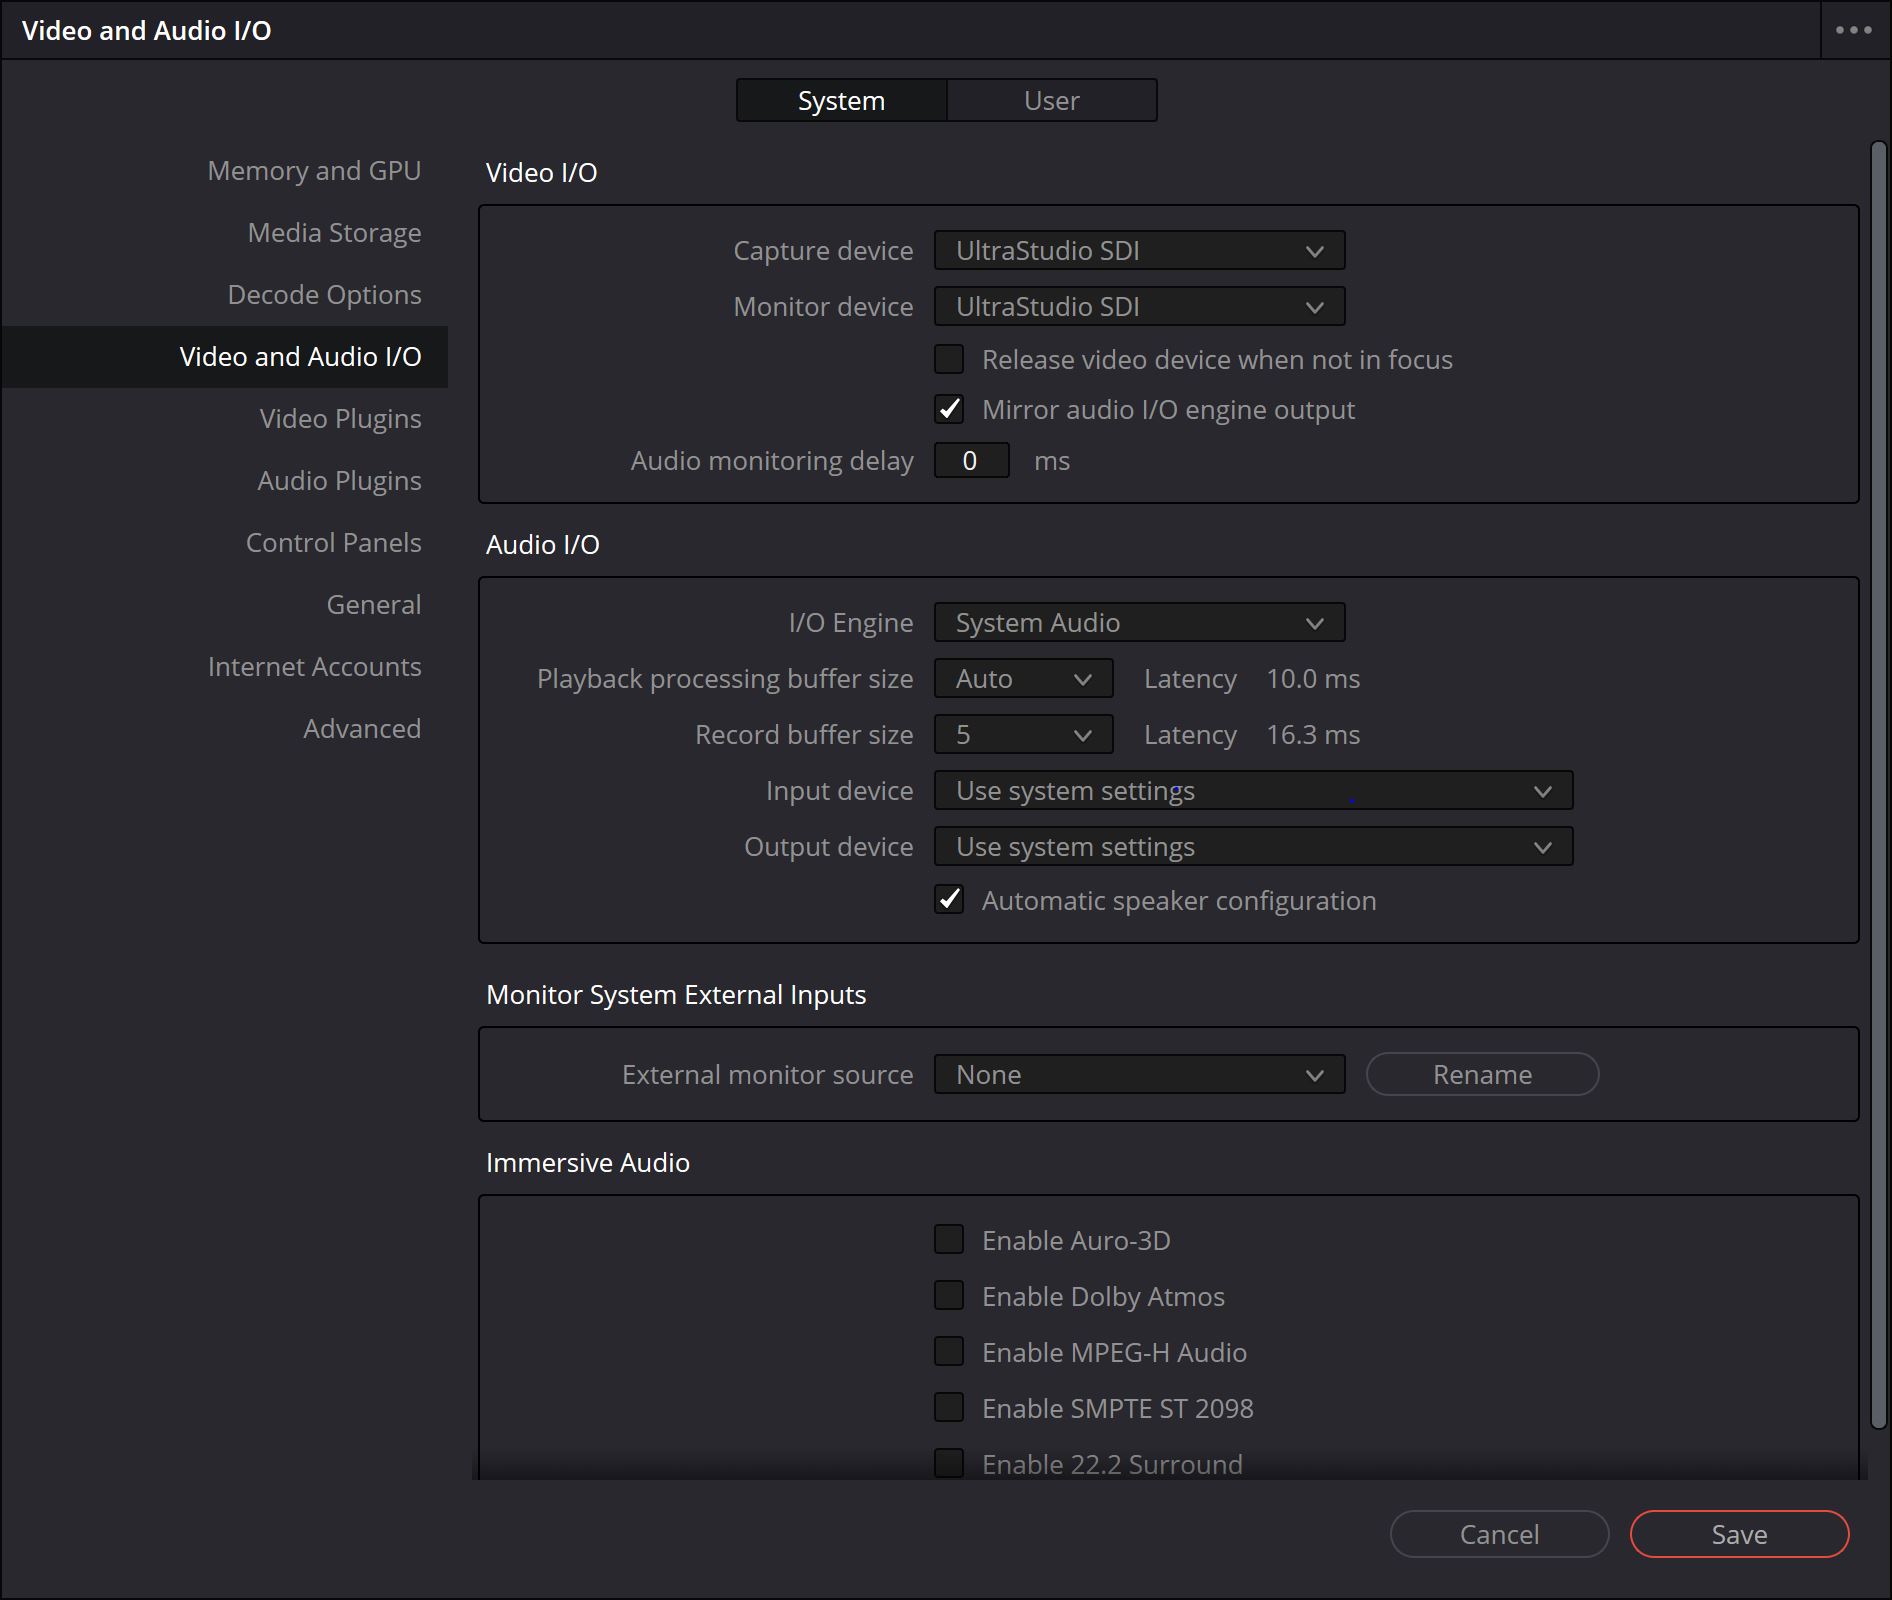
- Check Video Settings: Go to Preferences > System > Video and Audio I/O; Select your video input source from the available options.
- If you haven’t already, create a new timeline to store your recorded video.
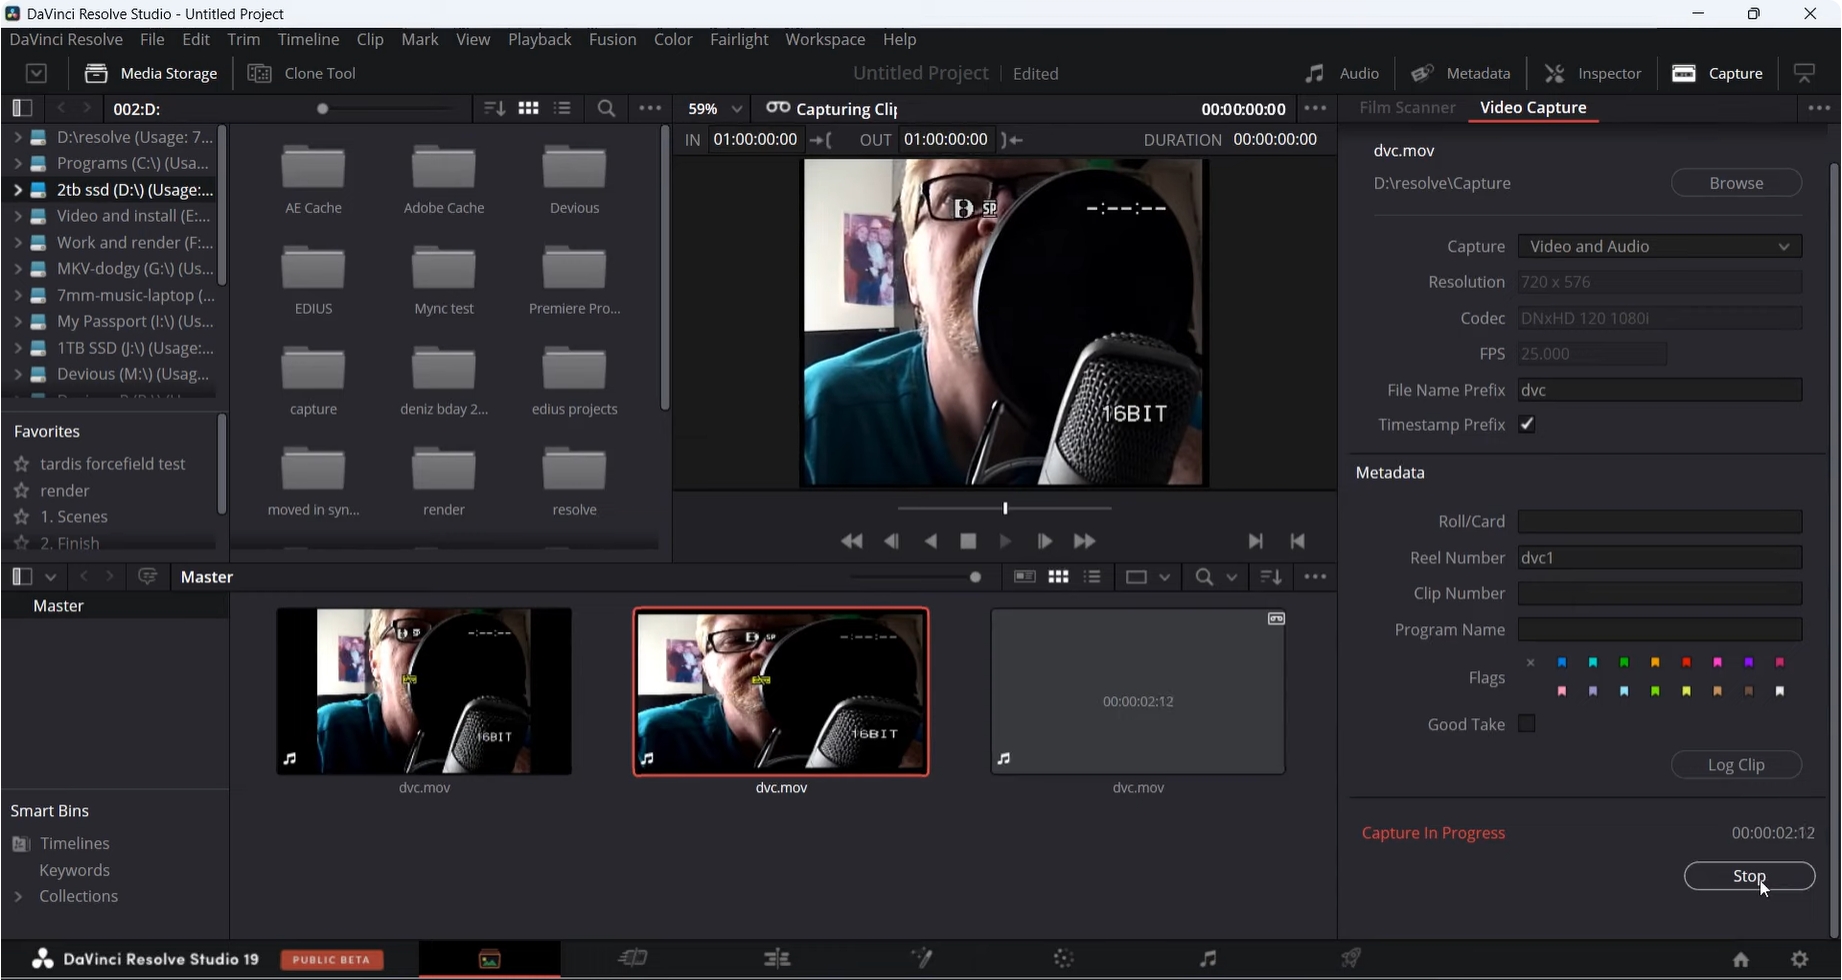
- Click the “Capture” button or use the shortcut (default: Ctrl + R) to begin recording live video.
- Once you’re done, click “Stop” to save your recording, which will be added to the timeline.
How to Record Audio in DaVinci Resolve:
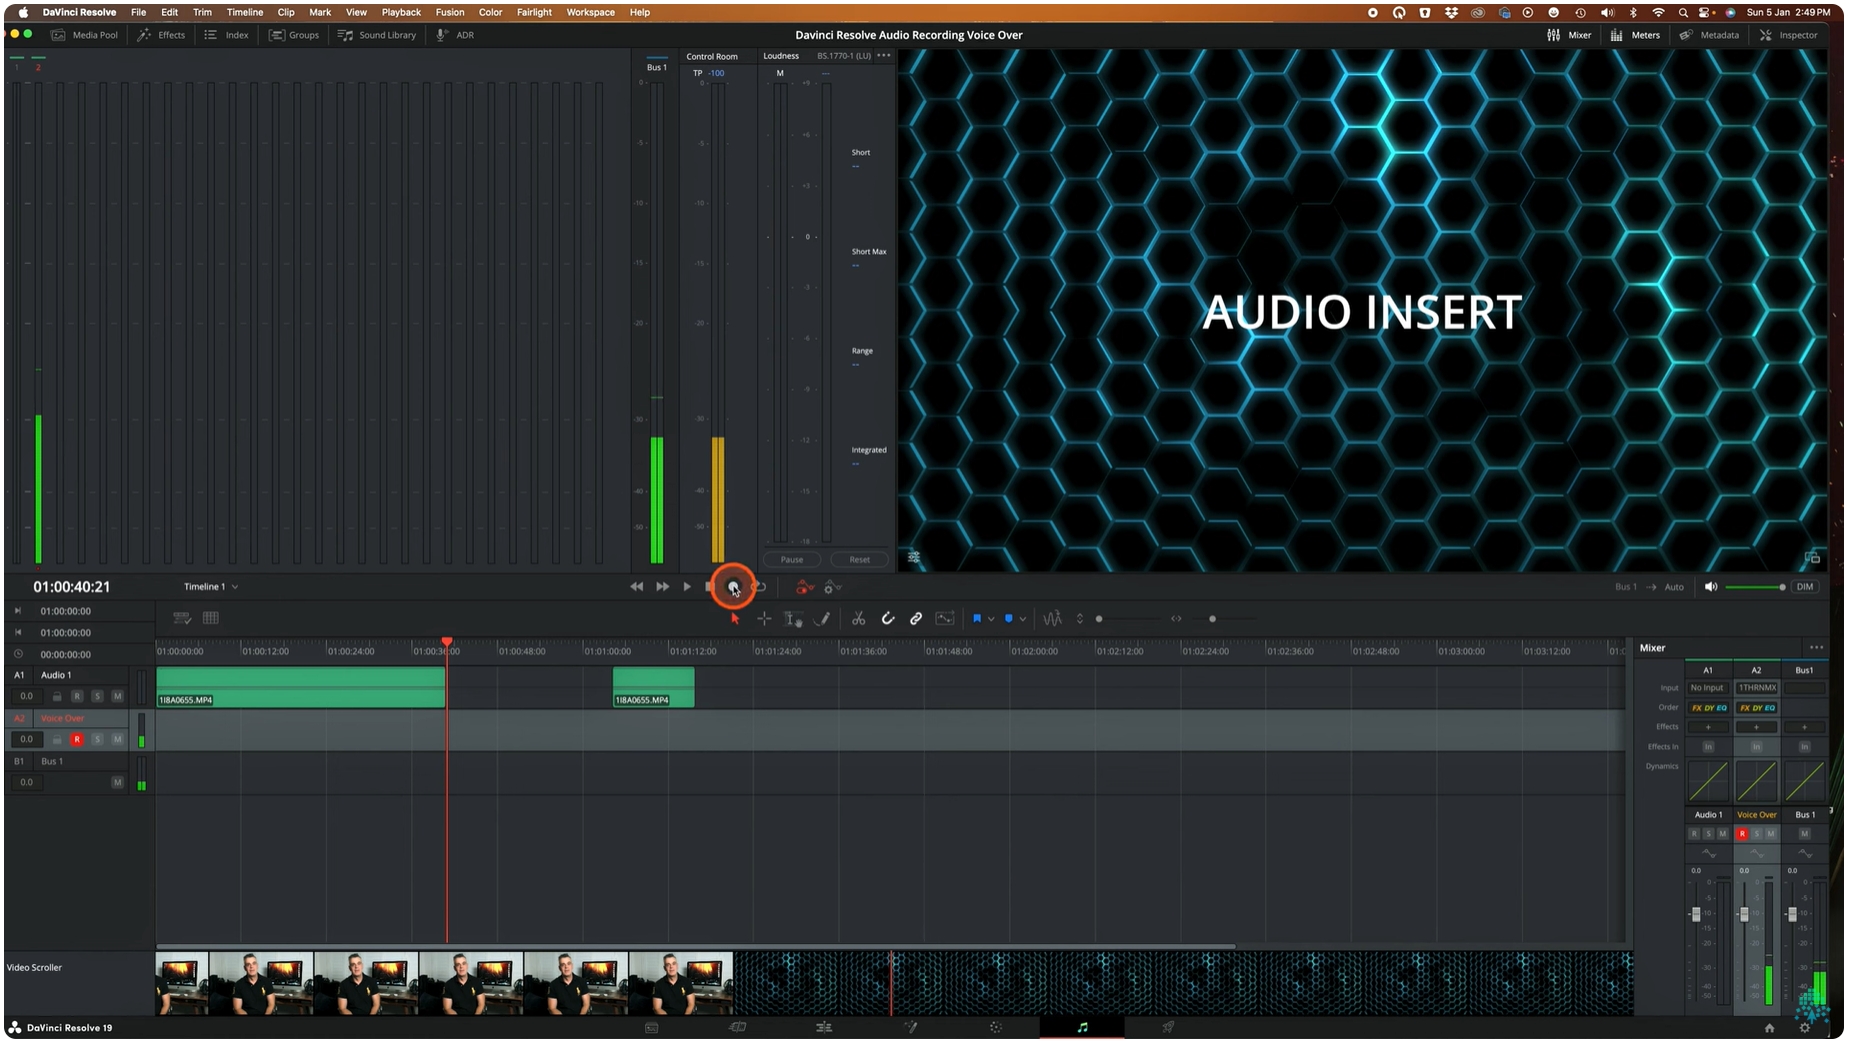
- Click on the “Fairlight” tab at the bottom of the interface to access the audio editing workspace.
- If there isn’t an existing audio track, right-click on the timeline, select “Add Track,” and choose “Mono” or “Stereo,” depending on your preference.
- Click on the “Mixer” panel and locate the track where you want to record audio. Click the input button and select your microphone or audio source.
- Click on the “R” button (Record Arm) on the selected track to enable it for recording.
- Click the “Record” button in the transport controls or use the shortcut (default: Shift + R) to begin recording your audio.
Following these steps should allow you to capture clear video and audio directly within DaVinci Resolve. However, if you’re trying to record live and encounter a black screen, you’ll need to troubleshoot the issue.
2. How to Troubleshoot DaVinci Record Live Black Screen?
If you’re facing a black screen when recording live in DaVinci Resolve, here are some potential fixes:
2.1 Check Video Input Settings
Ensure that your video input source is correctly configured:
Go to Preferences > System > Video and Audio I/O > Verify that the correct input device is selected > If using an external camera, ensure it is properly connected and recognized by DaVinci Resolve.
2.2 Update Graphics Drivers
Outdated graphics drivers can cause black screen issues.
- Update your GPU drivers from the official NVIDIA or AMD website.
- Restart DaVinci Resolve after updating.
2.3 Disable GPU Processing for Input
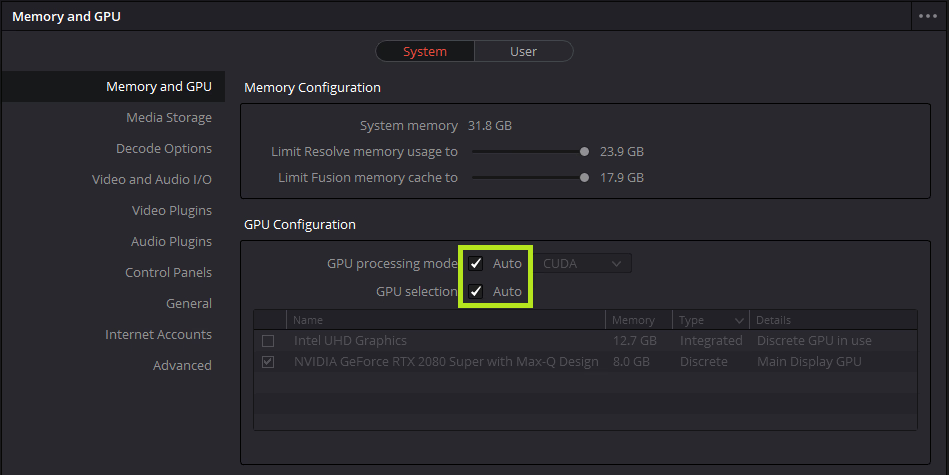
Sometimes, GPU acceleration can interfere with live recording: Go to Preferences > System > Memory and GPU > Uncheck “GPU processing mode” and restart DaVinci Resolve.
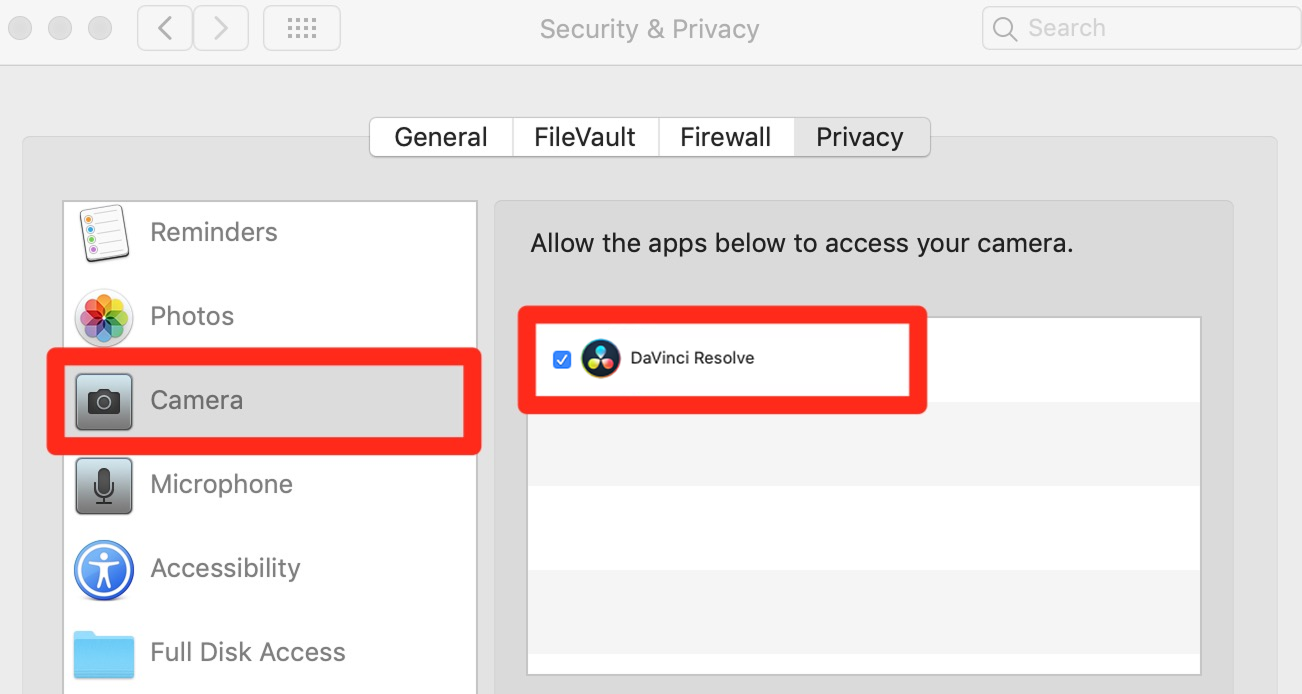
2.4 Check Camera Permissions
On Windows:
Go to Settings > Privacy & Security > Camera > Ensure DaVinci Resolve has permission to access the camera.
On macOS:
In System Preferences , go to Security & Privacy > Camera , and give DaVinci Resolve access to your camera.
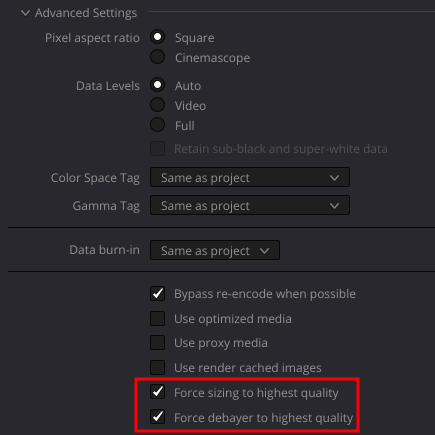
2.5 Adjust Project Settings
- Open Project Settings and navigate to Advanced Settings and set the timeline resolution and frame rate to match your recording device.
- Check if enabling “Force Sizing to Highest Quality” resolves the black screen issue.
2.6 Use an External Capture Card
If you’re using a webcam or external video source, an external capture card like Elgato Cam Link can help DaVinci Resolve recognize your video input properly.
2.7 Reinstall DaVinci Resolve
If none of the above solutions work, uninstall and reinstall DaVinci Resolve to ensure a clean installation without corrupted files.
If you’re still struggling with the black screen issue, you might need an alternative solution. That’s where Recordit comes in.
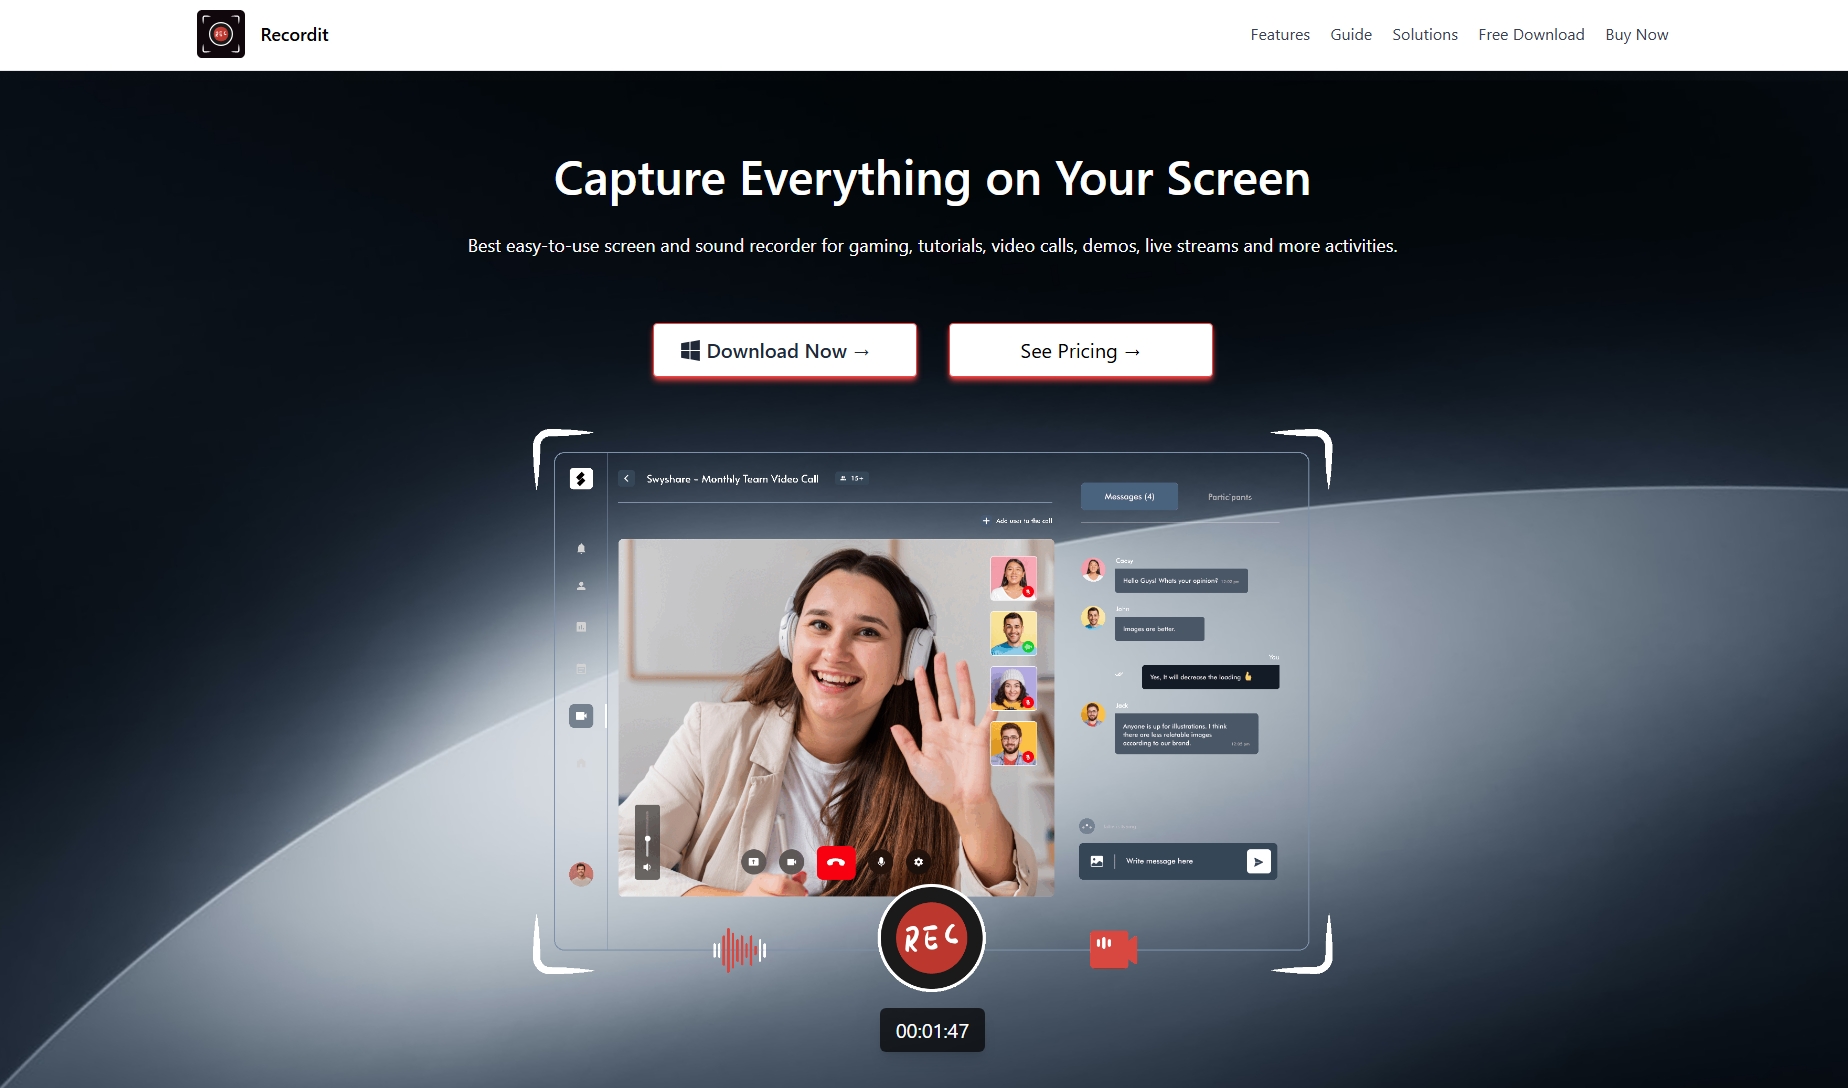
3. Best Easy-to-Use Screen Recorder to Record Live Without Black Screen – Recordit
If you need a reliable way to record live video without black screen issues, Recordit is the perfect solution. It is a simple yet powerful screen recording tool that allows you to capture high-quality video with minimal setup.
Why Choose Recordit :
- Ensure that your recordings are captured without any black screen problems.
- Straightforward user interface makes recording hassle-free, even for beginners.
- Easily capture screen, webcam, and all audio sources (system & microphone).
- Support for HD (1080p), 2K, or 4K screen recording for crystal-clear video.
How to record live using Recordit without capturing a black screen:
- Download the Recordit ’s appreciate version for your OS, install and launch the software.
- Choose record mode, and disable hardware acceleration on your browser or device.
- Click to recording to capture the activity on the screen in real time.
- Once done, click the stop button in the same location and find recorded video in “Files” tab.
4. Conclusion
Recording live video in DaVinci Resolve can sometimes be challenging, especially when encountering black screen issues. By following the troubleshooting steps outlined in this article, you can try to resolve the issue. However, if you’re looking for a quick and effective alternative, Recordit is a fantastic option for seamless screen recording without any complications.
If you need a reliable, easy-to-use, and hassle-free screen recording tool, we highly recommend giving Recordit a try. Whether you’re capturing tutorials, gameplay, or live streams, Recordit ensures high-quality results without the frustration of black screen errors. Try Recordit today and enjoy smooth, trouble-free screen recording!