OBS Replay Buffer Step-by-Step Guide

Capturing the perfect gaming moment, a live stream highlight, or an unexpected video clip can sometimes feel impossible. That instant when something amazing happens often comes and goes in the blink of an eye. Luckily, software like OBS Studio (Open Broadcaster Software) offers a feature called Replay Buffer, designed specifically to record the last few seconds or minutes of your screen so you never miss a crucial moment. In this guide, we’ll walk you through what OBS Replay Buffer is, and how does work.
1. What is Replay Buffer in OBS?
The Replay Buffer is a feature within OBS Studio that continuously stores the last X seconds of your recording in memory. Unlike normal recording, where you must hit “Record” before an event happens, Replay Buffer lets you retroactively save those last crucial seconds. For instance, if your character pulls off a perfect combo or you encounter an unexpected scene during a stream, Replay Buffer allows you to capture that moment even if you weren’t recording continuously.
This feature is especially useful for gamers, live streamers, and content creators who want to ensure they never miss spontaneous highlights without having to keep hours of raw footage.
2. How Does OBS Replay Buffer Work?
At its core, Replay Buffer works by keeping a rolling temporary recording in RAM . Here’s a simplified breakdown of how it works:
- Continuous Recording in Memory: Once enabled, OBS continuously records your screen or game to a temporary buffer stored in your computer’s RAM.
- User Trigger: When something notable happens, you press a specific hotkey or button to “save” the contents of the buffer.
- Permanent Storage: The buffered content is then written to your hard drive as a normal video file.
- Buffer Reset: After saving, the buffer starts overwriting old content again, ensuring that the most recent seconds are always available.
Think of it like a camera with an instant replay feature — it’s always recording the last few moments, ready to save them at a click.
3. How to Turn On Replay Buffer in OBS?
Setting up Replay Buffer in OBS Studio is straightforward. Follow these steps:
- Open OBS Studio: Ensure you have the latest version installed.
- Access Settings: Click on Einstellungen in the bottom-right corner of OBS.
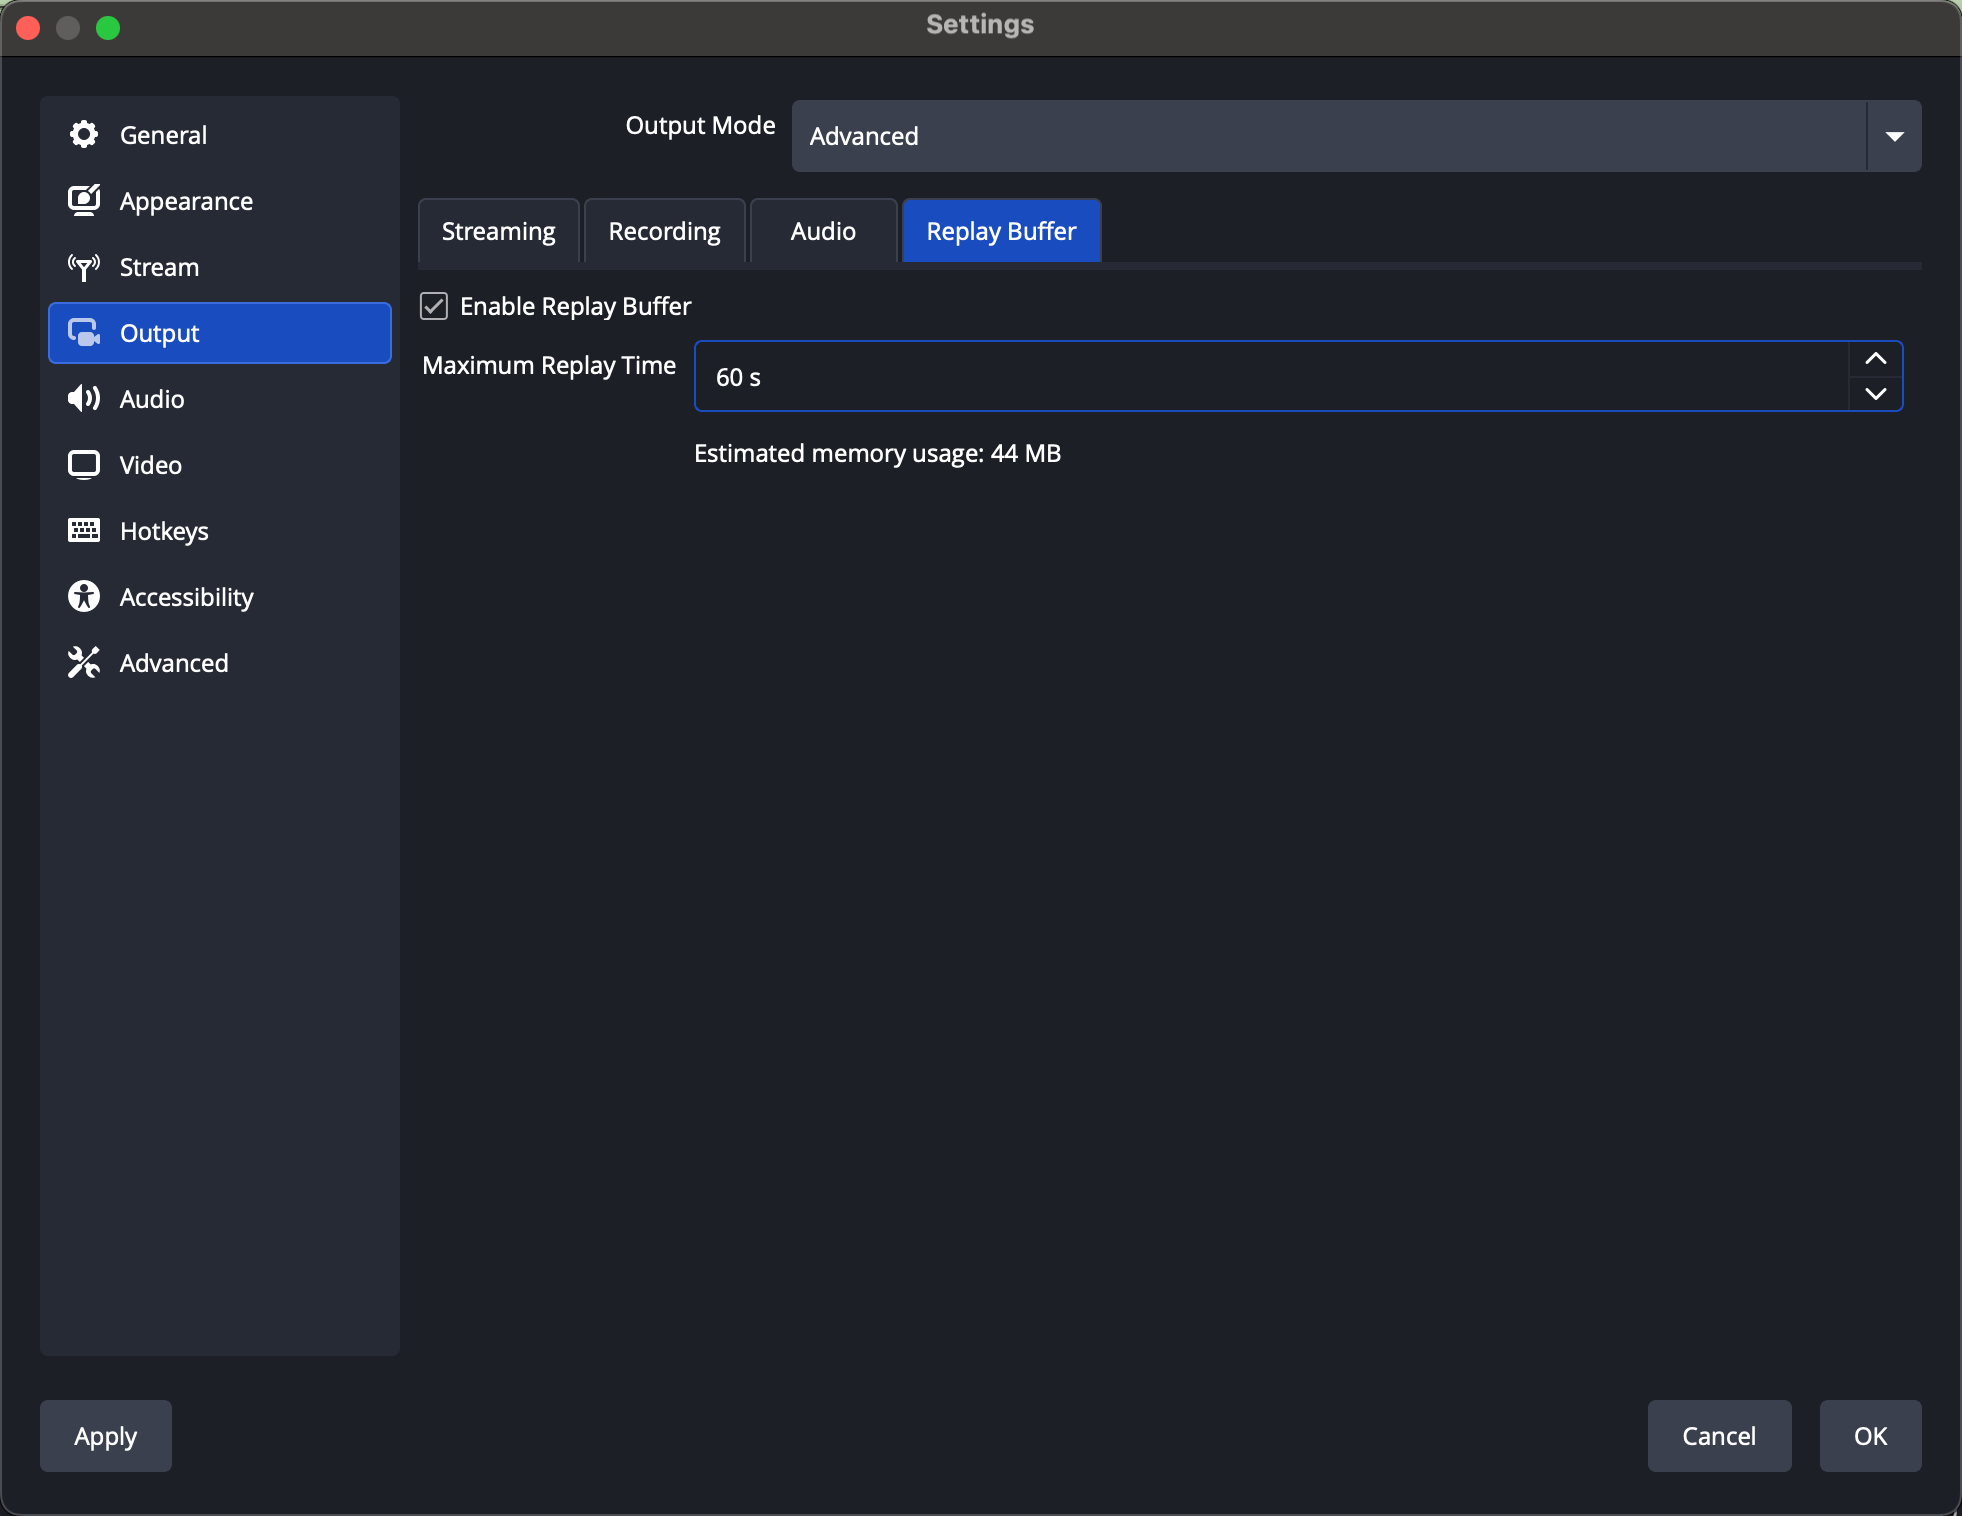
- Navigate to Output Settings: Select the Output tab from the left menu.
- Enable Replay Buffer: In the Output mode, switch to Advanced . Under the Replay Buffer section, check Enable Replay Buffer .
- Adjust Duration: Decide how many seconds of footage you want to keep in the buffer (e.g., 30, 60, or 120 seconds).
- Set Hotkey: Go to Settings > Hotkeys and assign a hotkey for Save Replay . This key will trigger OBS to save the buffered video to your drive.
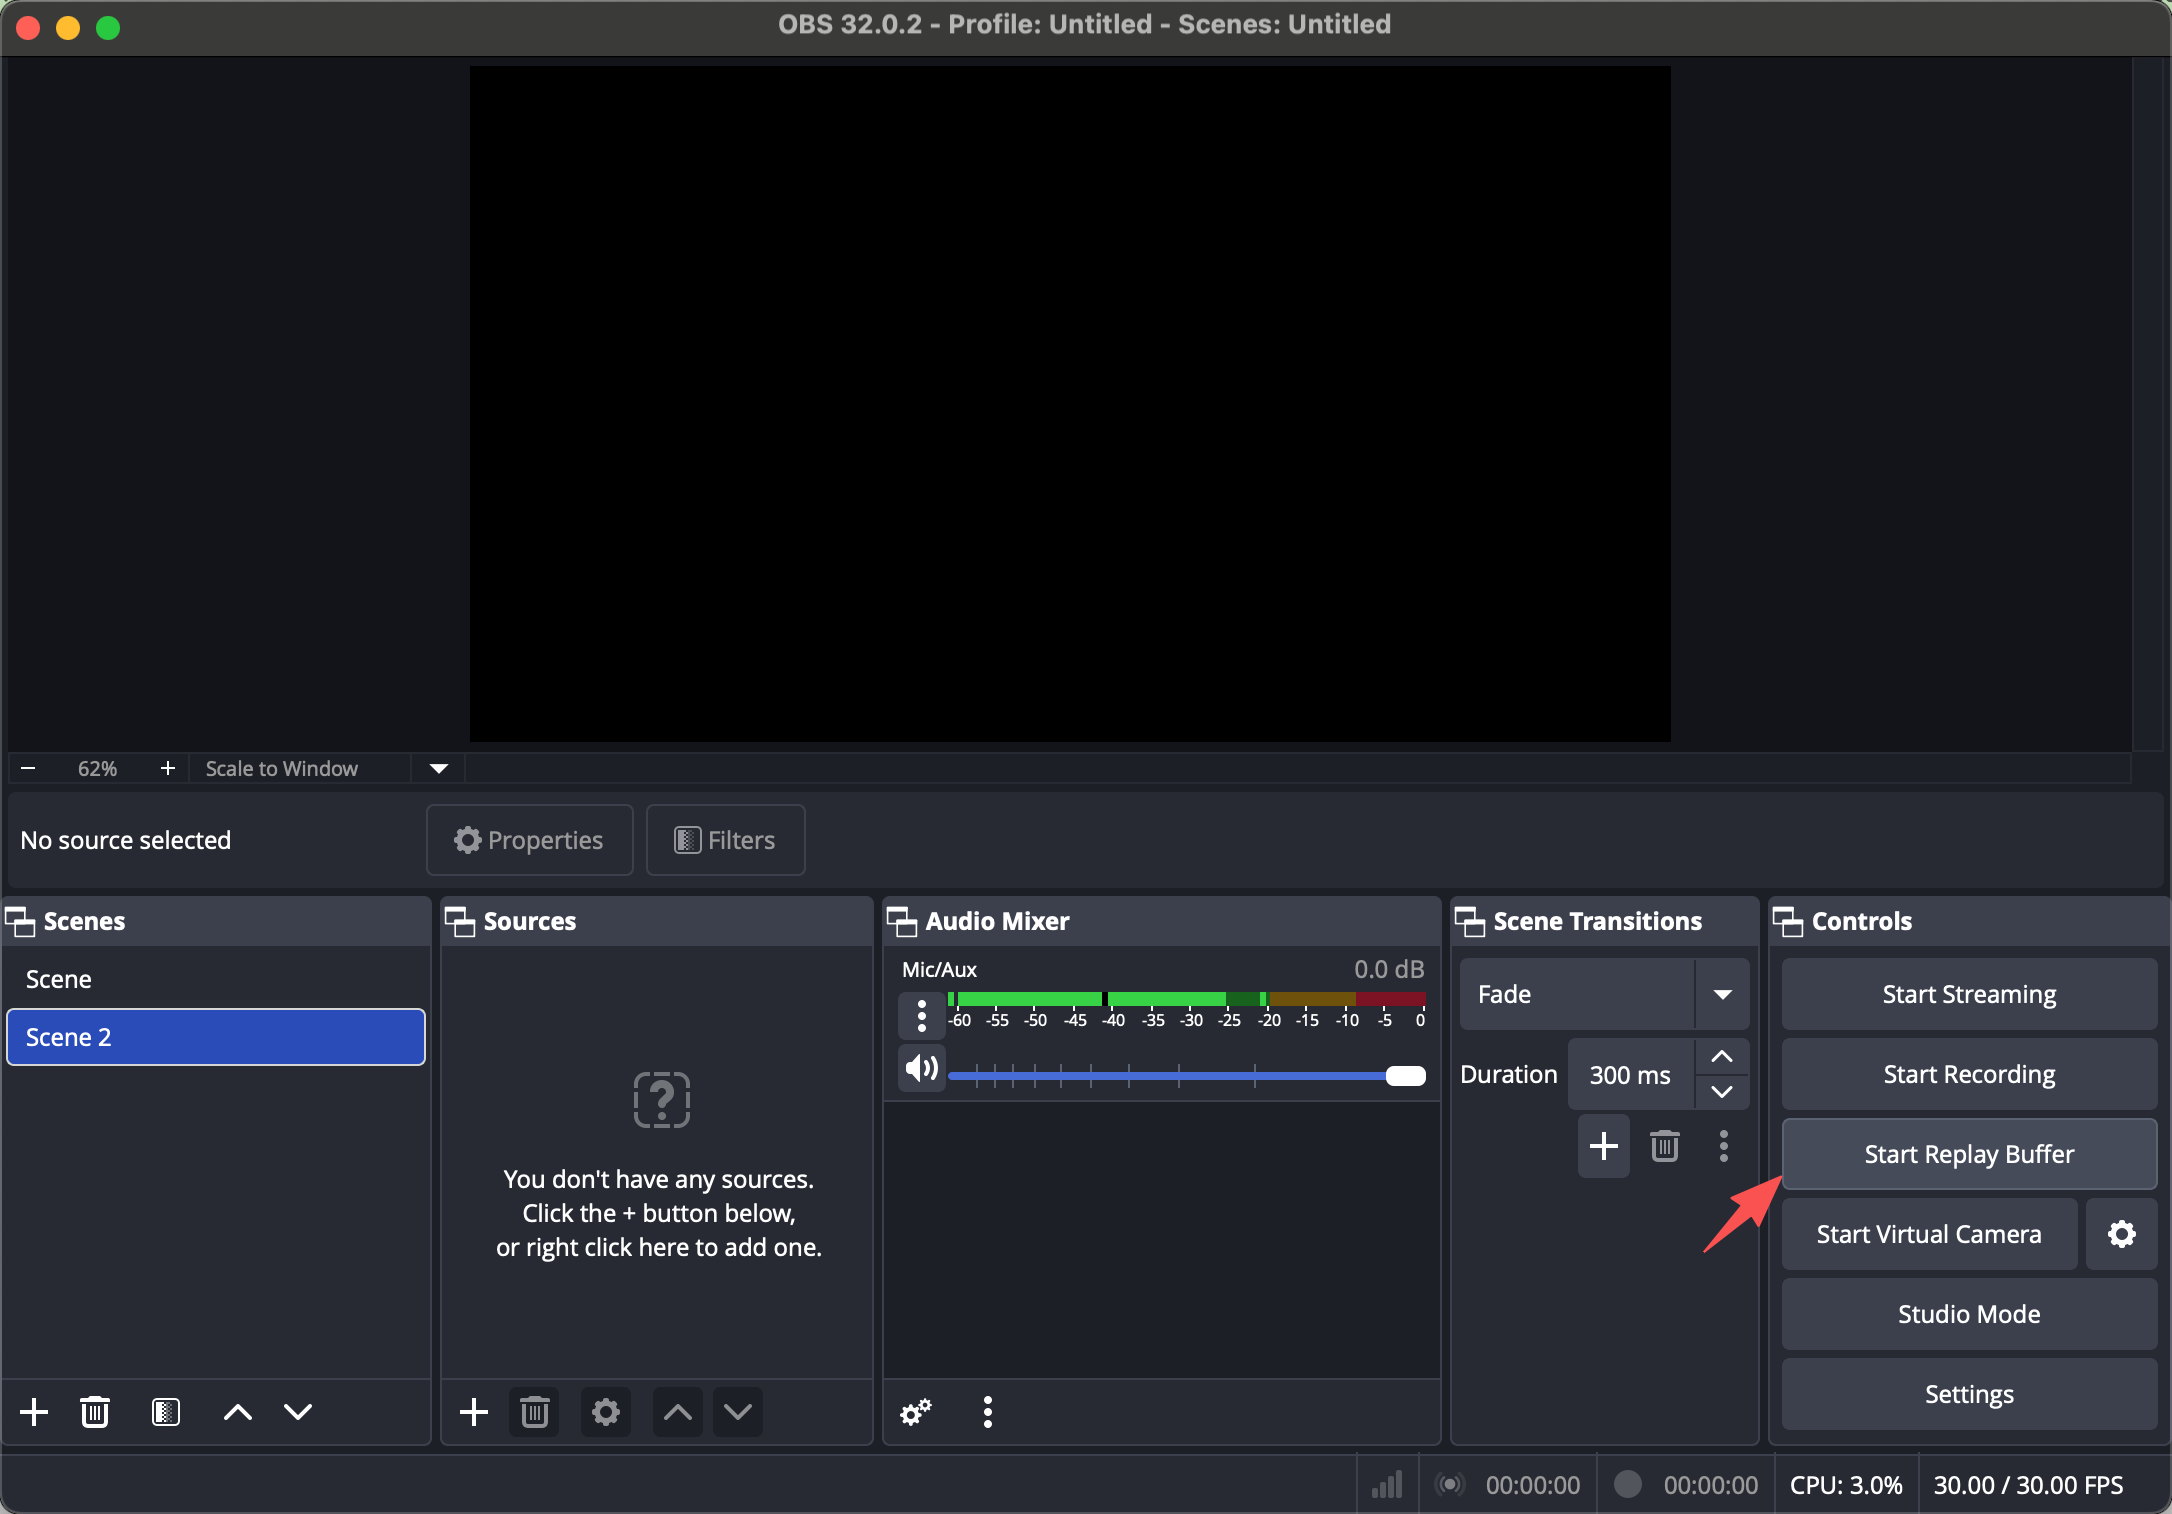
- Start Replay Buffer: Finally, click Start Replay Buffer in the main OBS interface. It will now run in the background, ready to capture your last few seconds at any time.
4. Best OBS Replay Buffer Settings
Optimizing Replay Buffer ensures smooth performance and high-quality recordings. Here are some recommended settings:
- Buffer Length: Start with 30–60 seconds for typical gaming moments. You can extend up to 300 seconds if your system has ample RAM.
- Recording Format: Use MP4 or MKV . MKV is safer, as it prevents file corruption if OBS crashes.
- Encoder: For NVIDIA GPU users, NVENC is recommended to reduce CPU load. AMD users can use AMF , and Intel users can use Quick Sync .
- Bitrate: For 1080p at 60 FPS, a bitrate of 10–15 Mbps works well. Adjust higher for 1440p or 4K.
- Audio Tracks: Typically, track 1 is enough for most users. Add more if you separate game audio, microphone, and other sources.
Tips: Make sure your system has enough RAM to handle the buffer. If you experience stuttering, reduce buffer length or lower recording resolution.
5. Pros and Cons of OBS Replay Buffer
Like any feature, OBS Replay Buffer has advantages and disadvantages:
Pros:
- Capture moments retroactively without constantly recording.
- Lightweight compared to recording full sessions.
- Customizable duration and quality settings.
- Supports multiple encoders and file formats.
Cons:
- Consumes RAM; long buffers can strain older systems.
- Requires manual hotkey triggering.
- Complex for beginners to set up compared to simpler software.
- Continuous use may affect performance during high-demand gaming.
6. Try the Simple Alternative to OBS: Swyshare Recordit
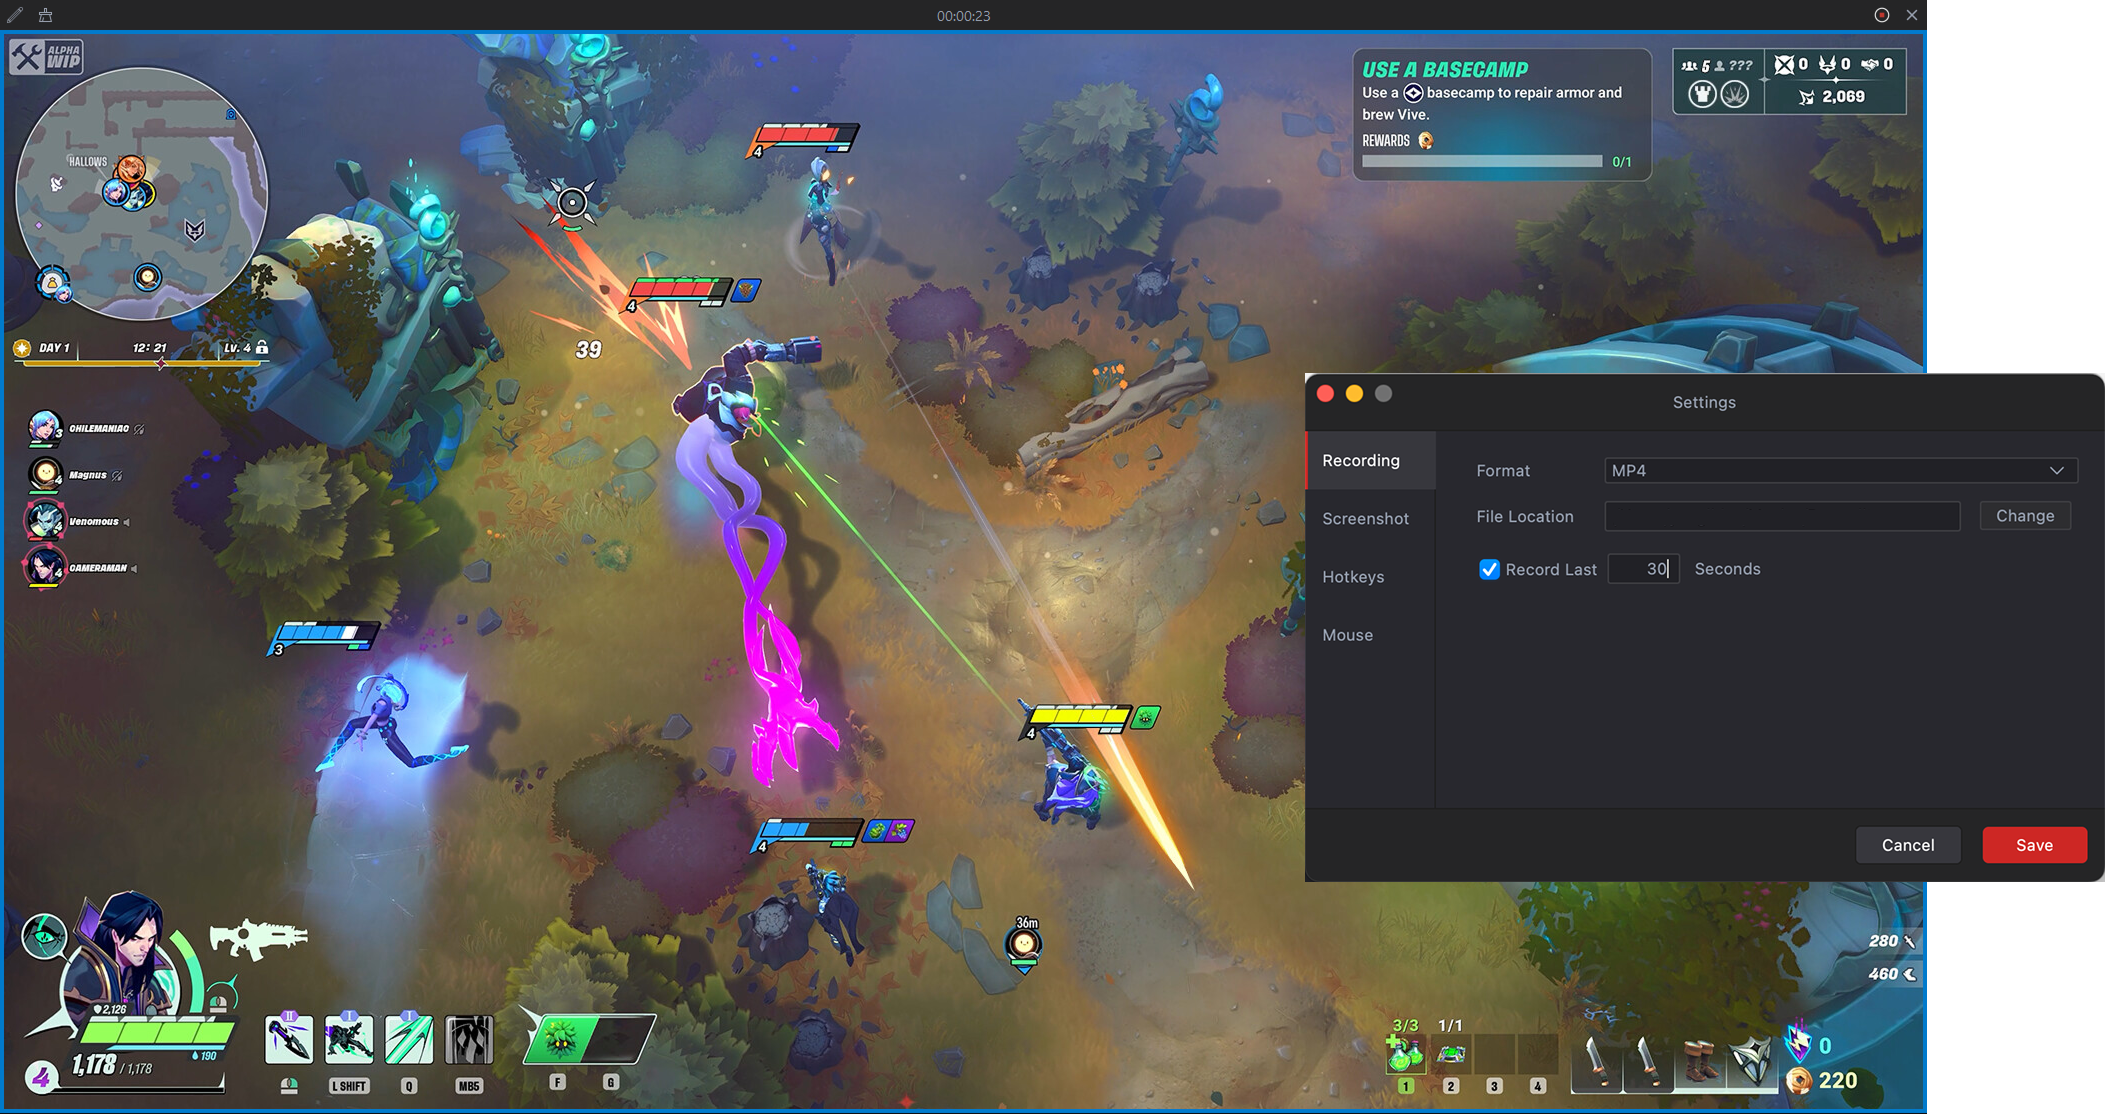
While OBS Replay Buffer is powerful, it can feel complex for casual users. That’s where Swyshare Recordit comes in.
Key Features of Swyshare Recordit :
- Record full screen, window, or custom area
- Capture system audio and microphone
- Webcam overlay (picture-in-picture)
- Take screenshots alongside video
- High-resolution output (up to 4K)
- Record the last ** seconds (instant replay)
- Set a start and stop time in advance
- Basic built-in editing tools
- Lightweight and easy-to-use interface
7. Conclusion
OBS Replay Buffer is an incredible feature for capturing those fleeting, unforgettable moments. With careful setup, optimized settings, and a bit of practice, it can be a powerful tool for any content creator or gamer. However, its complexity, RAM usage, and manual operation may not suit everyone.
For those who want simplicity, efficiency, and instant results, Swyshare Recordit is a fantastic alternative. It allows you to record the last few seconds effortlessly, with minimal system impact and zero complicated setup. Whether you’re capturing gameplay highlights, live stream moments, or important desktop events, Recordit ensures you never miss the perfect moment — no tech expertise required.
In short, if you want a professional-level solution with a simpler workflow, Recordit is the tool that can make instant replay easy and reliable.