How to Save Streams on Twitch?

Twitch has grown into one of the world’s largest live-streaming platforms, hosting everything from gaming and esports to music performances, podcasts, and educational content. While Twitch excels at live interaction, it doesn’t always make it easy to keep streams forever. By default, most Twitch streams are temporary, and once they expire, they are gone for good.
Whether you’re a streamer wanting to archive your broadcasts or a viewer hoping to save memorable streams for offline viewing, knowing how to save streams on Twitch is essential. In this guide, we’ll explore multiple methods—from Twitch’s built-in features to third-party tools—so you can choose the best approach based on your needs.
1. Save Your Own Twitch Streams Using VODs
If you are a Twitch streamer, the most straightforward way to save your streams is by using Twitch’s Video on Demand (VOD) feature.
How to Enable Twitch VODs :
- Open your Twitch Creator Dashboard
- Go to Settings > Stream
- Turn on Store past broadcasts
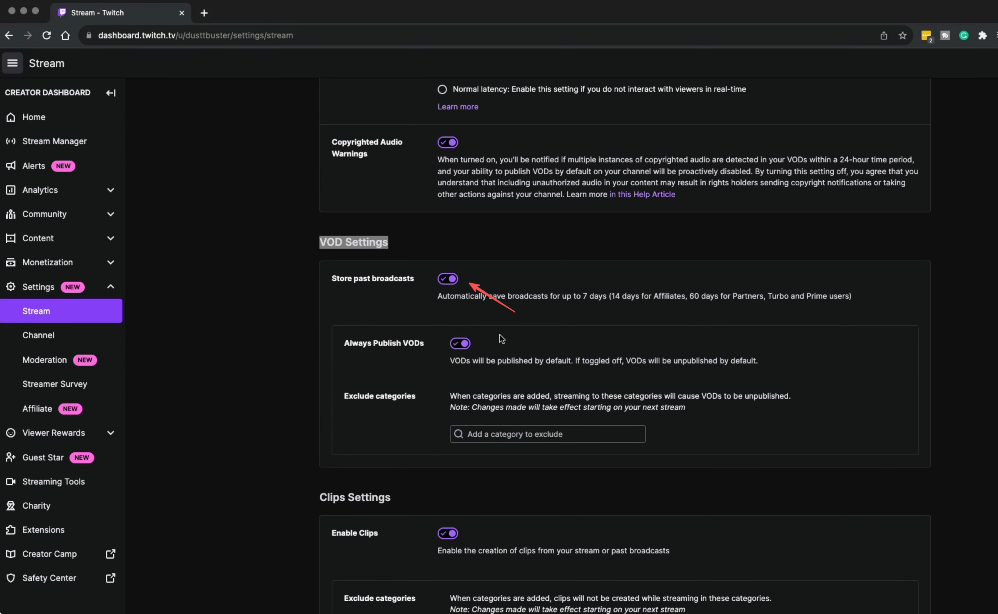
Once enabled, Twitch will automatically save your live streams as VODs after the broadcast ends.
VOD Storage Duration
Twitch does not store VODs permanently:
- Regular streamers: 7 days
- Twitch Affiliates: 14 days
- Twitch Partners & Turbo users: 60 days
After this period, the VOD will be deleted unless you download or preserve it elsewhere.
How to Download Your VOD :
- Go to Content > Video Producer
- Find the VOD you want to save
- Click the three-dot menu
- Select Herunterladen
Pros
- Official and safe
- No third-party software required
Cons
- Only works for your own streams
- Time-limited storage
2. Save Your Own Twitch Streams Using Highlight Streams
Twitch Highlights are a smart way to prevent streams from expiring.
Highlights are edited portions of a VOD that do not expire, unlike regular past broadcasts. You can even highlight the entire stream to keep it permanently on Twitch.
How to Create a Highlight :
- Go to Video Producer
- Select a past broadcast
- Click Highlight
- Choose the section (or full stream)
- Save the highlight
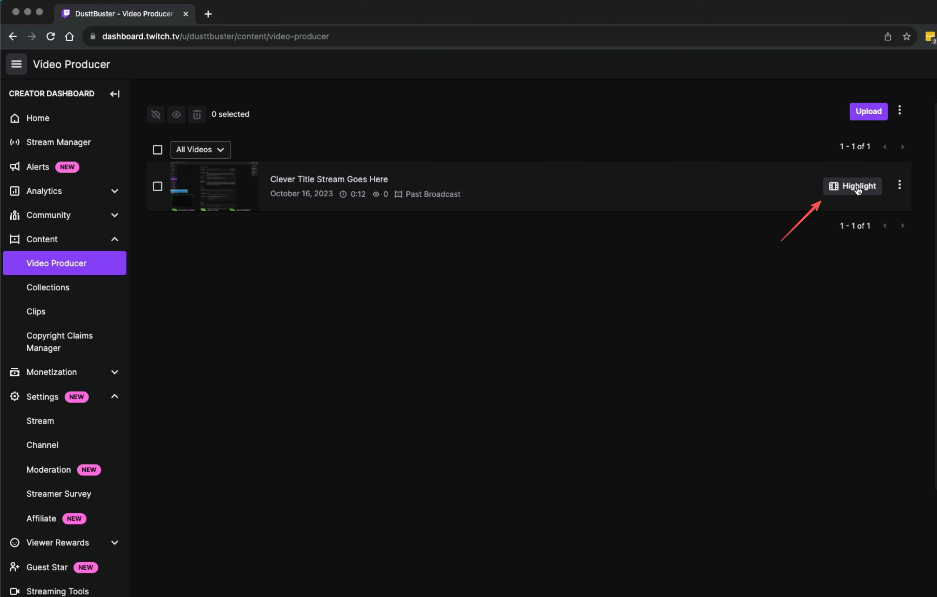
Once created, the highlight can stay on Twitch indefinitely and can also be downloaded.
Best Use Case
- Streamers who want to archive content without downloading immediately
- Preserving important or high-performing streams
3. Save Twitch Streams with the Simple but Powerful Screen Recorder – Swyshare Recordit
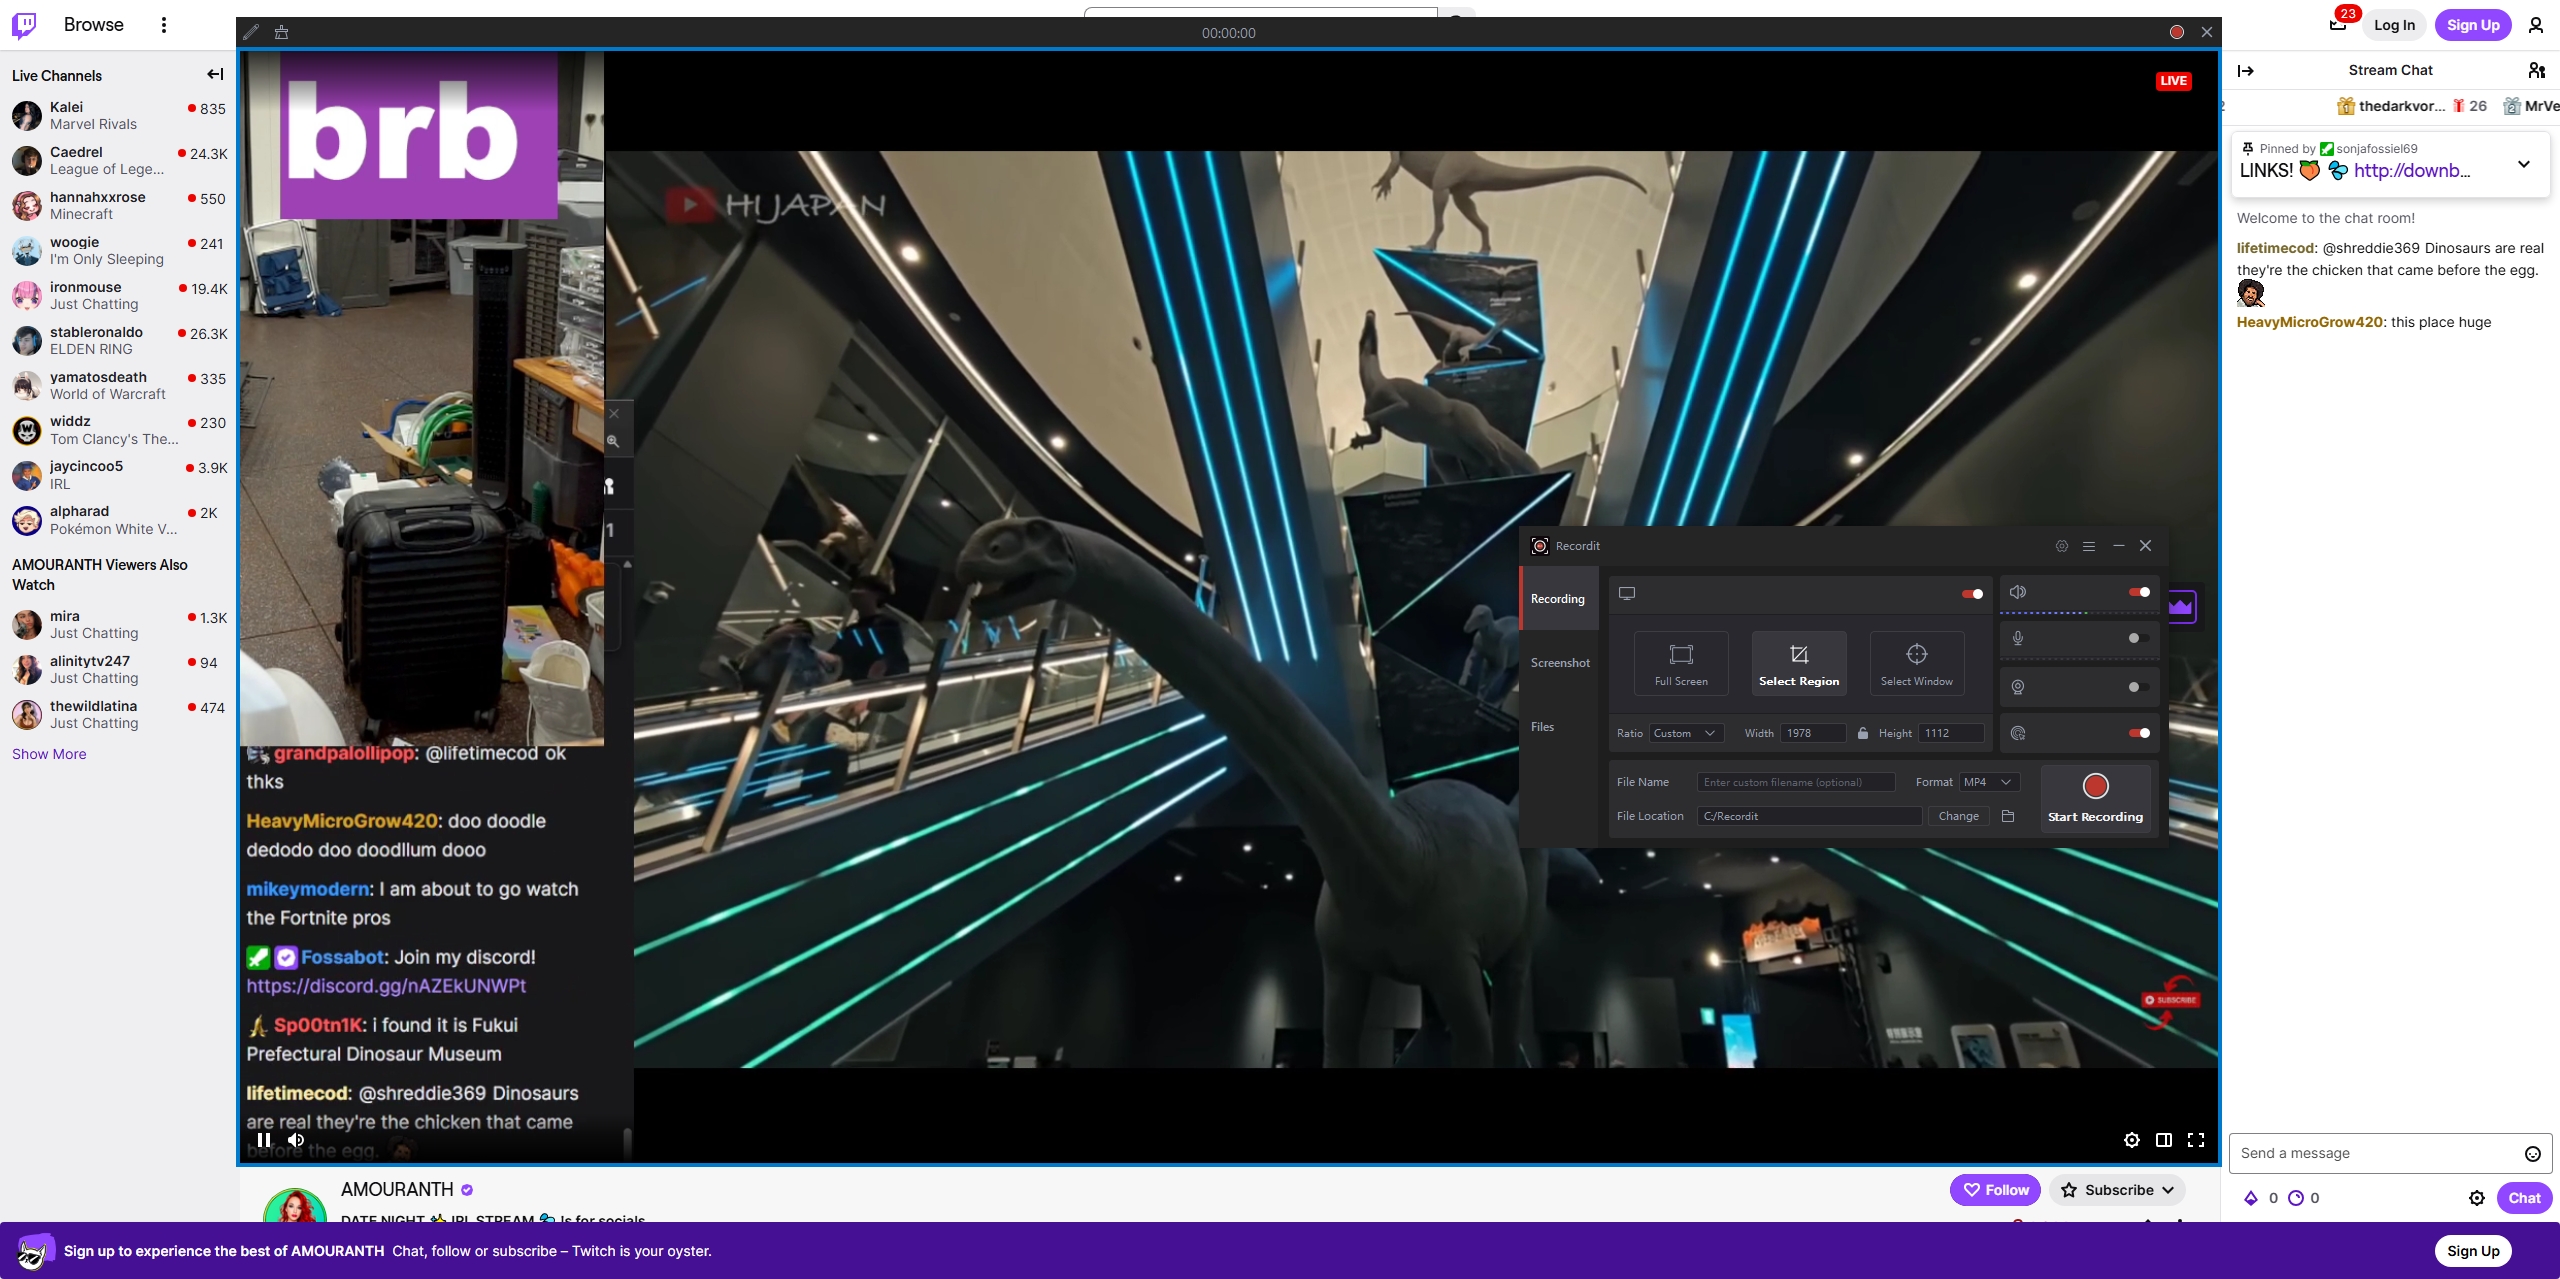
For users who want maximum flexibility, especially when saving live streams or streams they don’t own, screen recording is one of the most reliable solutions. This is where Swyshare Recordit stands out.
Swyshare Recordit is a lightweight yet powerful screen recorder designed for capturing high-quality videos with minimal setup. It works seamlessly on both Windows and macOS, making it ideal for saving Twitch streams.
Why Use Recordit for Twitch Streams :
- High-quality screen recording (HD/1080p+ depending on display)
- Flexible recording area (window, tab, or full screen)
- System and microphone audio capture (records stream sound)
- Instant replay to save Twitch hightlights
- Easy local saving in common video formats like MP4
- Customizable settings (resolution, mouse effects, schedule recording)
How to Save Twitch Streams with Recordit :
- Download and install Swyshare Recordit on your computer
- Open Twitch and play the stream or VOD.
- Launch Recordit and select the recording area (browser tab, window, or full screen) and choose system audio for stream sound
- Start recording and let the stream play; Stop recording and find it under the “Files” tab.
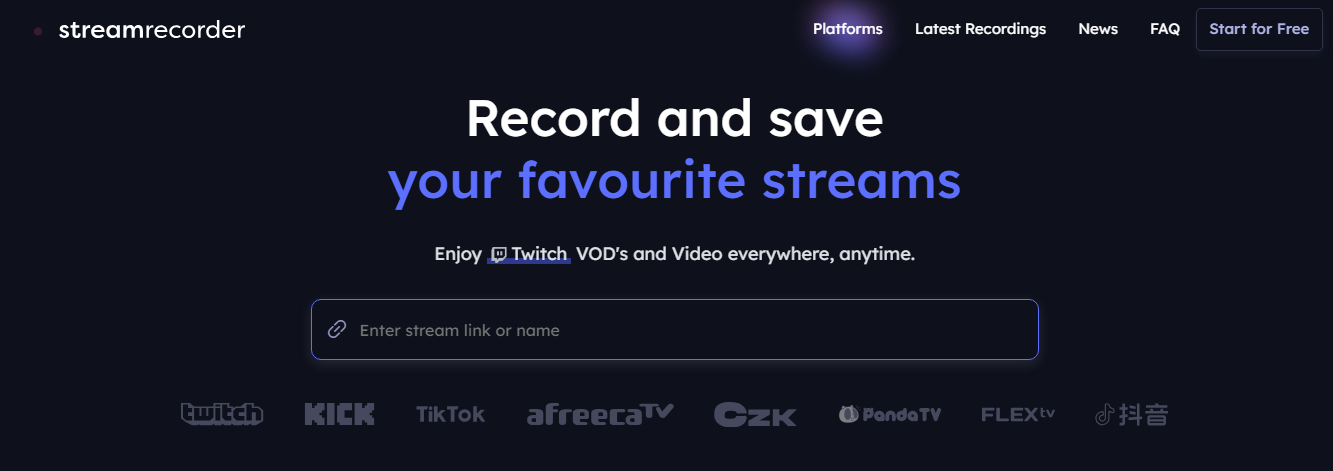
4. Save Twitch Streams with Online Recorders
Online Twitch recorders are web-based tools that allow you to save Twitch VODs by simply pasting a video link.
How Online Recorders Work
- Go to Twitch and copy the stream URL you want to save.
- Paste it into an online recorder website like streamrecorder.io
- Choose video quality and download the stream.
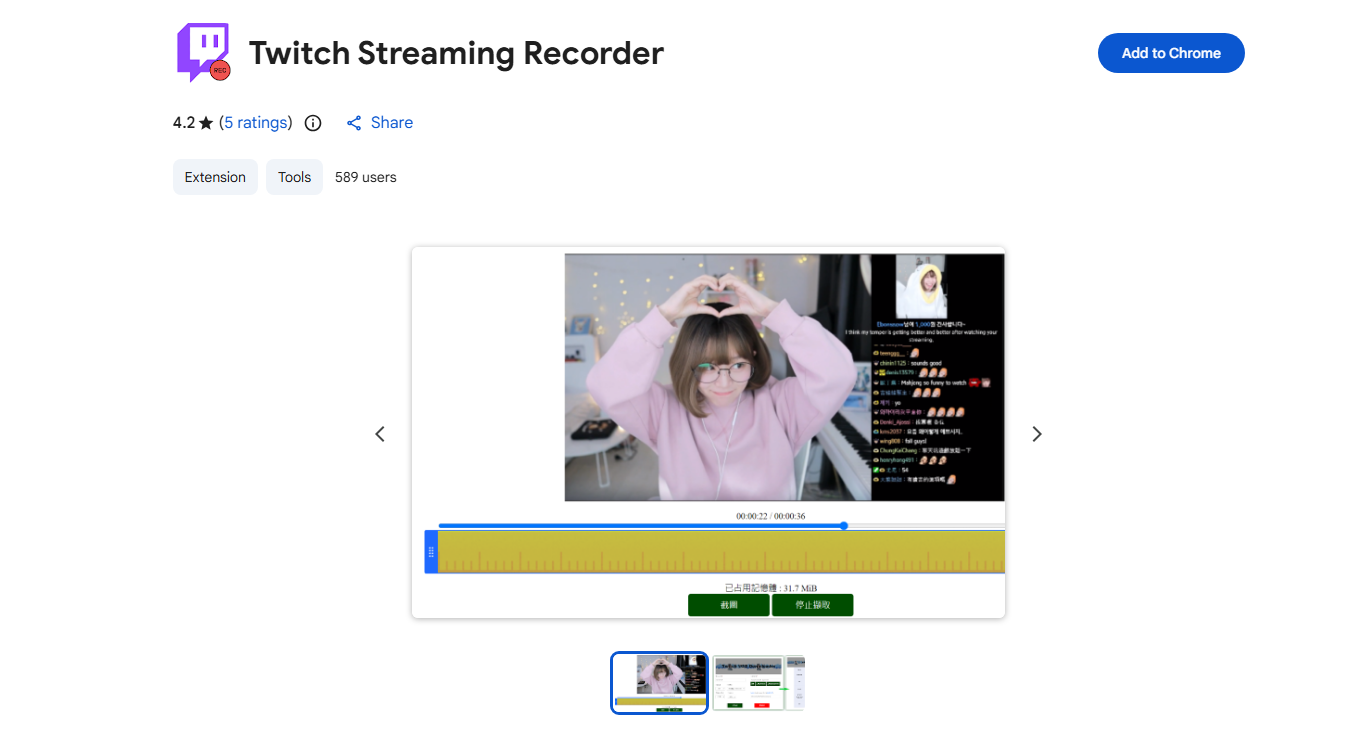
5. Save Twitch Streams with Browser Extensions
Some browser extensions add Twitch downloading features directly into your browser.
How Browser Extensions Work :
- Install the extension (e.g. Twitch Streaming Recorder) from the browser’s extension store
- Visit a Twitch stream page, then click the extension icon to start recording.
- Stop recording and download the recorded stream on your device.
Pros :
- Easy to install
- Convenient for casual use
Cons :
- Often break after Twitch updates
- Limited quality options
6. Conclusion
There are many ways to save streams on Twitch, but each method comes with limitations. Twitch’s built-in VODs are convenient but time-restricted. Highlights are useful but still tied to the platform. Online downloaders and browser extensions may work occasionally, but they often struggle with long streams and stability issues.
For users who want a simple, powerful, and flexible solution, Swyshare Recordit is the best option. It allows you to save Twitch streams exactly as you see them without worrying about expiration dates, platform restrictions, or broken tools. With its clean interface, high-quality recording, and reliable performance, Recordit is an excellent choice for streamers, viewers, and content creators alike.
If your goal is to ensure important Twitch streams are never lost, Swyshare Recordit is the tool worth using.